UK based
Prices for UK customers are shown inc 20% VAT
Other countries, inc EU, prices shown are ex VAT.
Bouwhandleiding


KASTENLOK INDEX
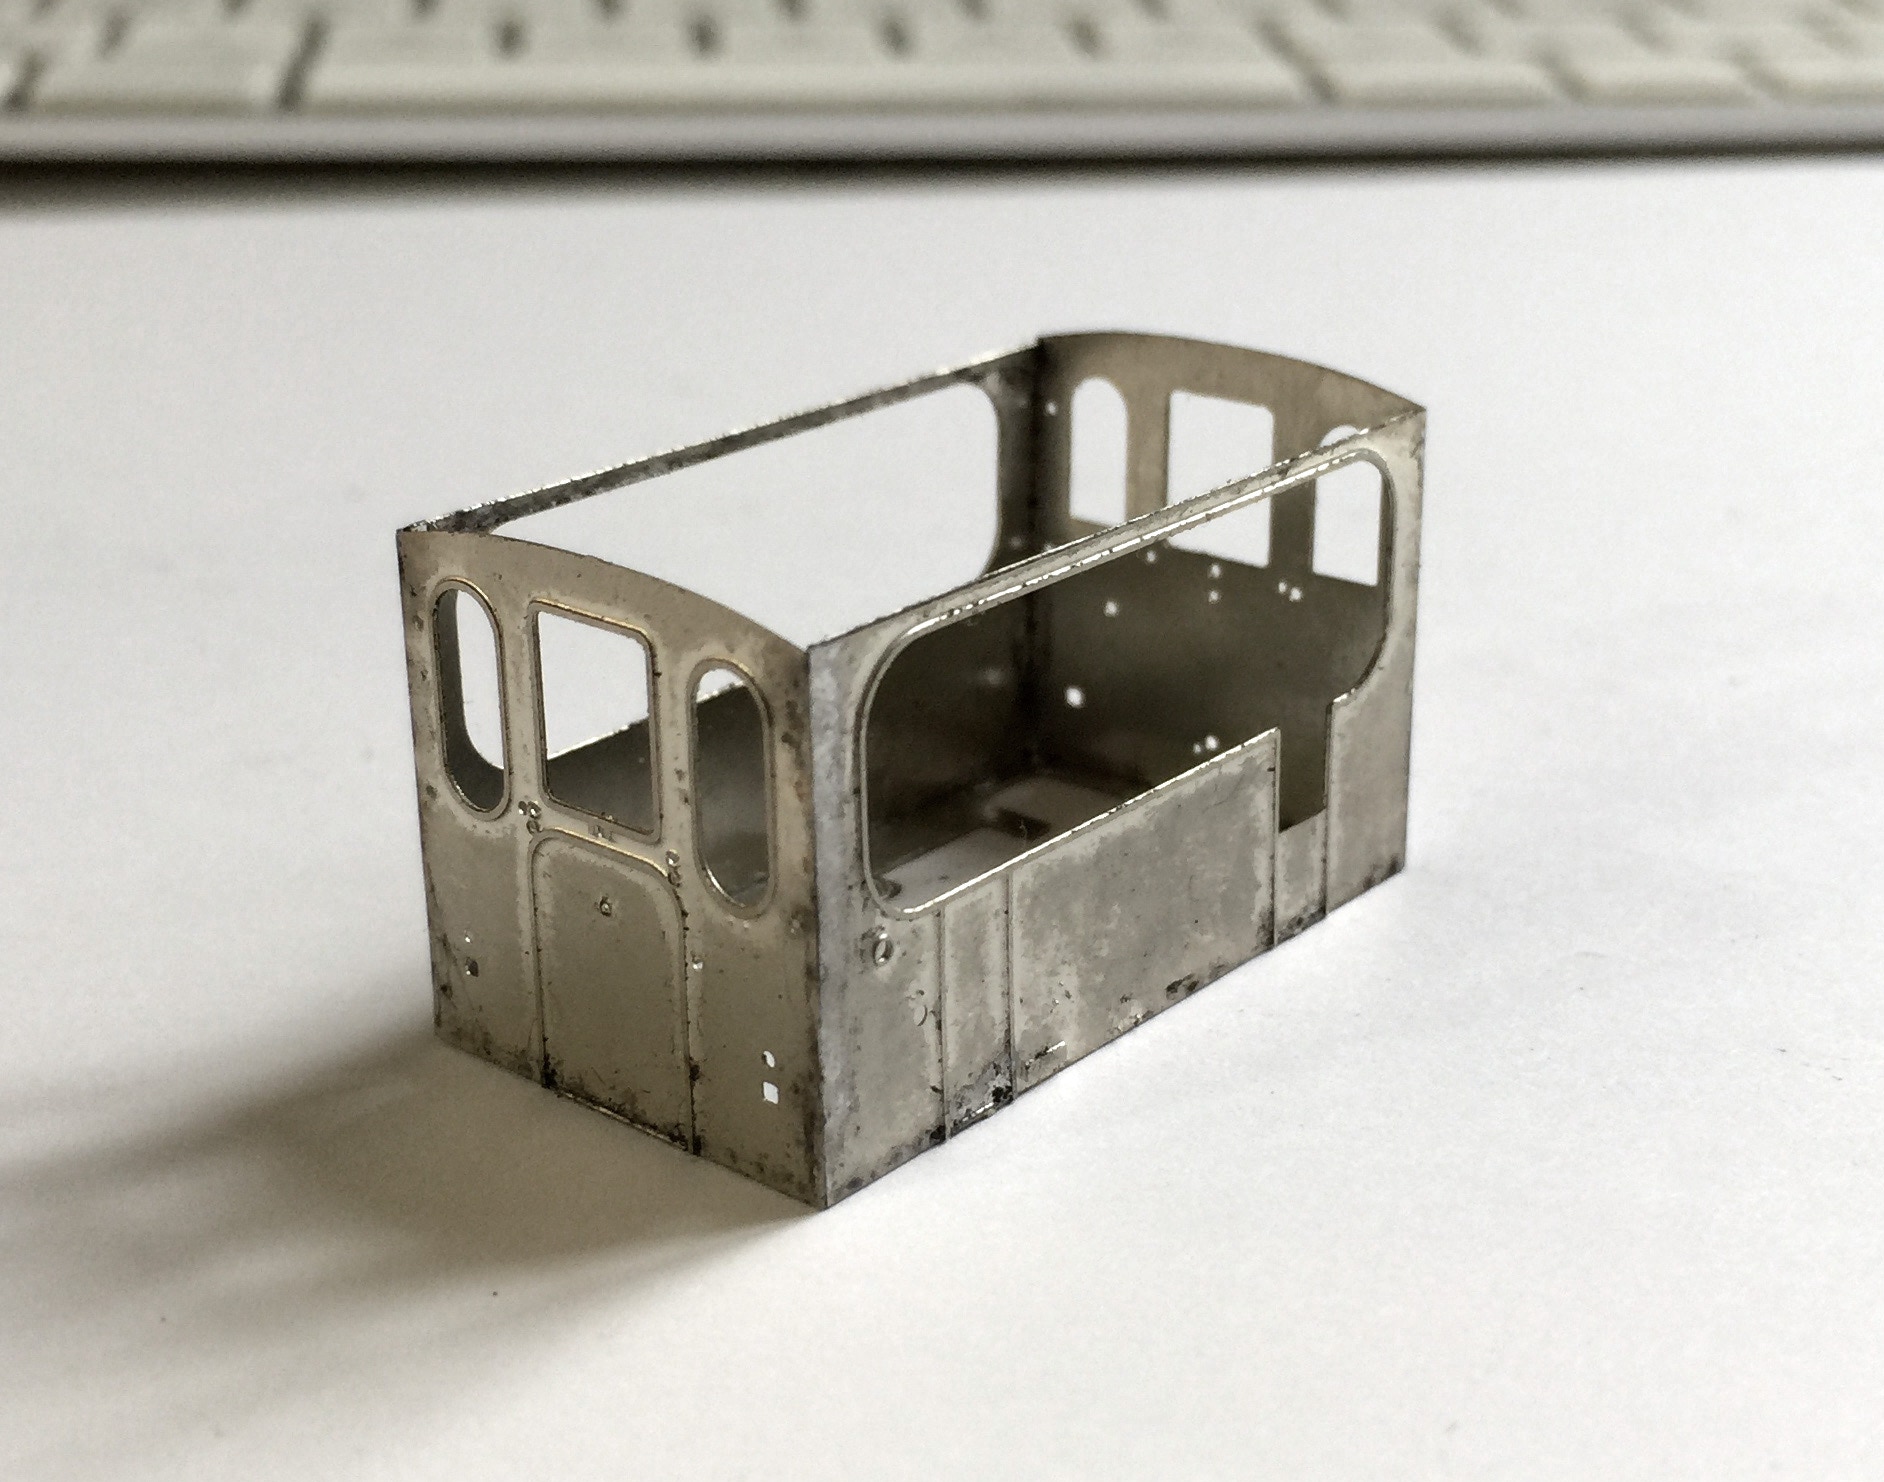
GTM 13 ‘Silvolde’


UK based
Prices for UK customers are shown inc 20% VAT
Other countries, inc EU, prices shown are ex VAT.
Bouwhandleiding
KASTENLOK INDEX
GTM 13 ‘Silvolde’
B. BOVENKANT
A. TOP SIDE
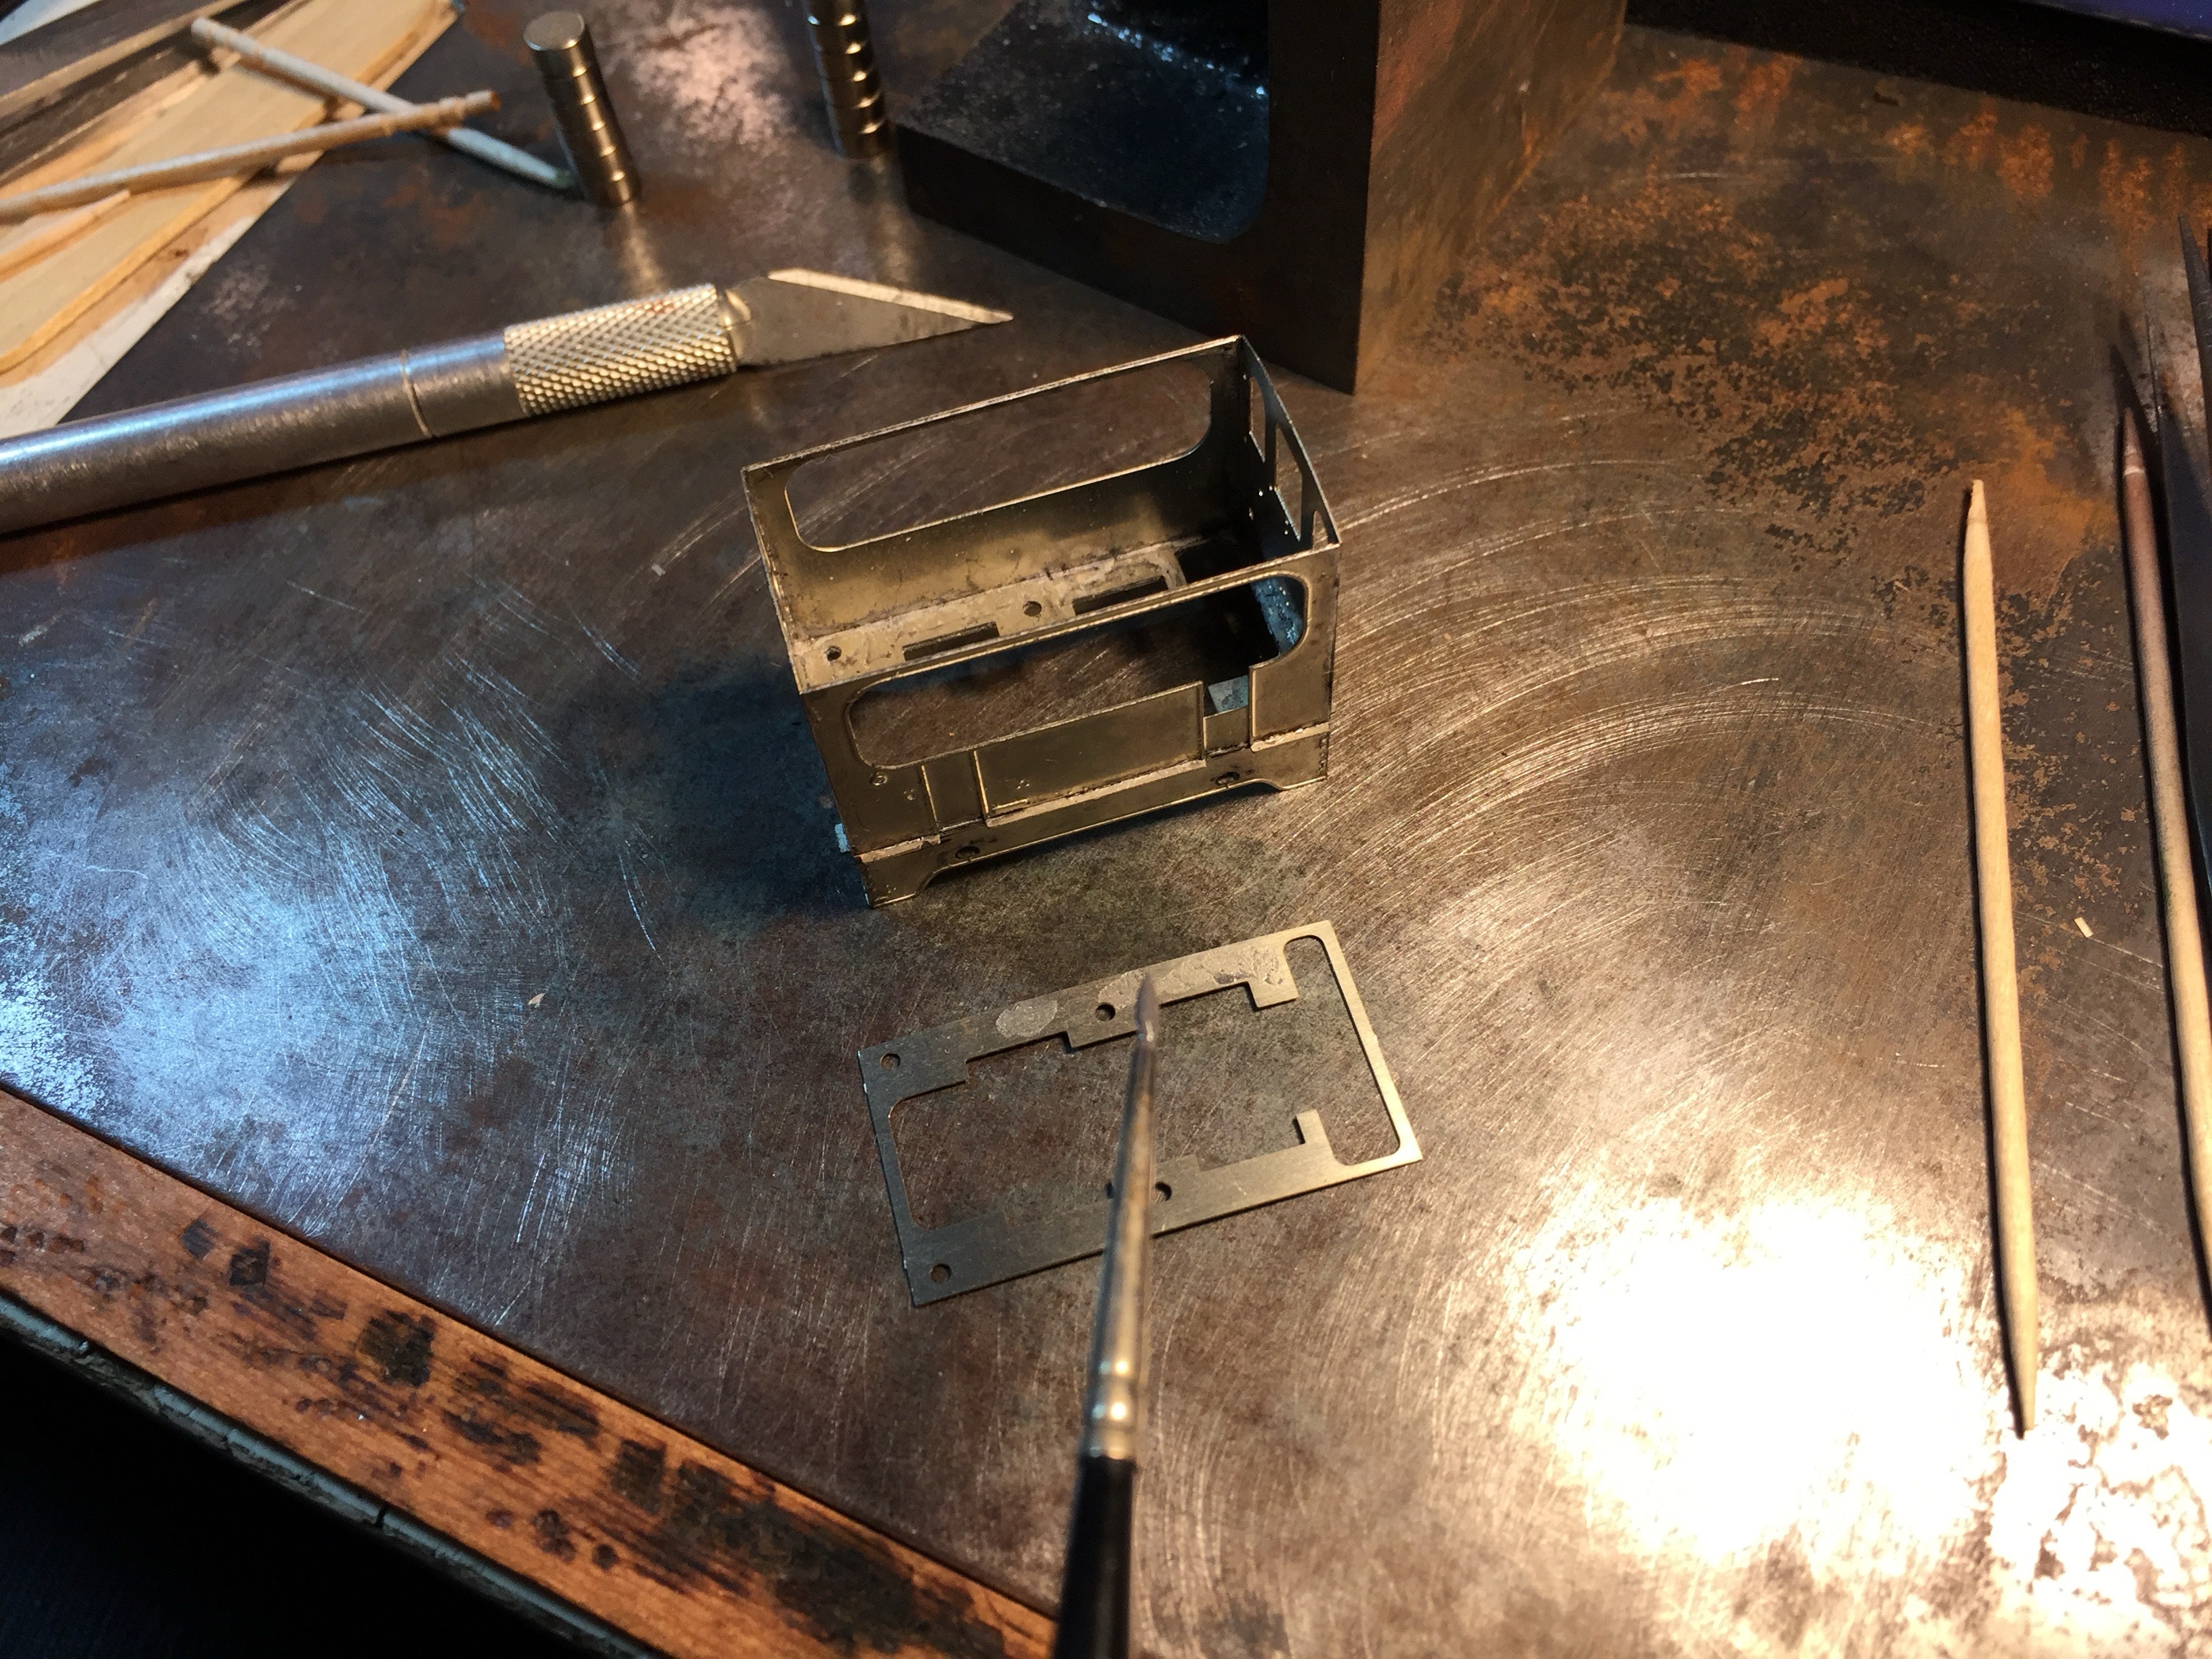
Nu de bovenkant. Hiervoor zijn de volgende onderdelen nodig:
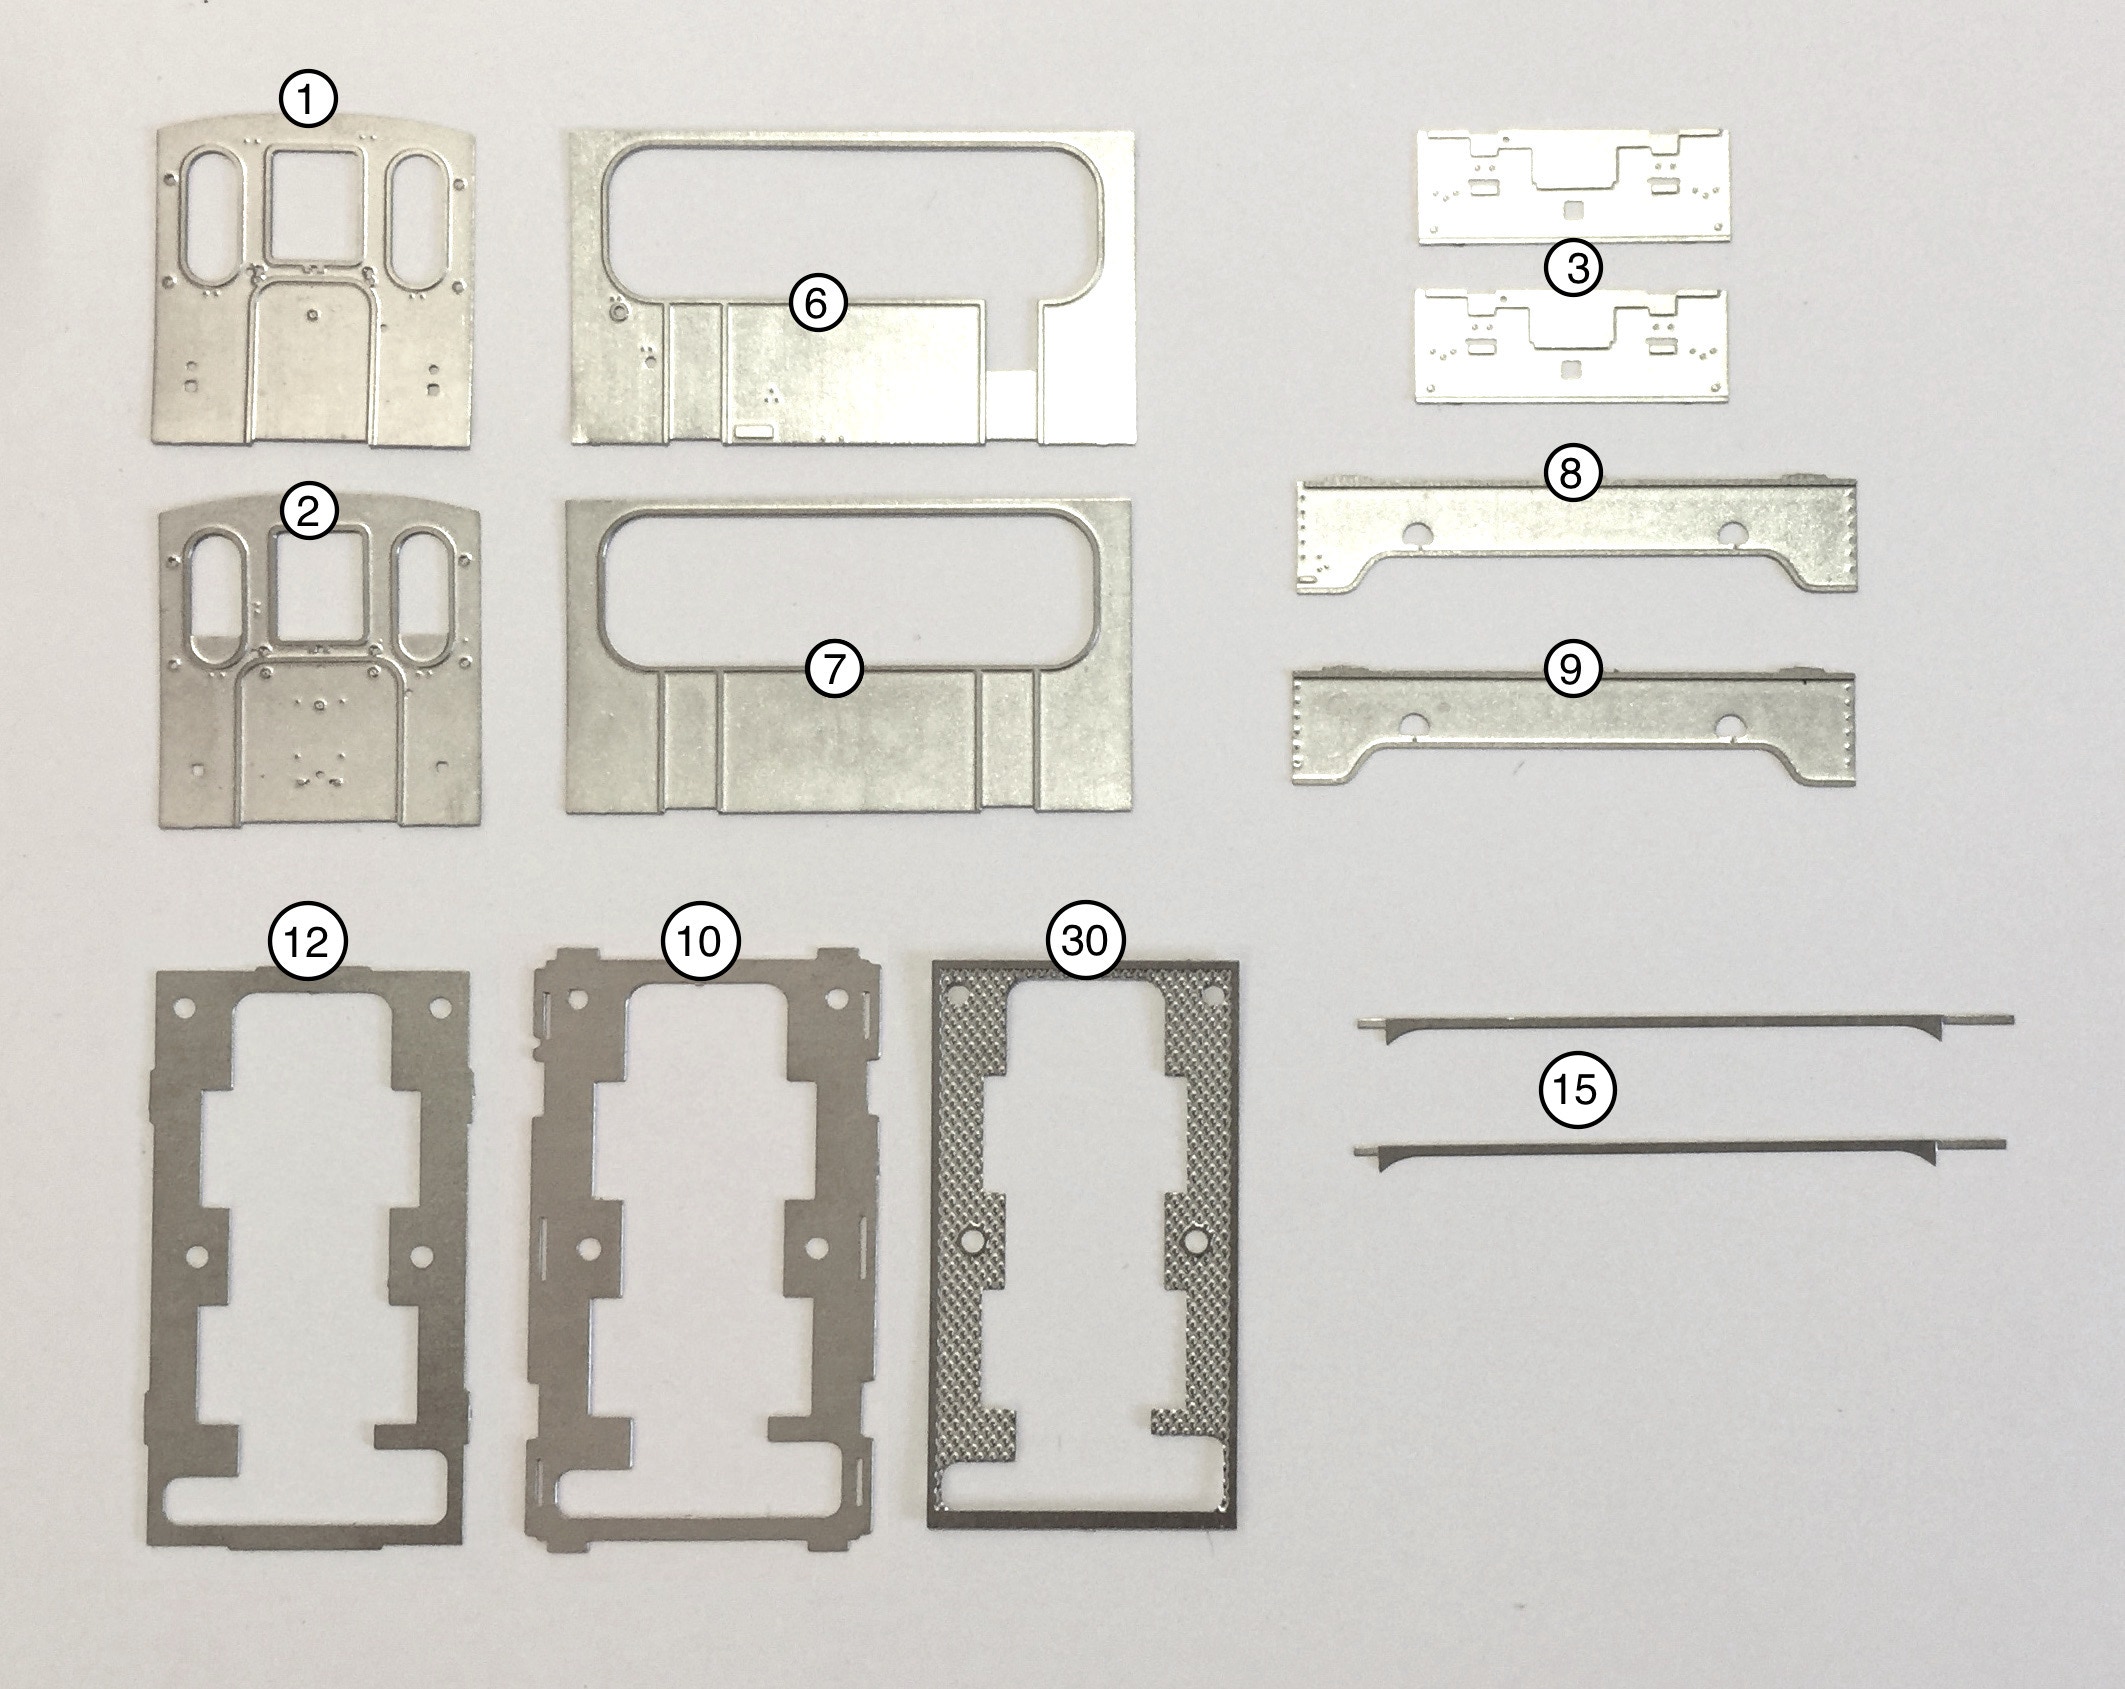
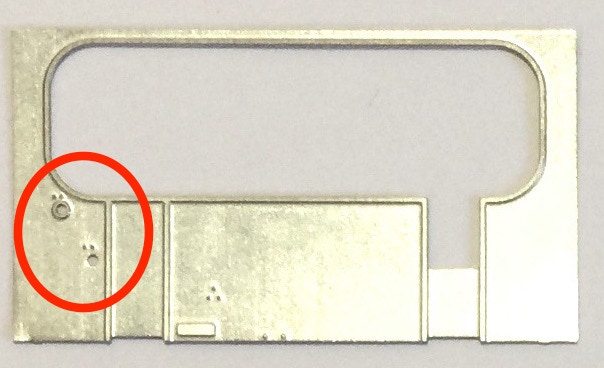
1. Voorkant kast
2. Achterkant kast
6. Zijkant kast links van de rijrichting
7. Zijkant kast rechts van de rijrichting
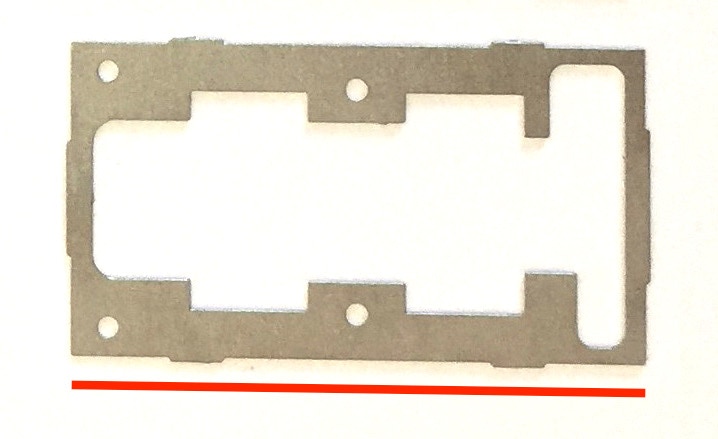
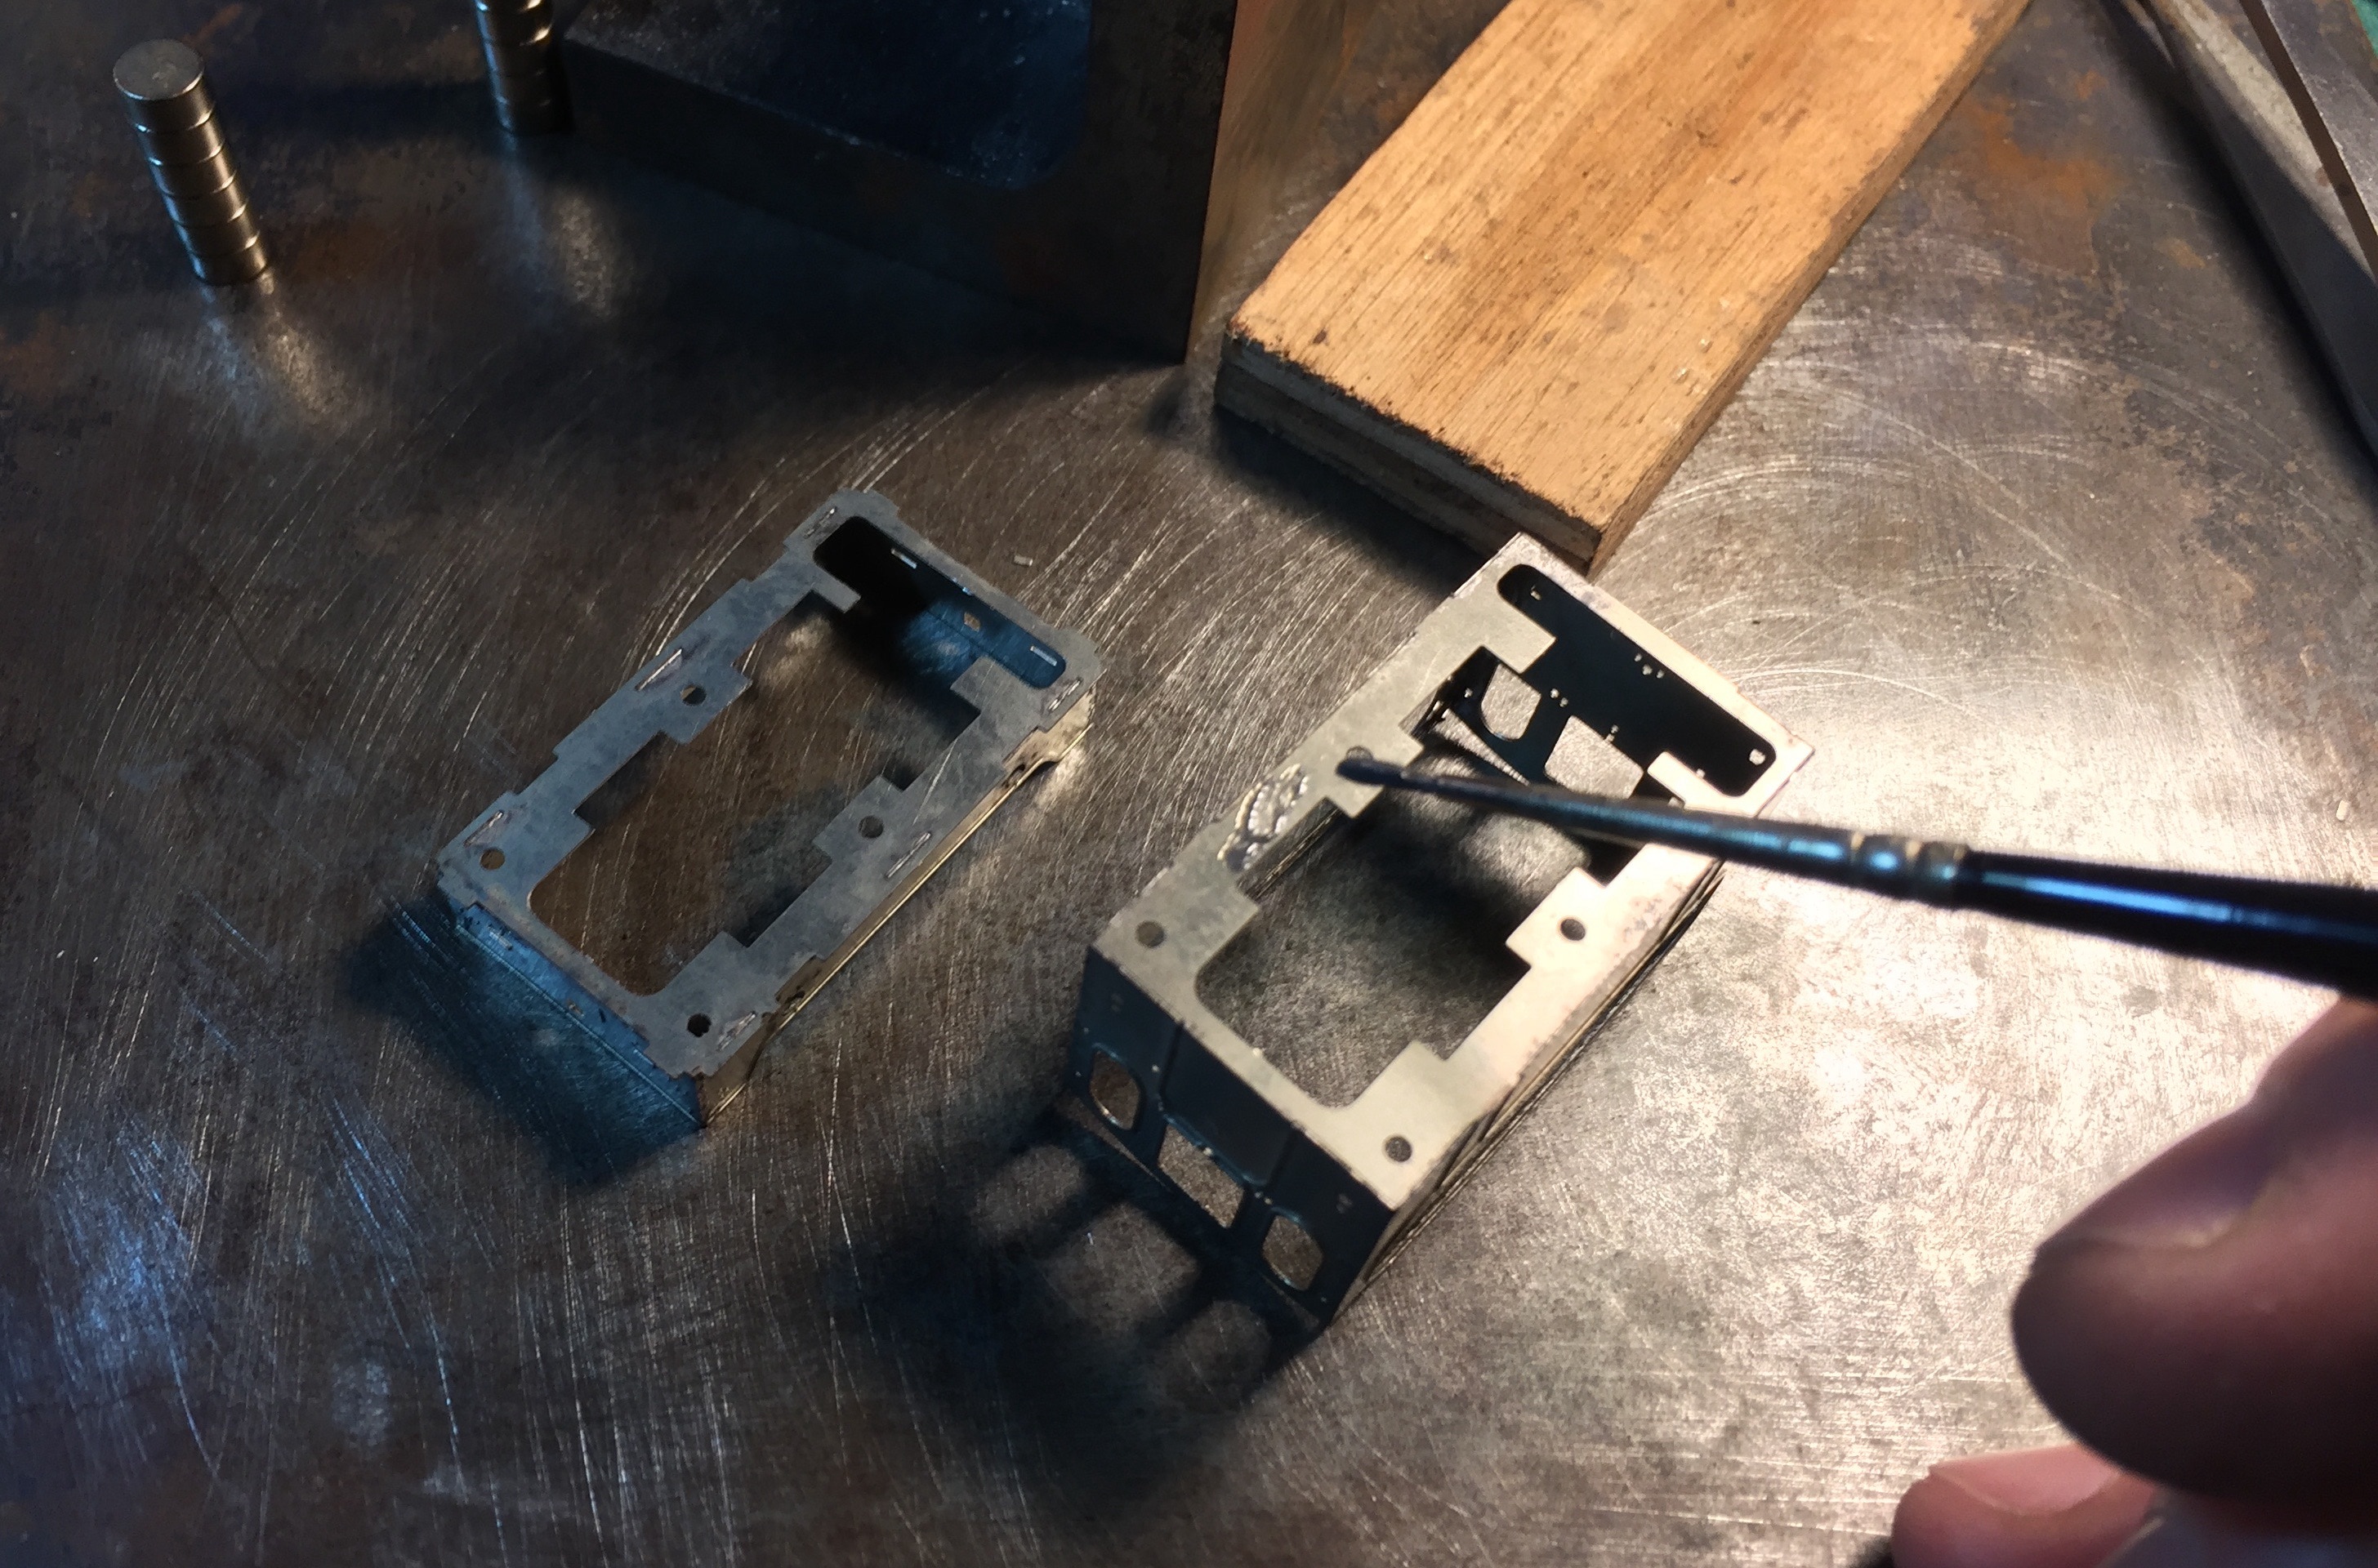
12. Bodemplaat miden (voor bovenpanelen)
15. Verstevigingsstrips zijwand
30. Bodemplaat boven
Now the top side of the box. For this you need the following items:
1. Front side
2. Back side
6. Side panel, right side of forward travel
7. Side panel, left side of forward travel
12. Bottom plate middle layer (for upper panels)
15. Strengthening strip
30. Bottom plate top layer
Even een overzicht waar de onderdelen geplaatst gaan worden.
An overview where the parts have to be placed.
Nu de stappen om het bovenstaande te maken:
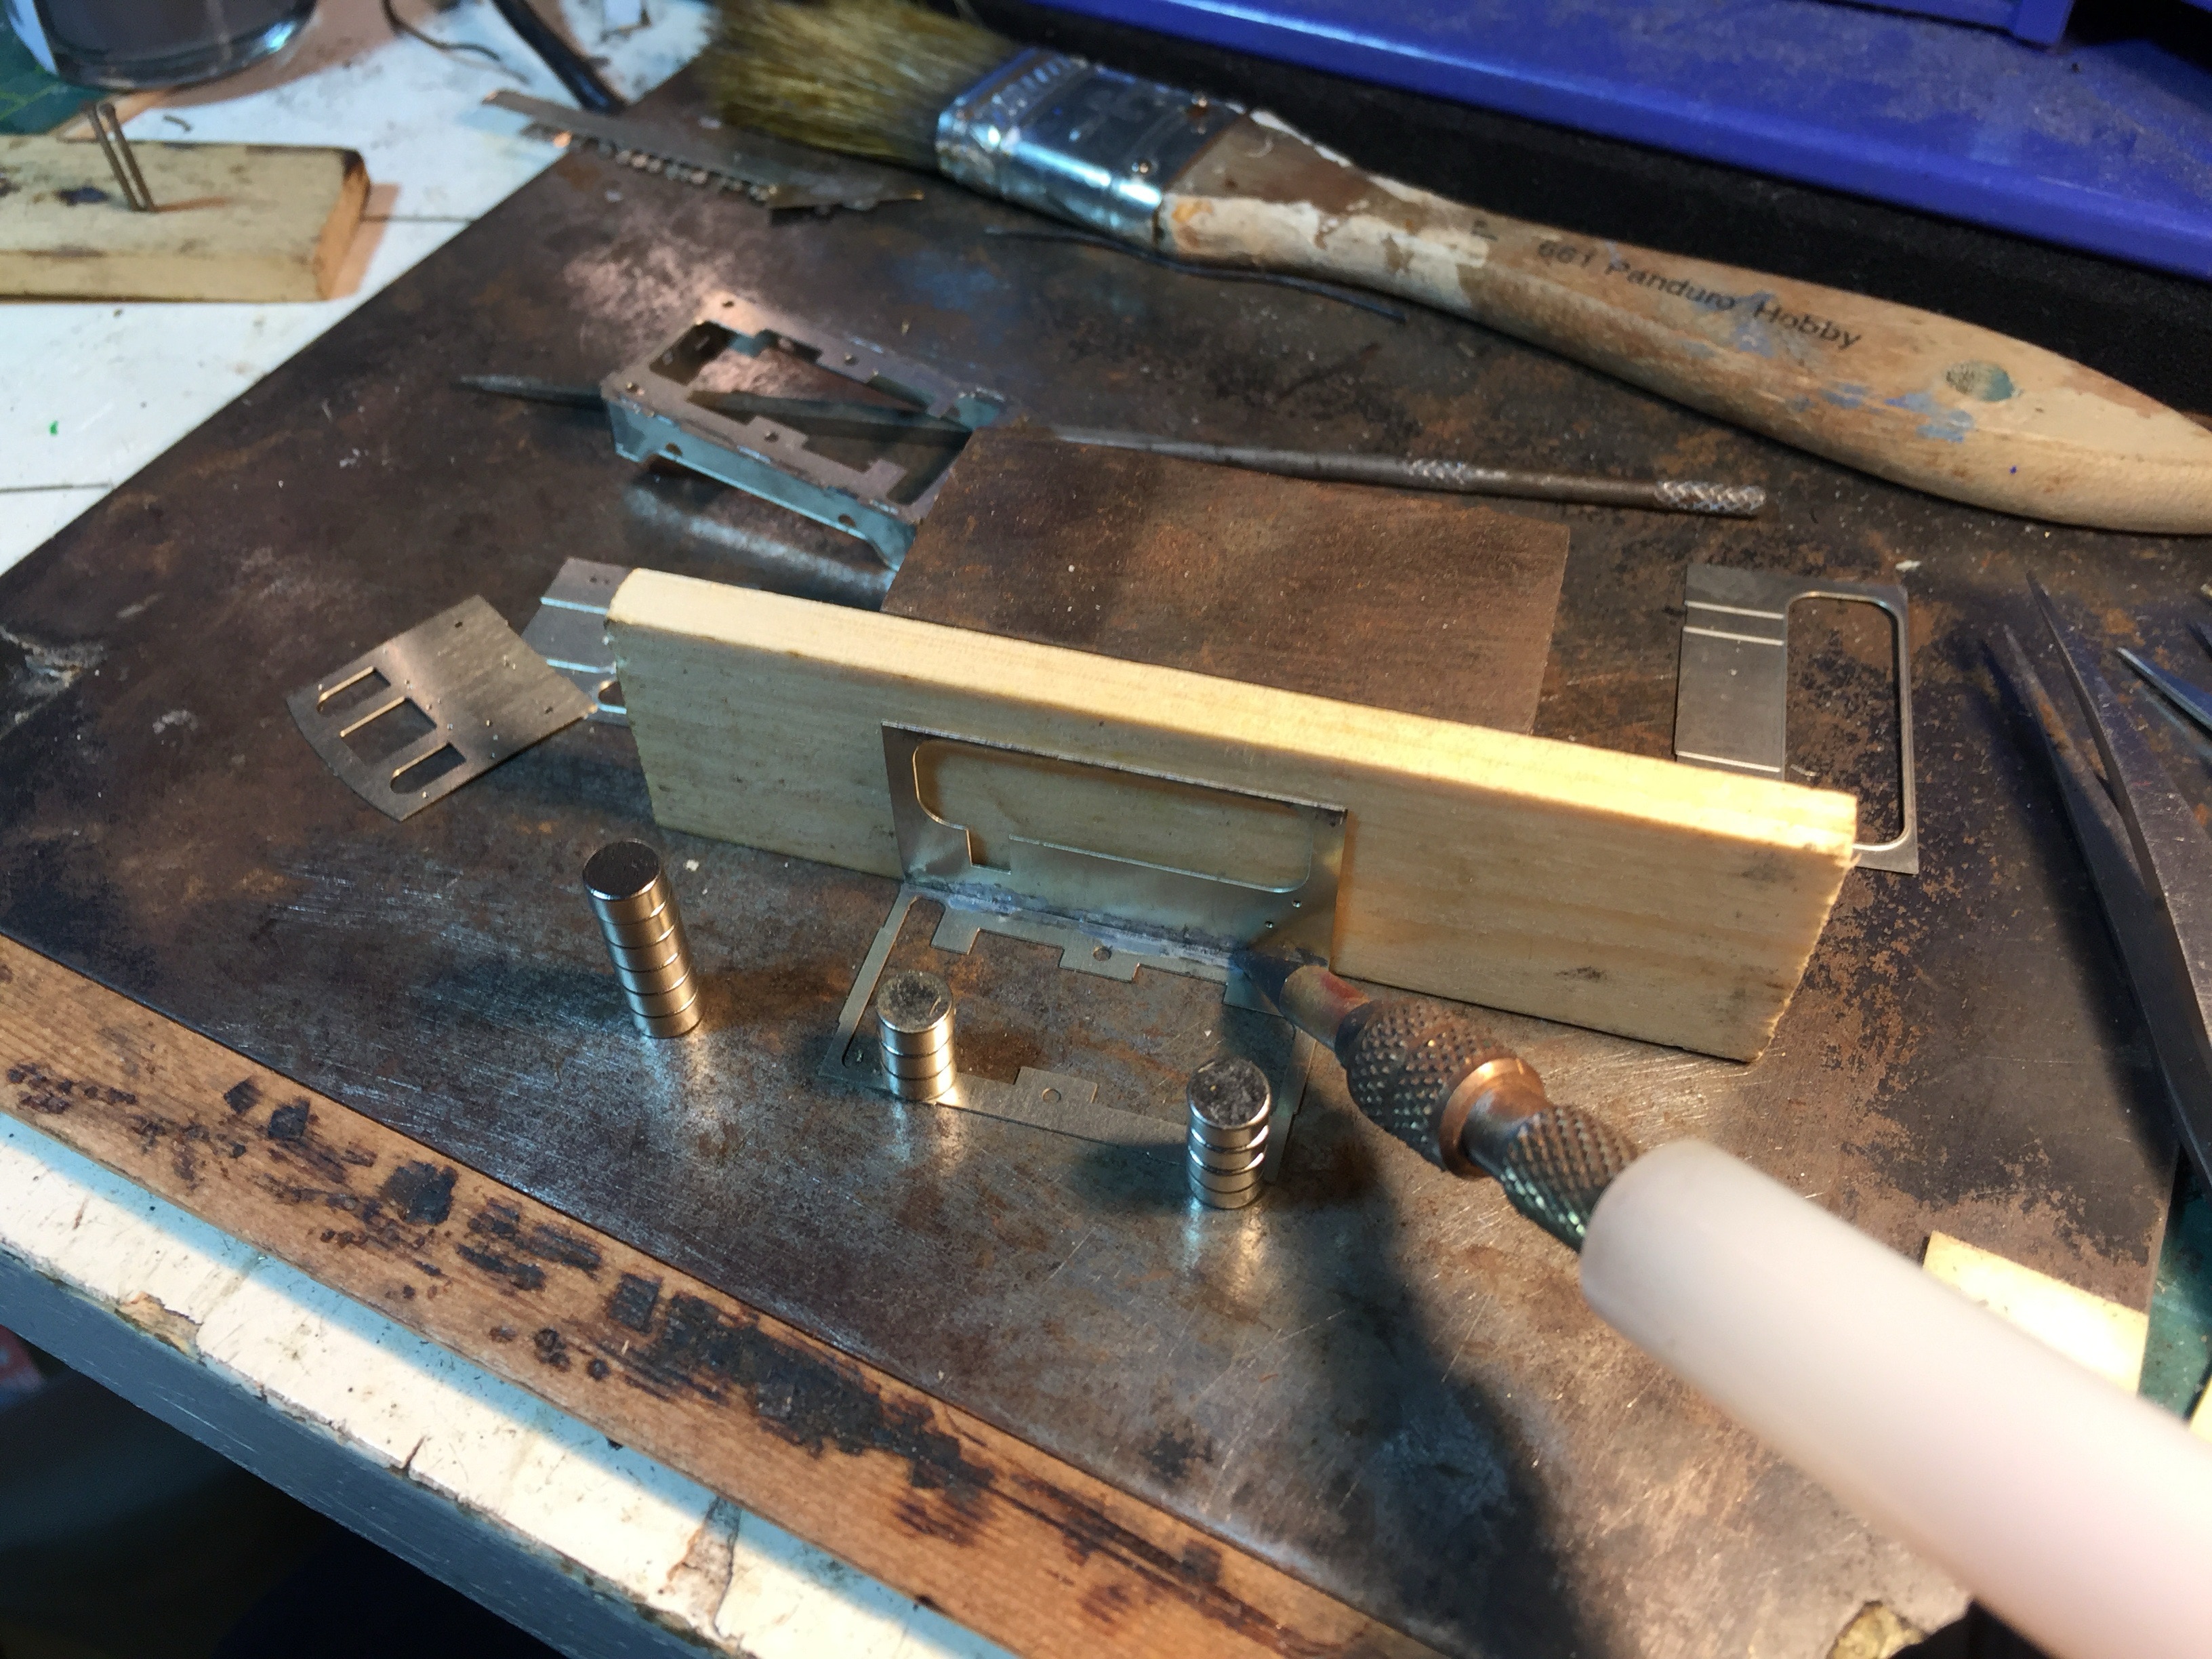
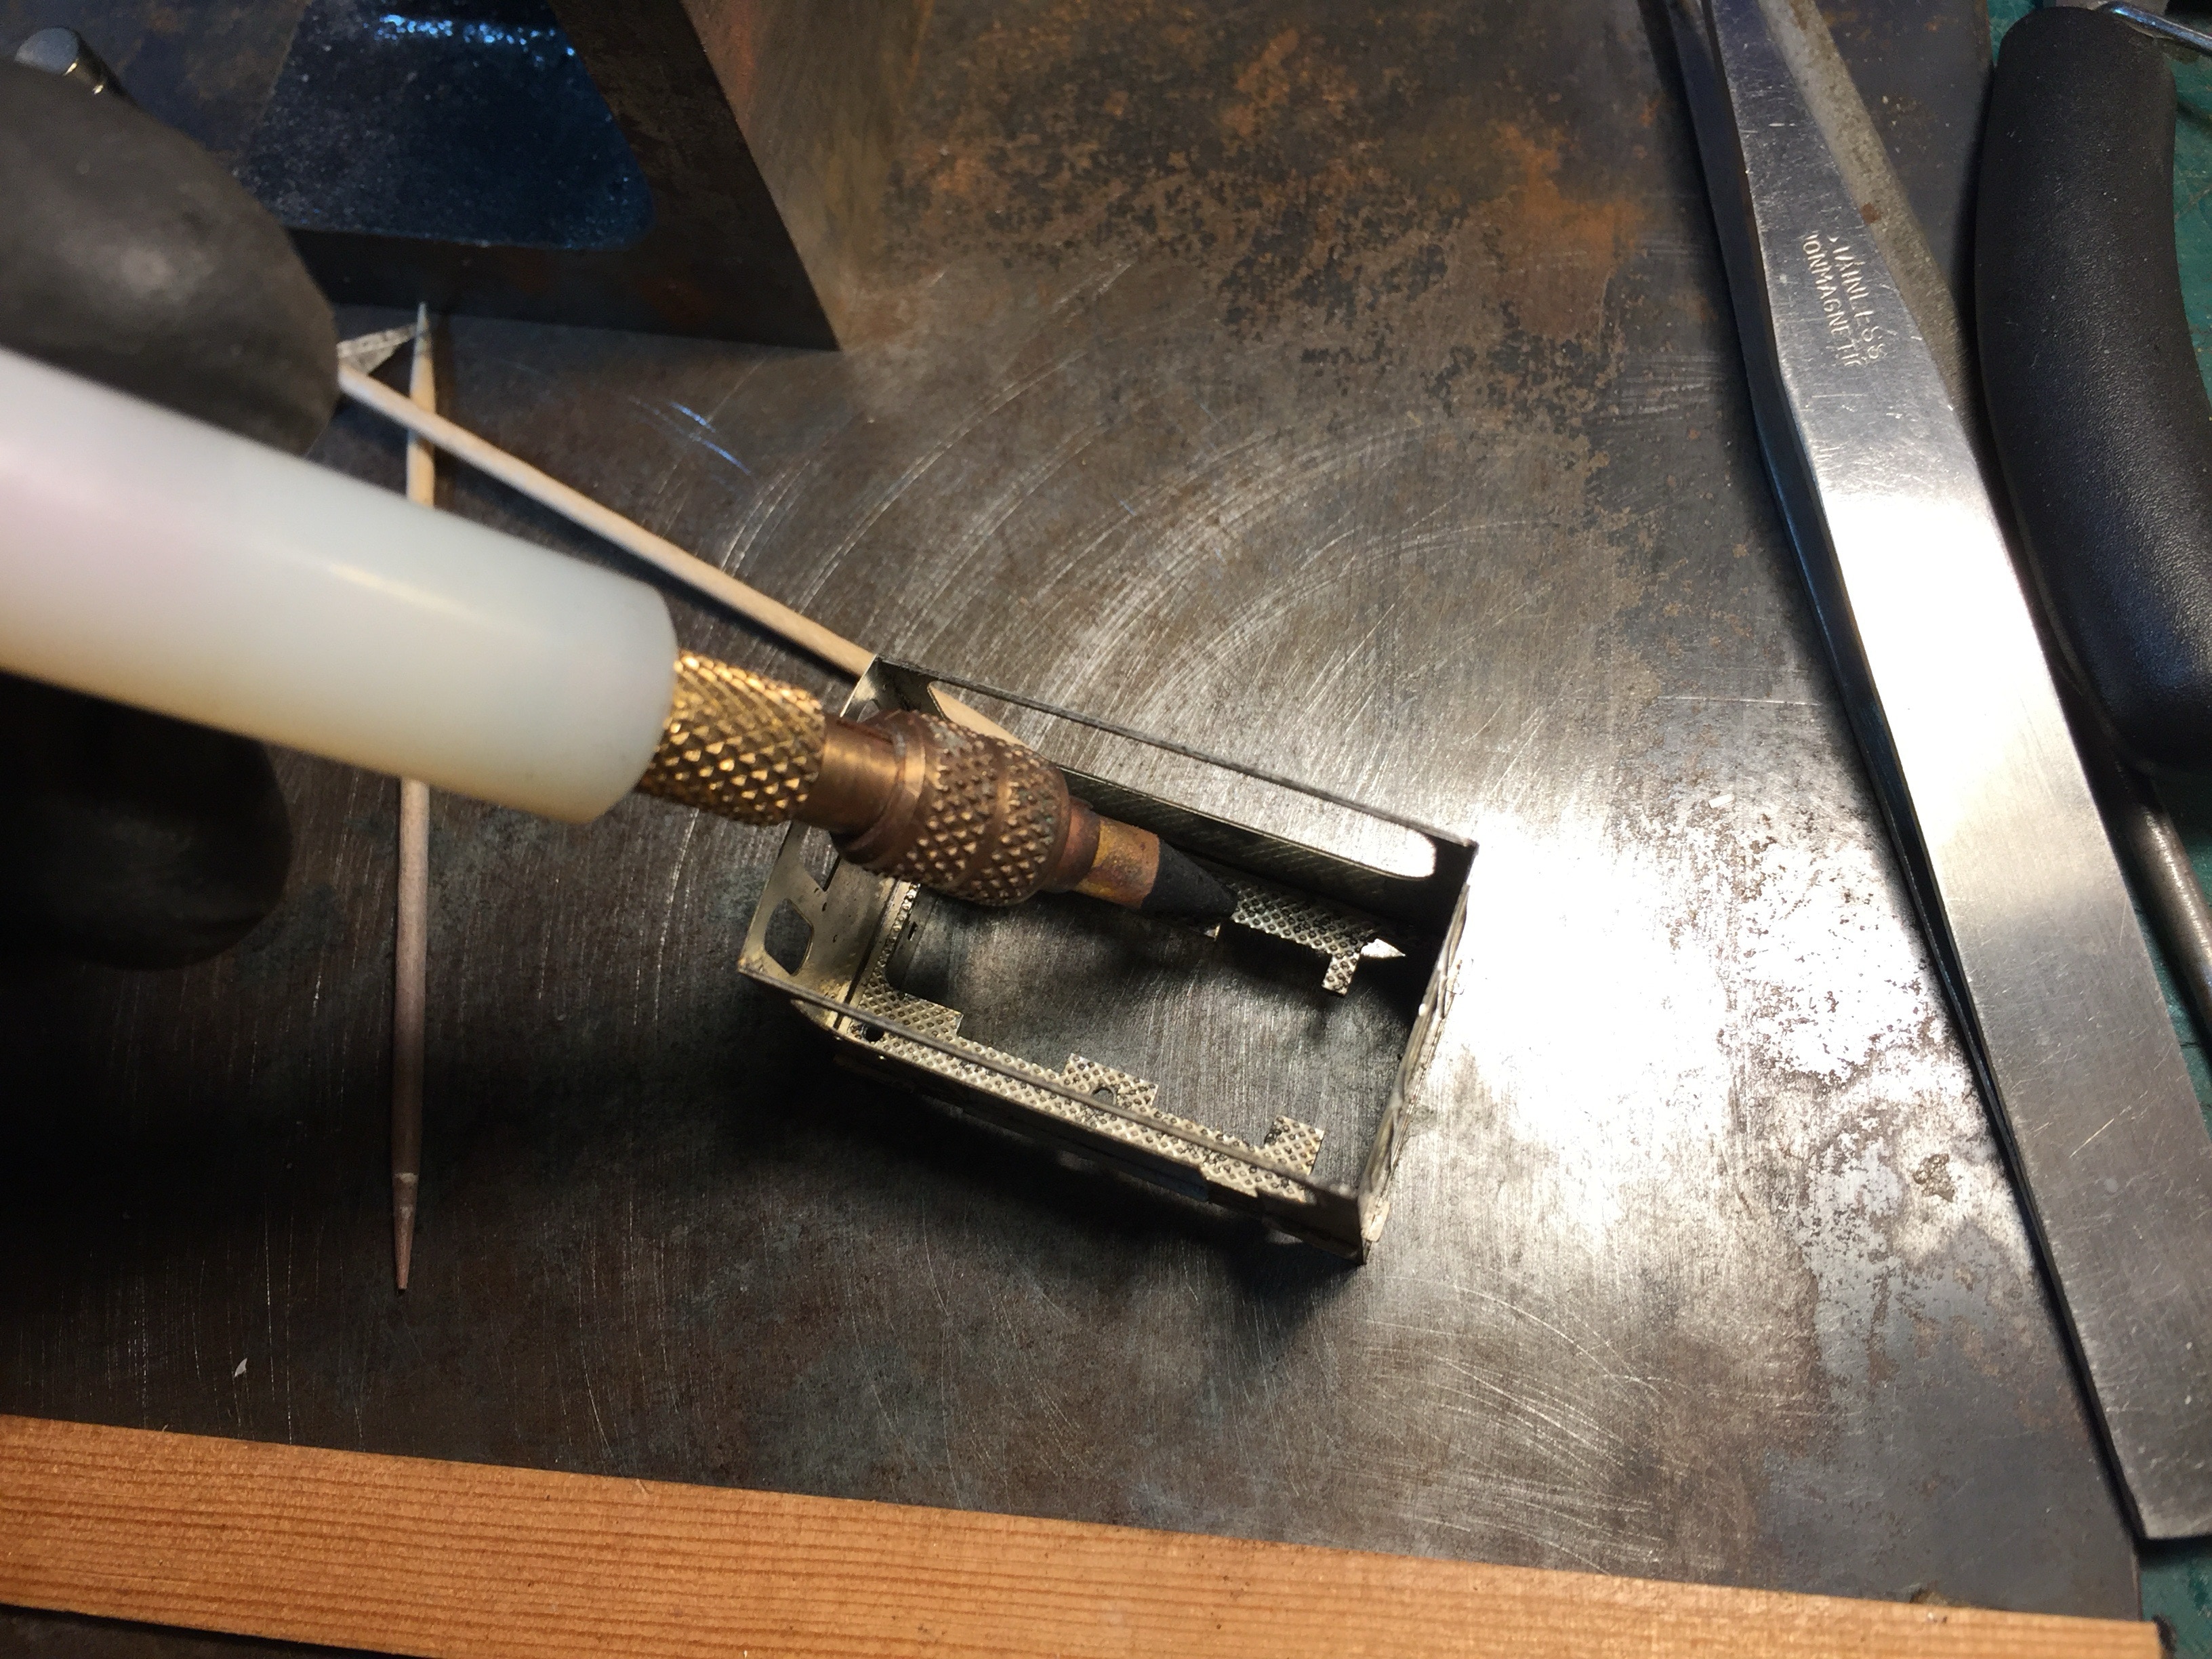
Check elk plaatje of de verbinding naar de etsplaat netjes glad is afgeknipt. Als er nog een klein stukje uitsteekt, knip het dan met een klein schaartje (uit de winkel voor naaigarenbenodigdheden) af. Ik zou het persoonlijk niet vijlen, want dat gaat langzamer en je vijlt eigenlijk altijd ook een stuk eromheen af. En dat is niet de bedoeling.
Now the steps the make the model shown above:
Check every pane if the connection sprue are clean cut. If there is still some left, cut with a small pair of scissors (from a sewing shop). Personally, I wouldn’t file it, as that goes slower and you always will file some part around it. That is not suppose to happen.
First attach the strip to strengthen the top bar.
Bevestig eerst de strip voor versteviging aan de binnenzijde.
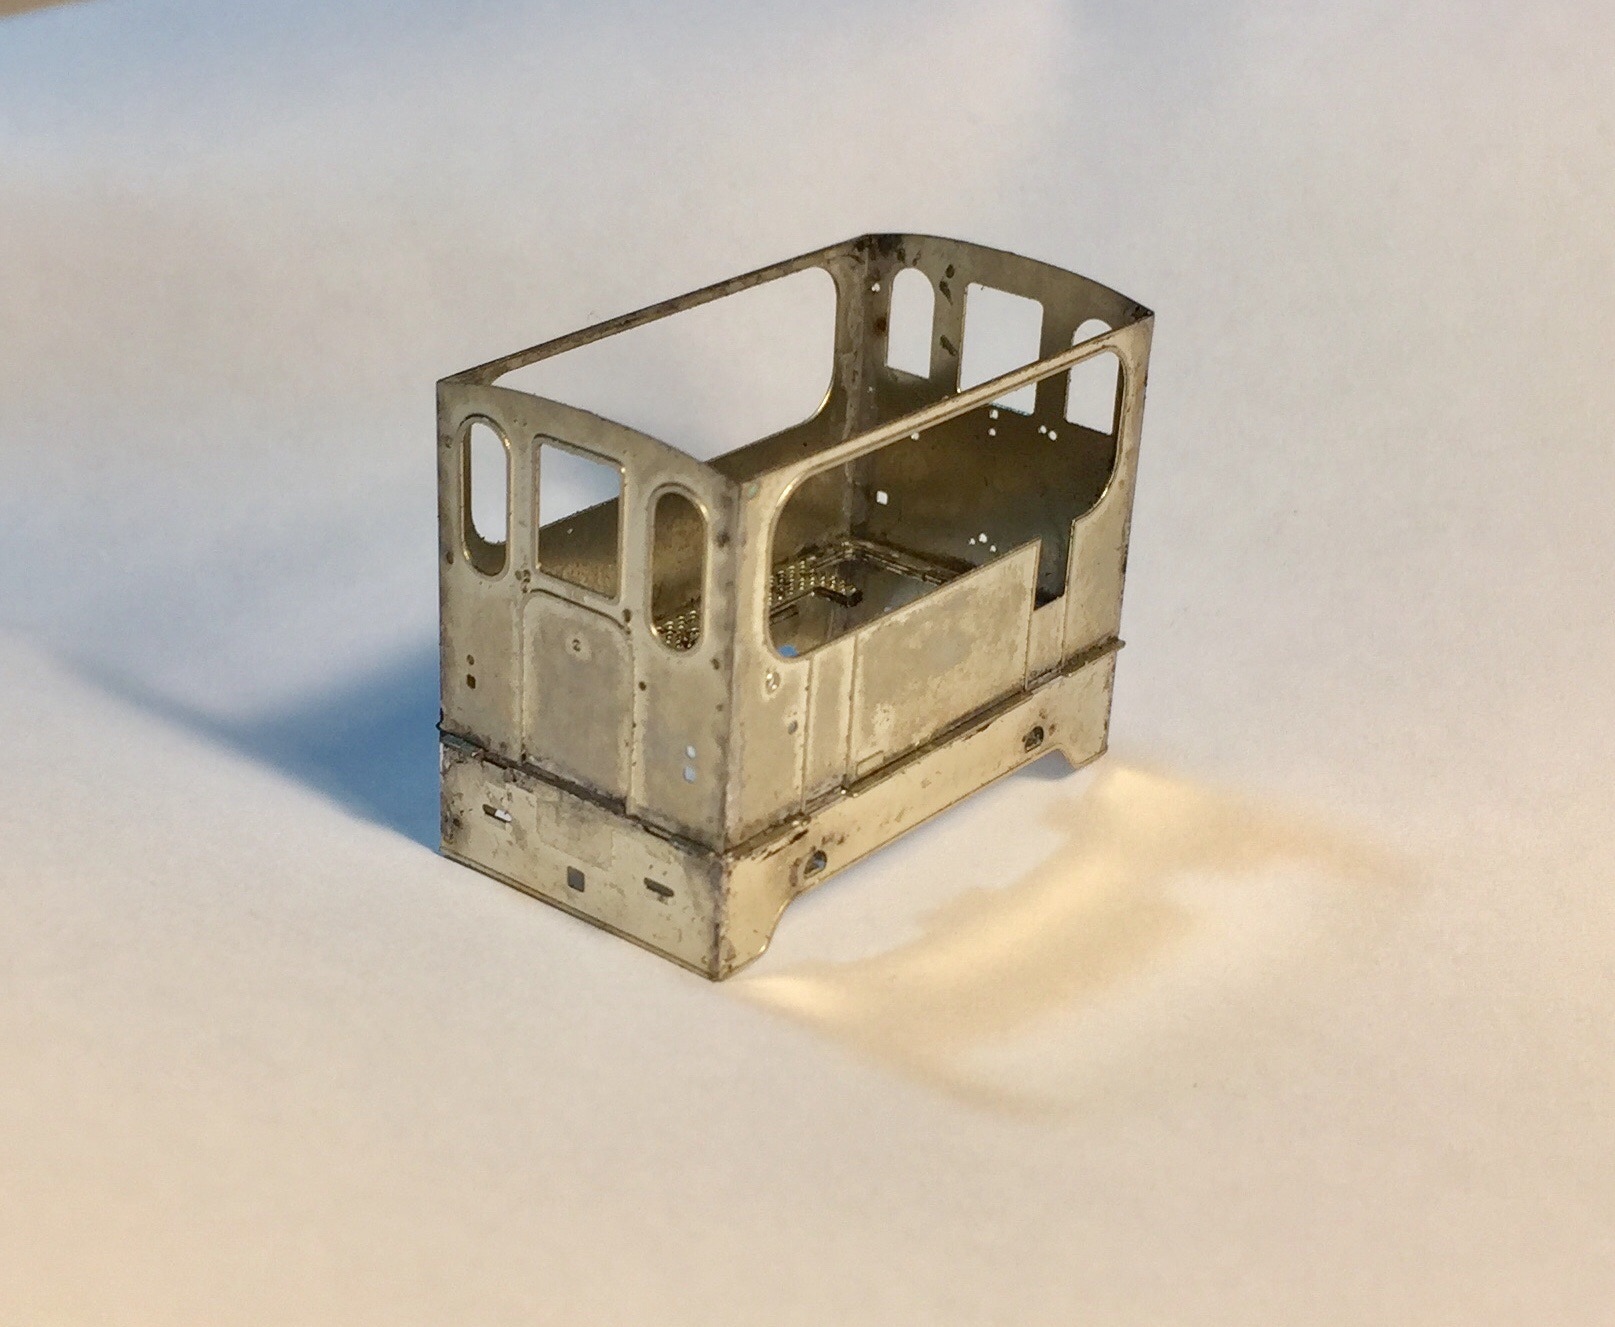
Bevestig een zijpaneel. Let er op dat het juiste paneel aan de juiste kant komt.
Voorkant
Front
Voorkant
Back
Voorkant
Front
Fit a side panel. Take care to put the correct panel on the correct side.
Voorkant
Back
Fit the front. The panel should slide perfectly in the slot. The front panel will overlap the side panel, but the edge of the front panel should align with the side panel and not stick out.
Dan bevestig de voorkant. Het paneel moet zo in het slot schuiven. Het voorpaneel valt over het zijpaneel. De rand van het voorpaneel moet gelijk liggen met het zijpaneel en niet uitsteken.
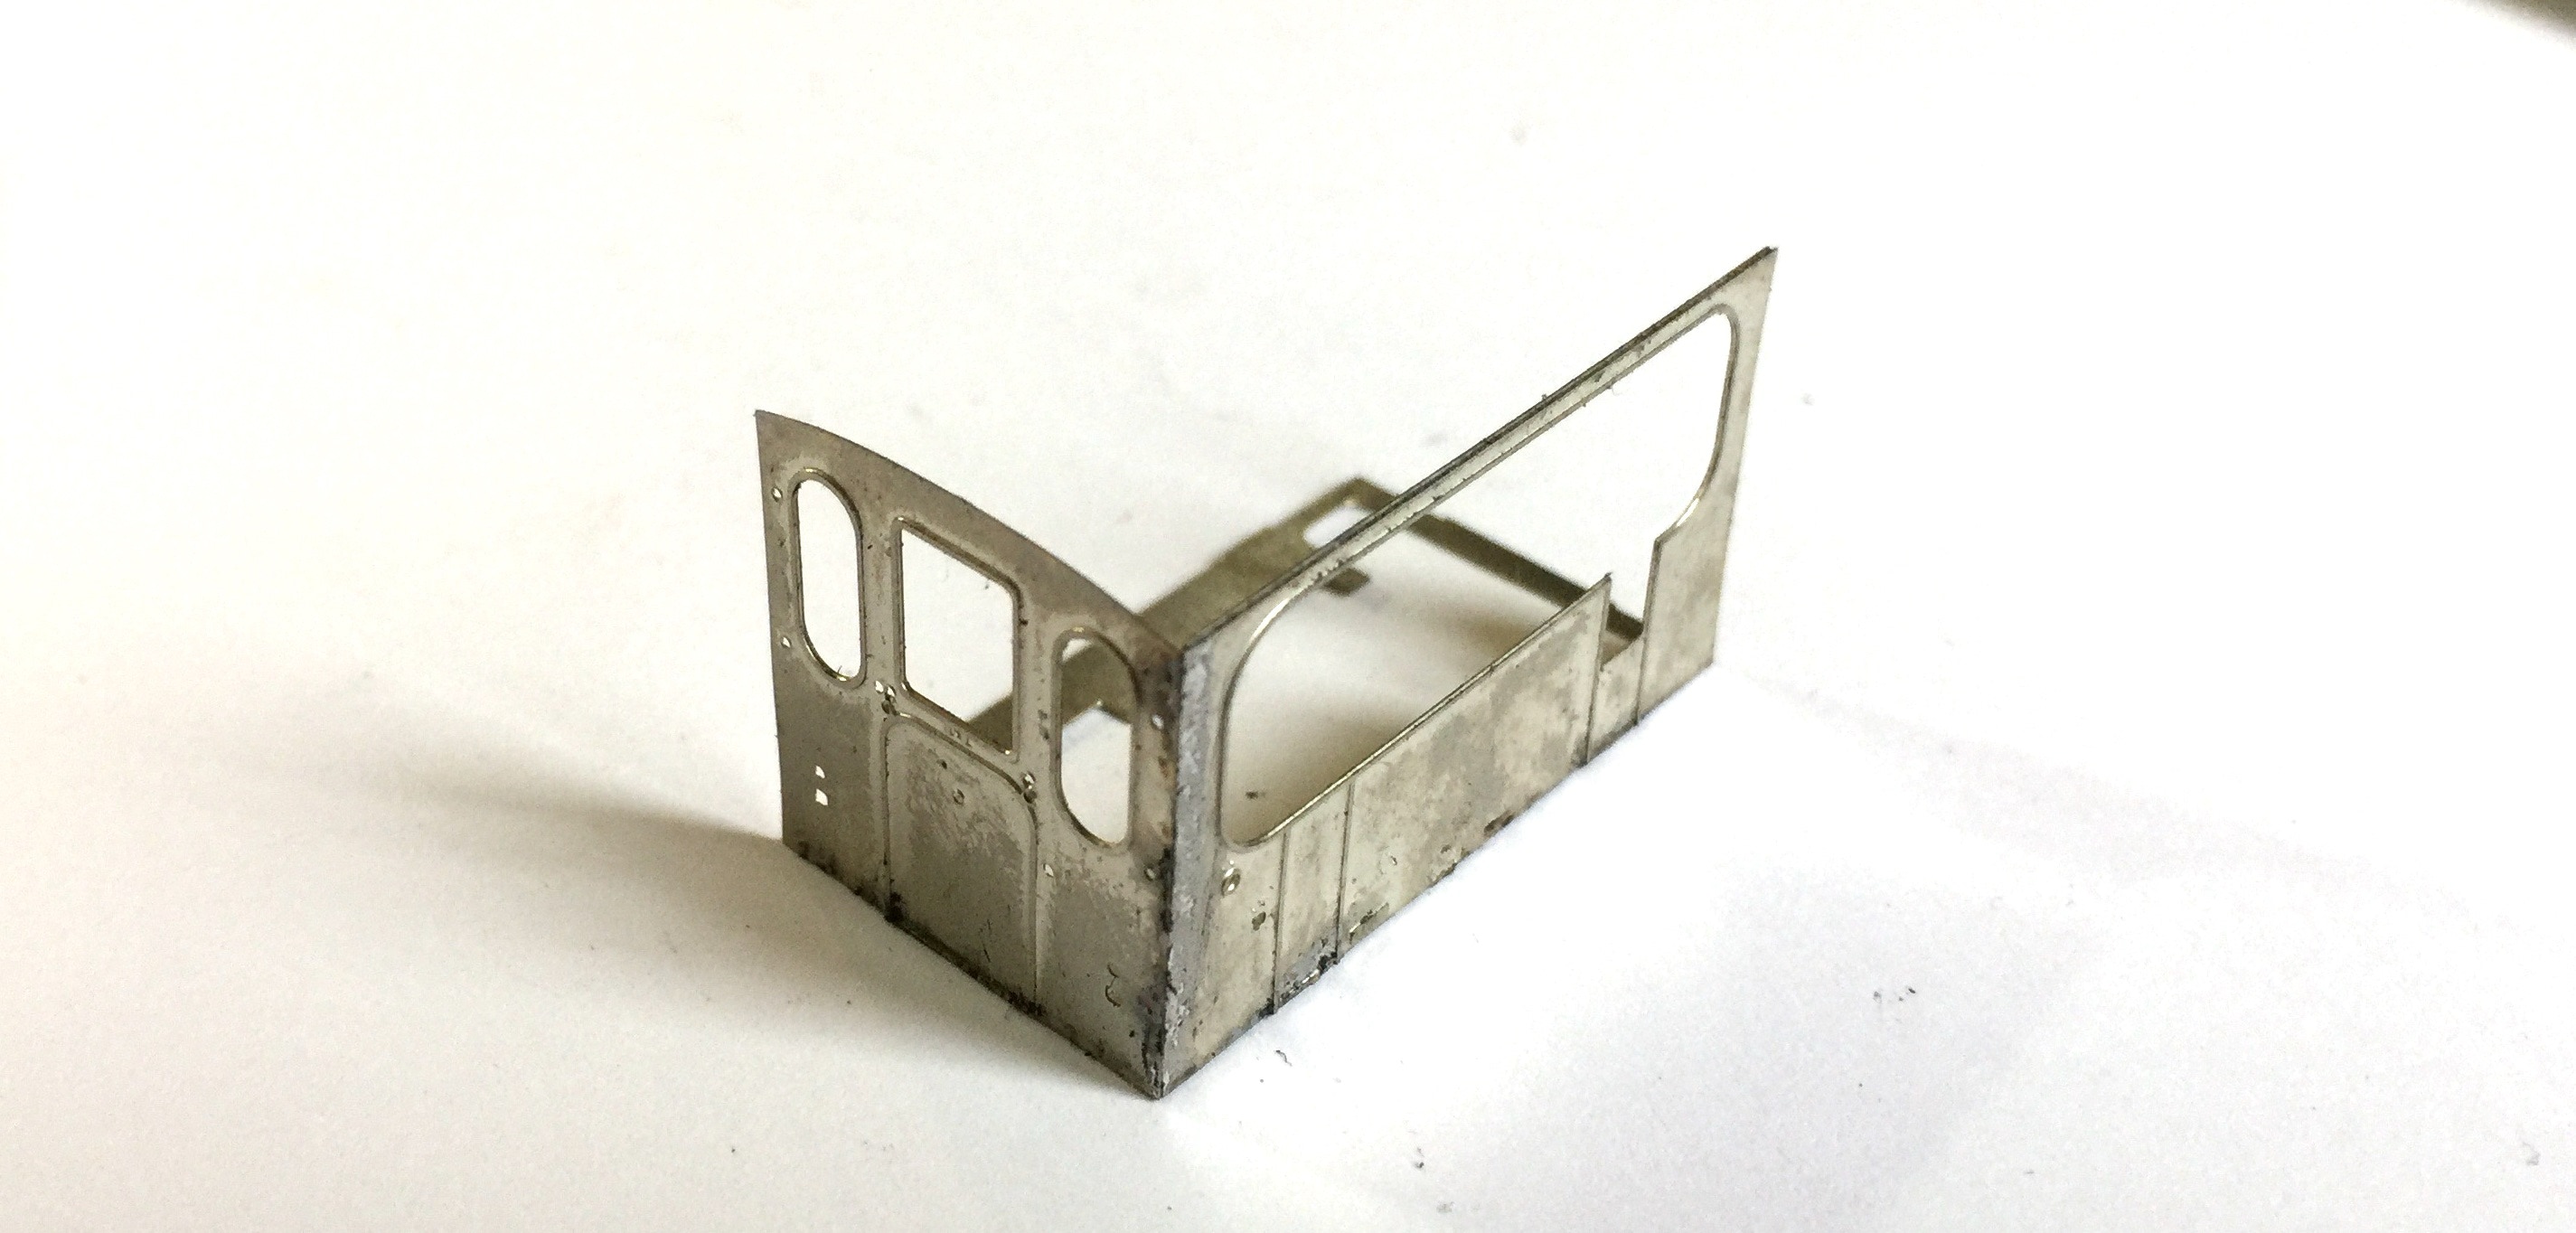
Bevestig op dezelfde wijze de andere panelen. Altijd controleren of de hoeken mooi aansluiten.
Fit the other panels in the same way. Always check if the corners are connecting smooth and well.
Nu de boven- en onderkant klaar zijn, worden deze op elkaar gesoldeerd of gelijmd. De voetplaat (30) wordt nog niet gebruikt.
Let op! Het op elkaar lijmen kun je ook pas doen na het verven doen, zodat de zwarte afscheidingslijn strakker wordt, maar ik vind het risico op lijmresten op een geverfd model te groot om hiervoor te kiezen.
Now the top and bottom part are finished, they will be soldered or glued together. The footplate (30) is not fitted yet.
NOTE! Connecting these two parts can also be done after painting, so the painted black line between the two parts will be very precise. But the risk on glue residue on the finish paint will be quite big.

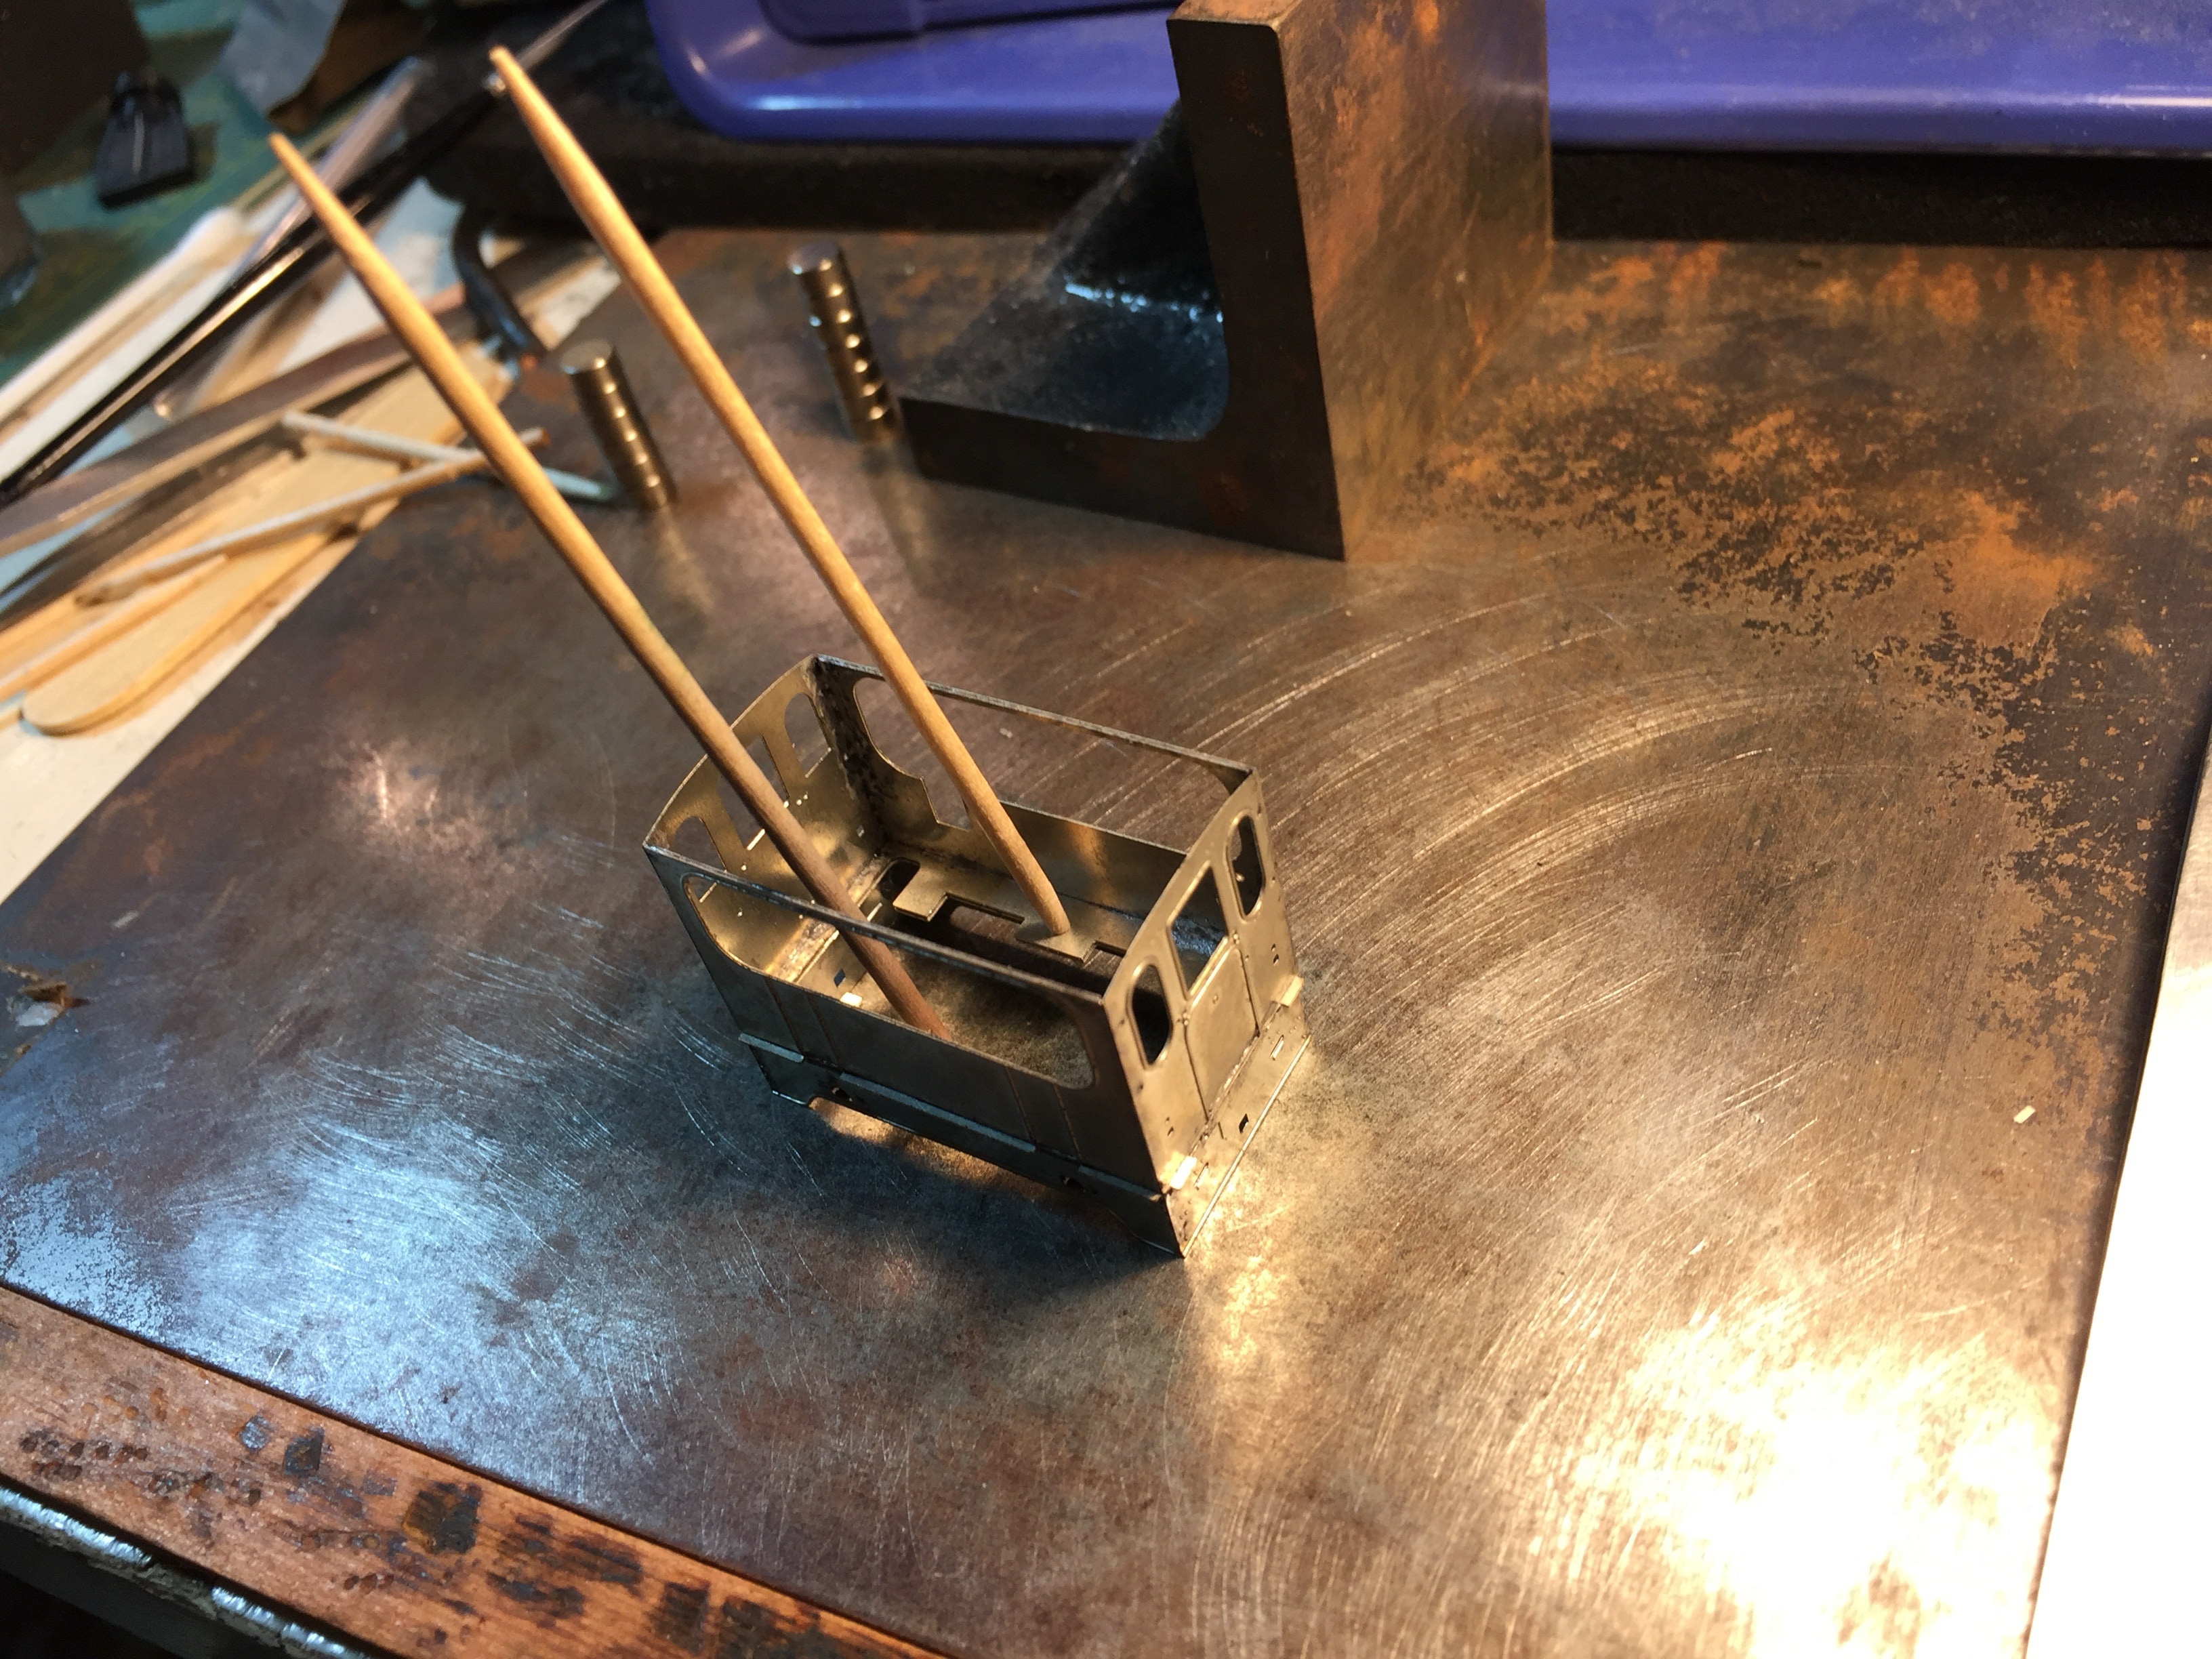
Gebruik tandenstokers om de twee delen te centreren.
BELANGRIJK! Voor het definitief bevestigen, controleer of alle hoeken van de boven- en onderkant mooi in één lijn liggen.
Use tooth picks to centre the two parts.
IMPORTANT! Before you finally fix these two parts together, check if all corners of top and bottom parts are aligned.
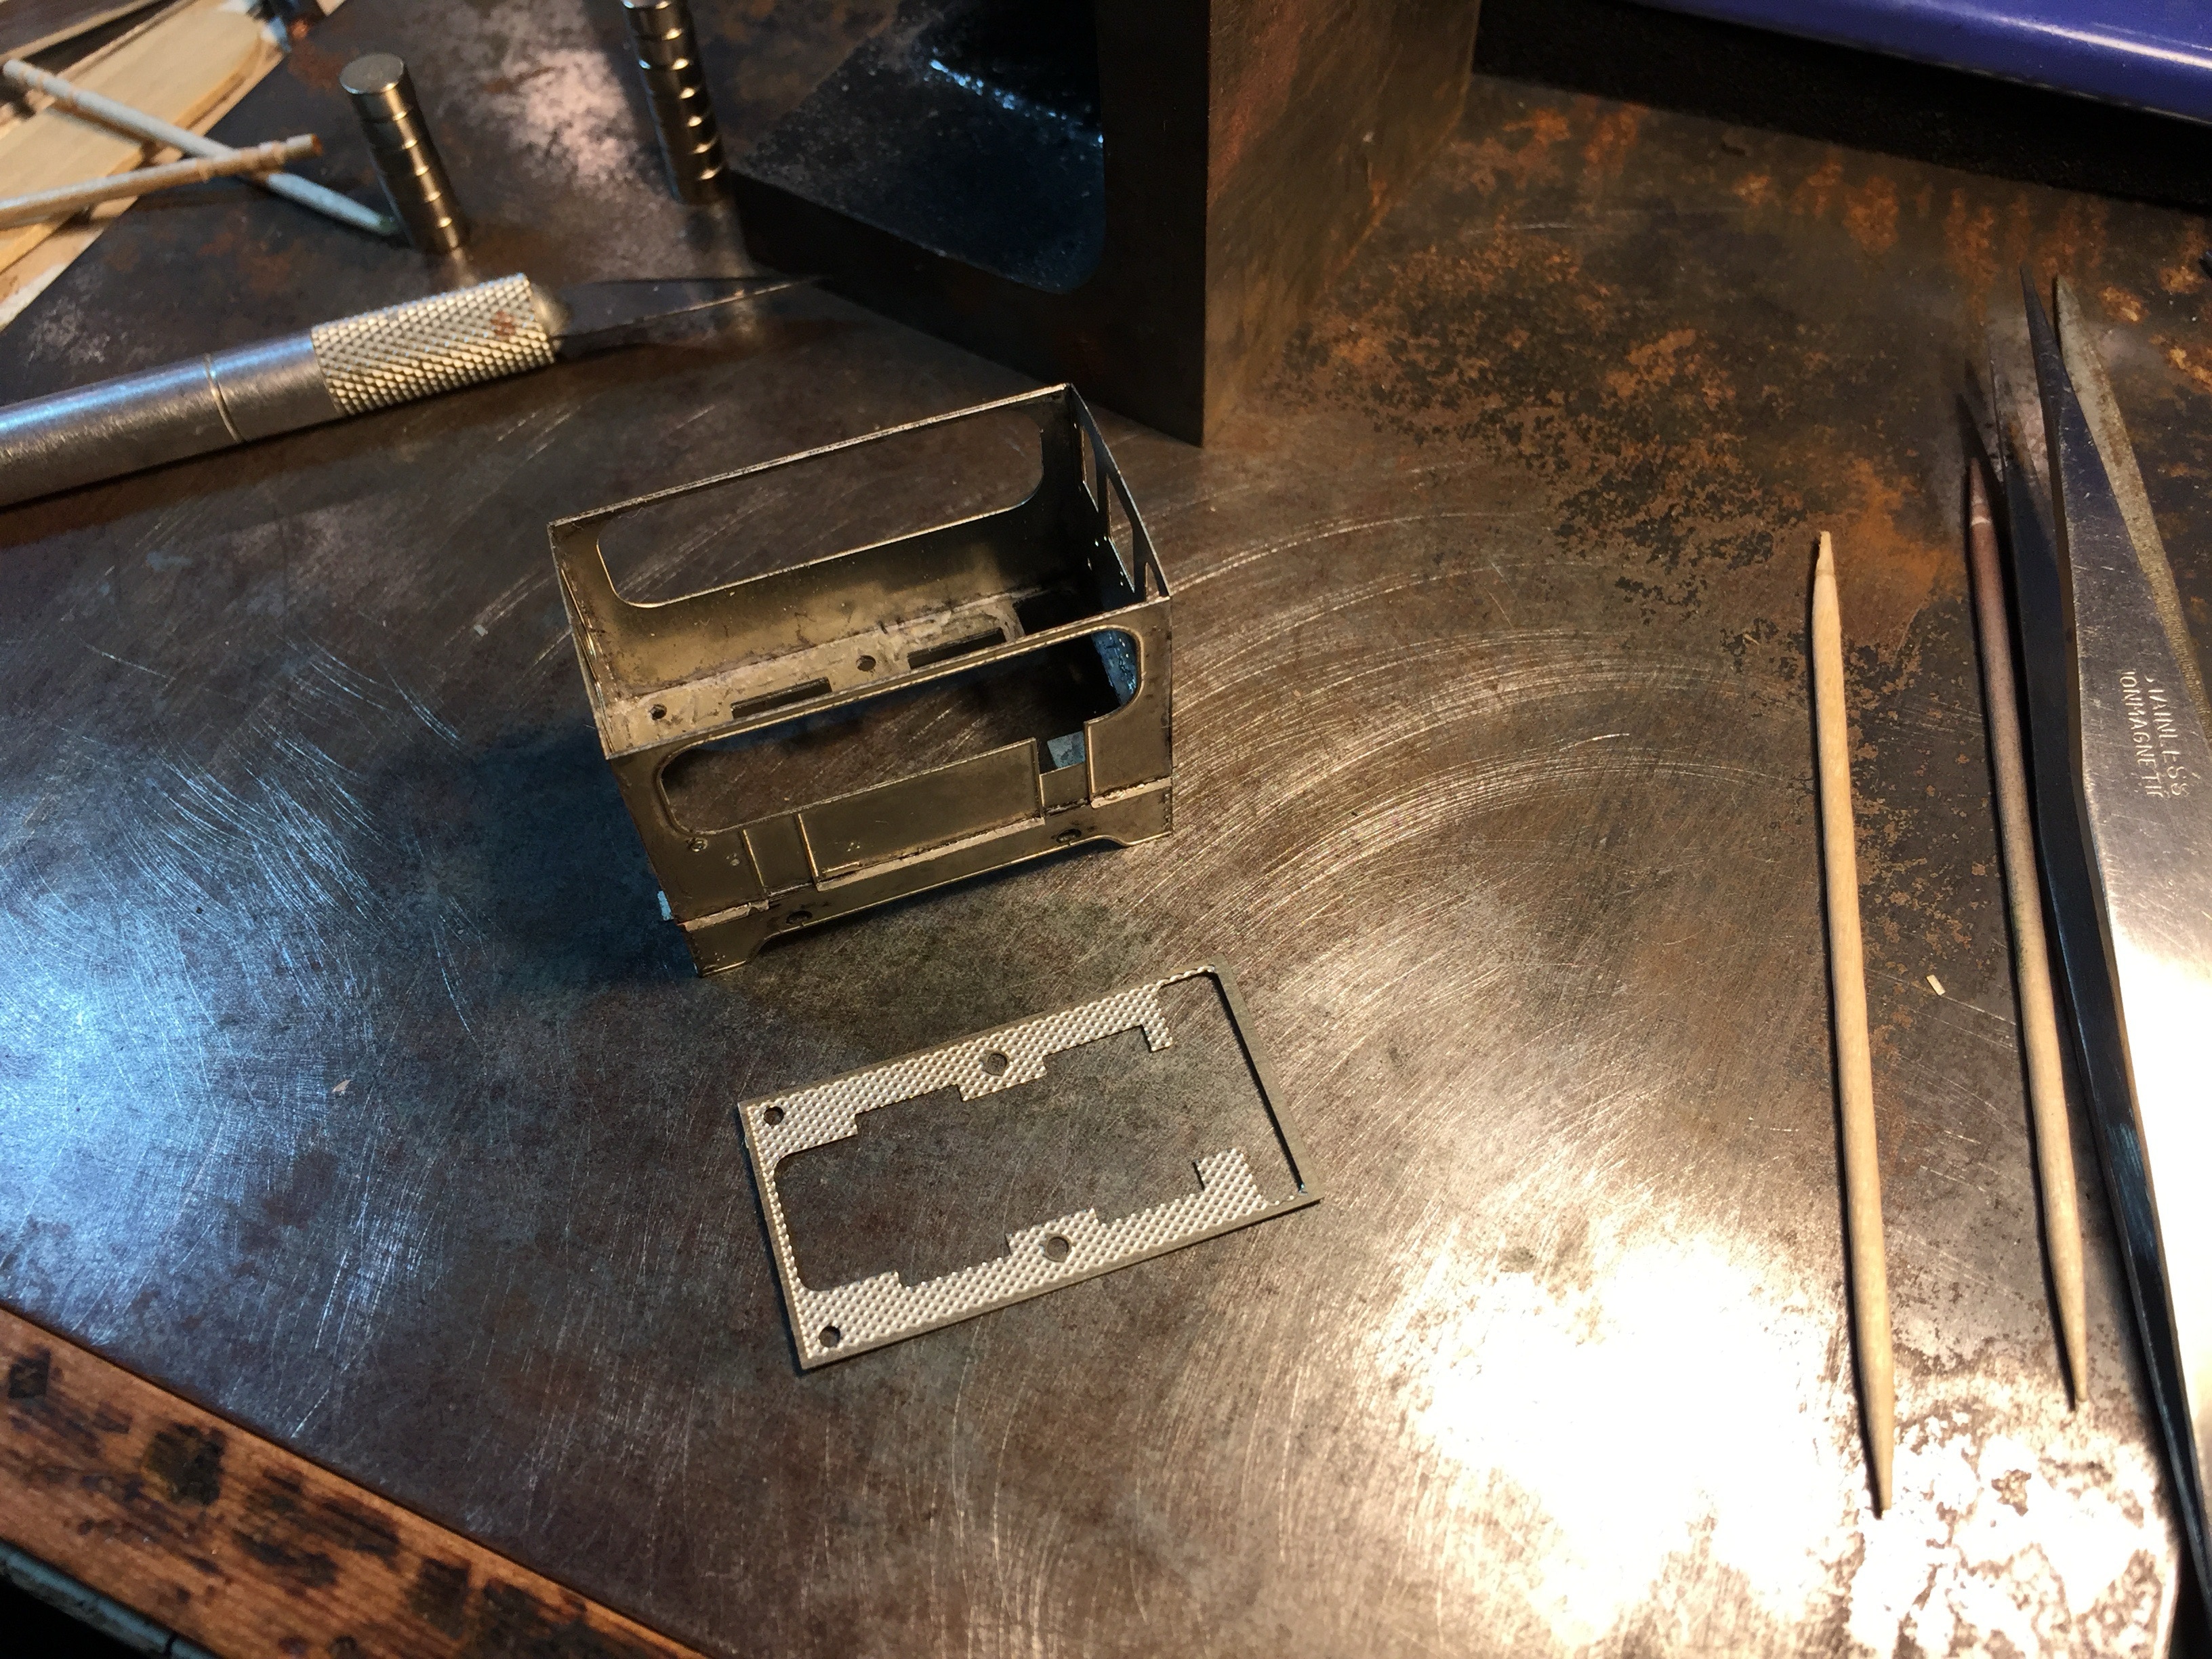
Als de kastdelen op elkaar zitten, plaats de voetplaat. Deze moet je er zonder nabewerking in kunnen leggen. Wees voorzichtig dat je het onderdeel niet verbuigt. Het wordt dan lastig om ‘m weer mooi plat te krijgen.
When both parts are fixed, fit the footplate. This should fall in place without any modification to the footplate. Be careful not to bend the part, otherwise it might be hard to get it flat again.
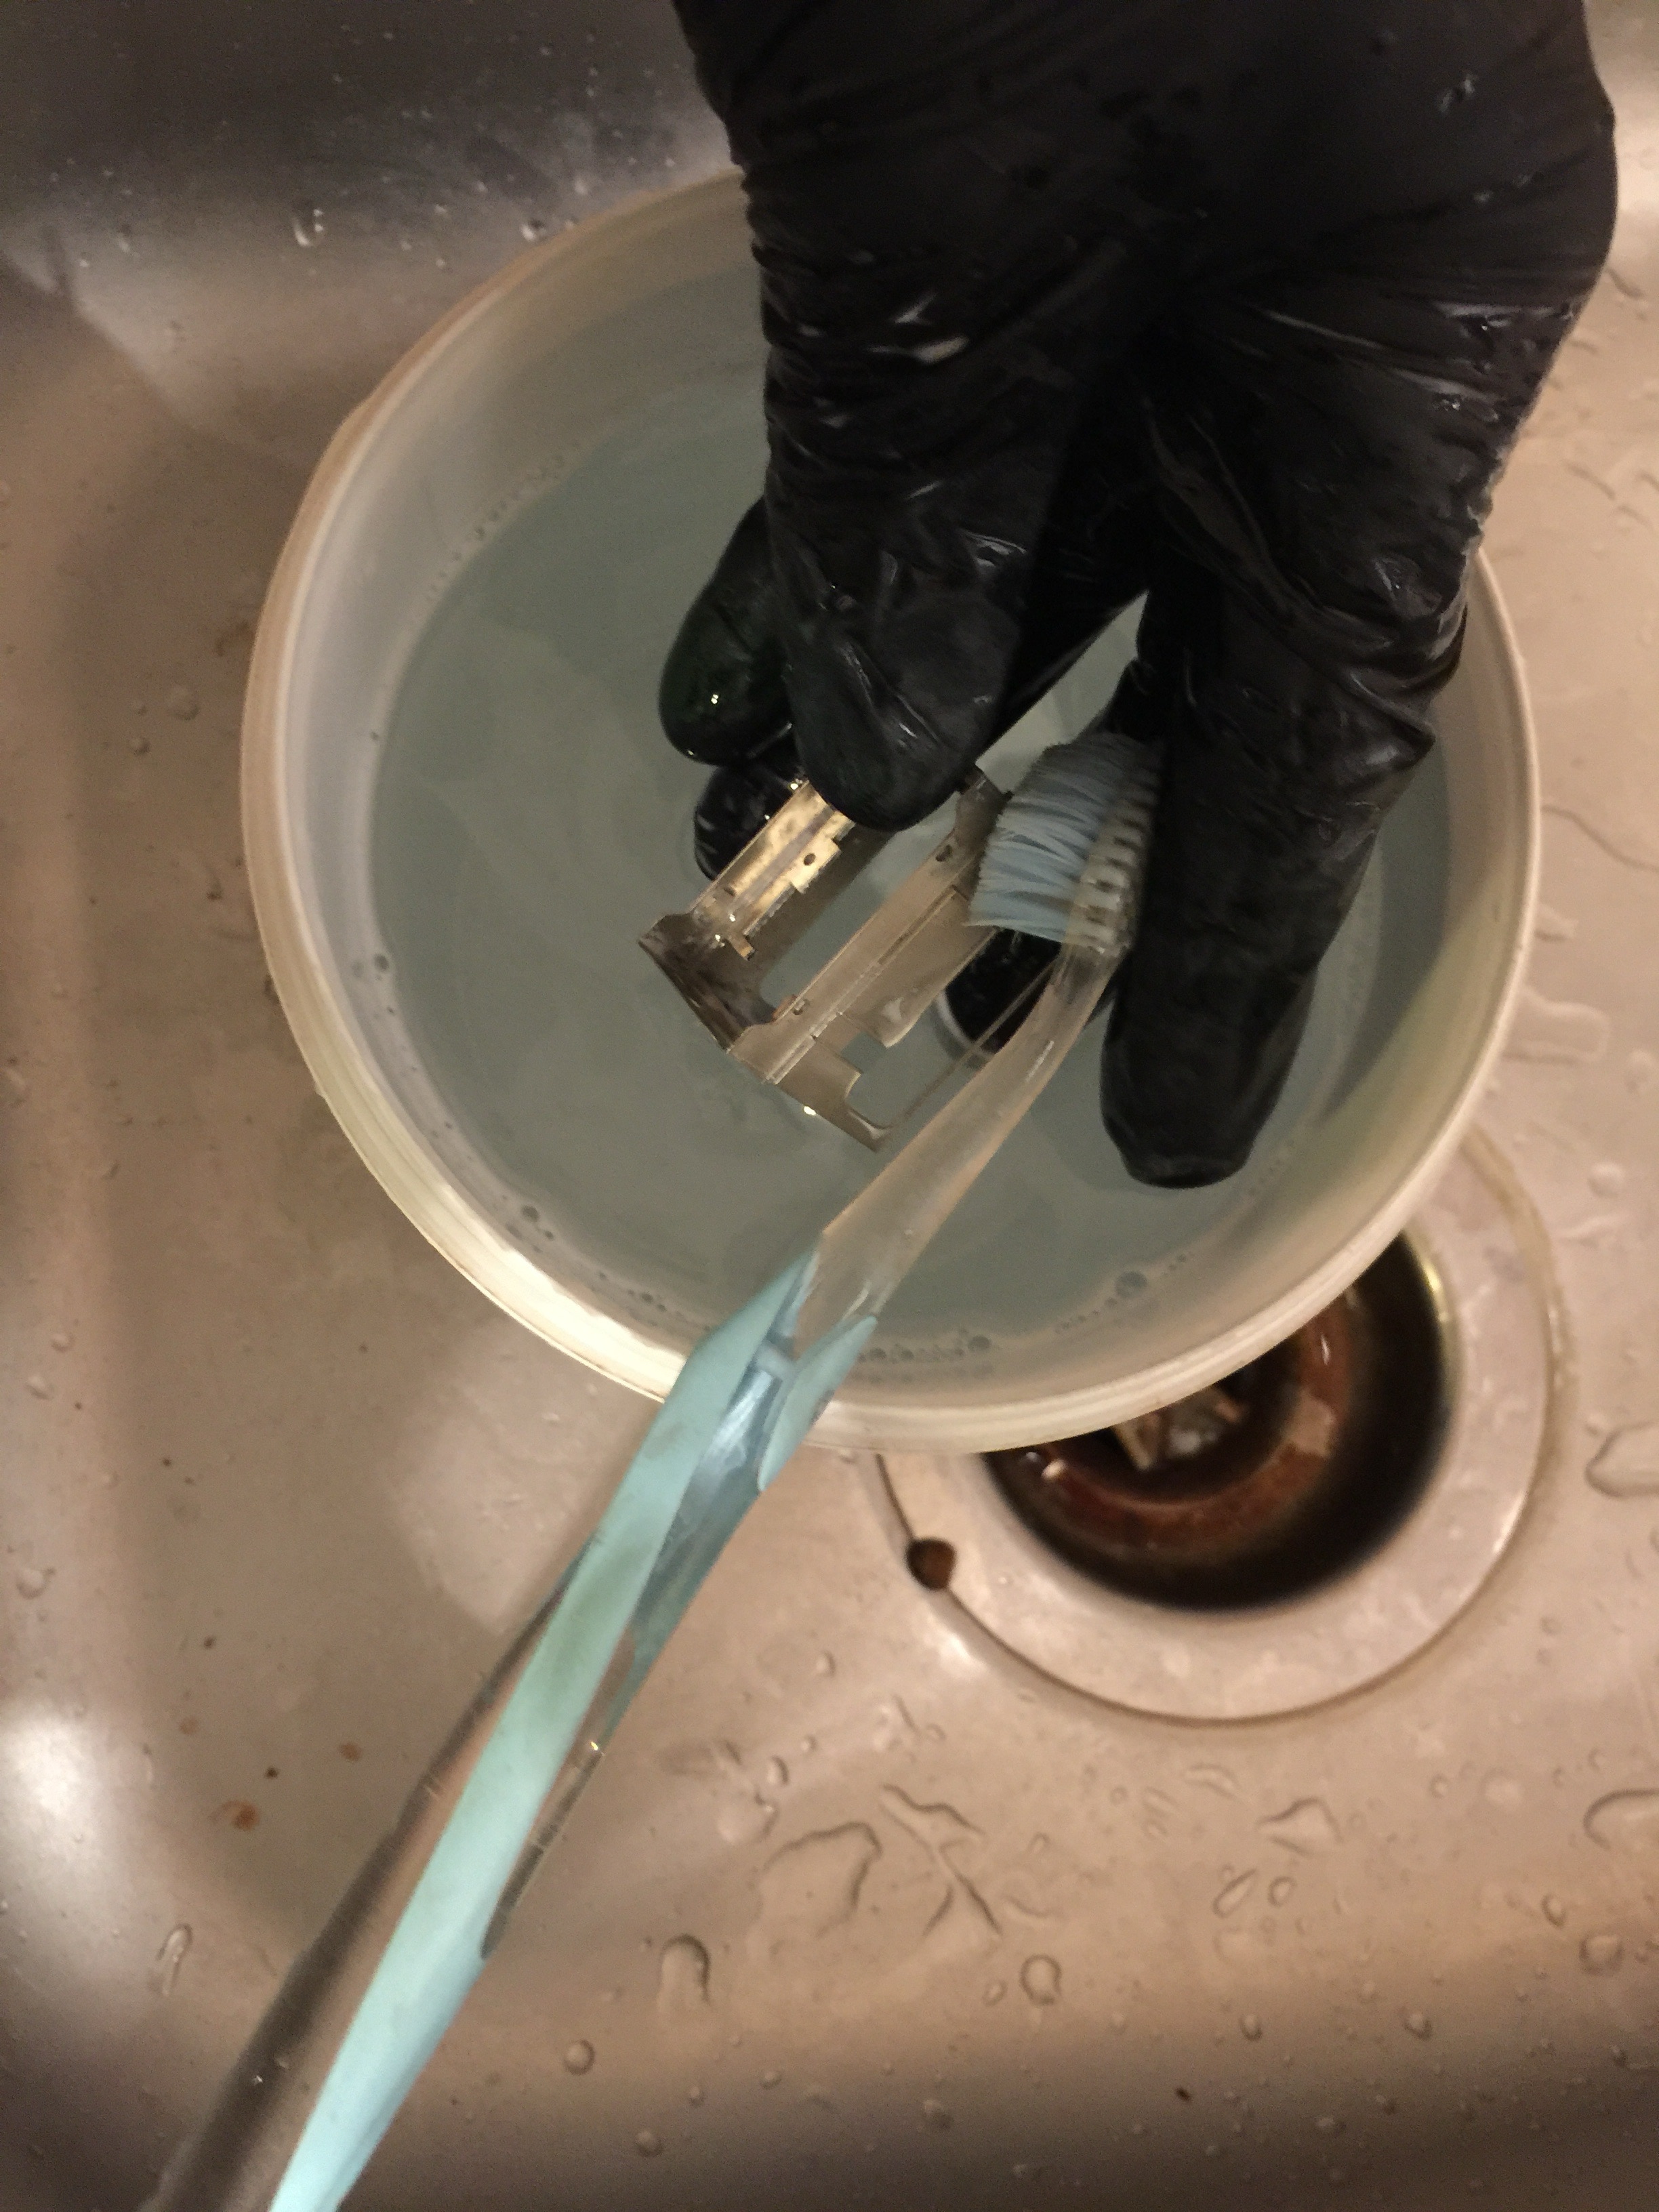
Was de kast in warm water met een druppeltje afwasmiddel, om de resten van het vloeimiddel eraf te krijgen. Gebruik een (oude!) tandenborstel en een oude kwast om alle plekken te bereiken.
Wash the box in warm water with a drop of liquid soap, to clean it from flux. Use a toothbrush and an old brush to reach all places.
•