


Prices for UK customers are shown inc 20% VAT
Other countries, inc EU, prices shown are ex VAT.
UK based

KASTENLOK INDEX

Let’s open the
Bachmann Quarry Hunslet
Prices for UK customers are shown inc 20% VAT
Other countries, inc EU, prices shown are ex VAT.
UK based
KASTENLOK INDEX
Let’s open the
Bachmann Quarry Hunslet

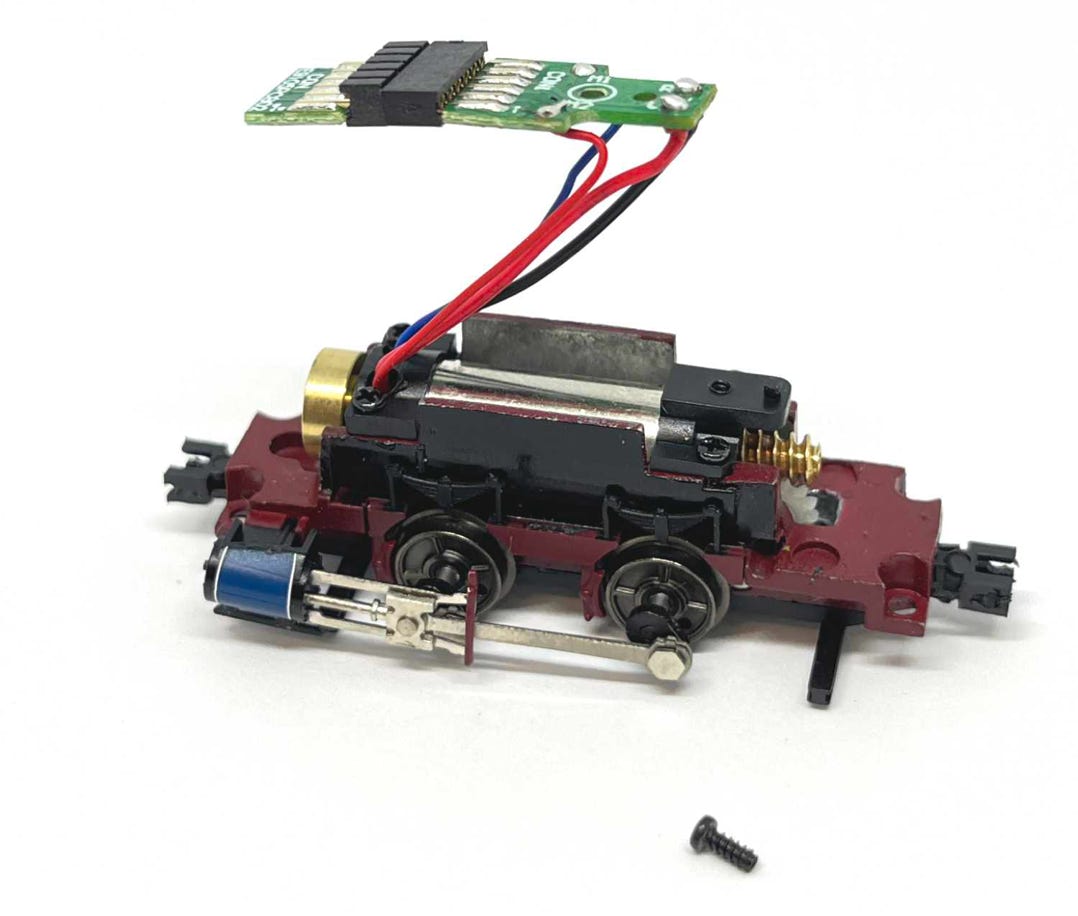
Here is where we get to the decoder. A standard 6 pin decoder doesn’t fit, but the very small version. It will be the Doehler & Haass PD05A-4, or Zimo has the MX615.
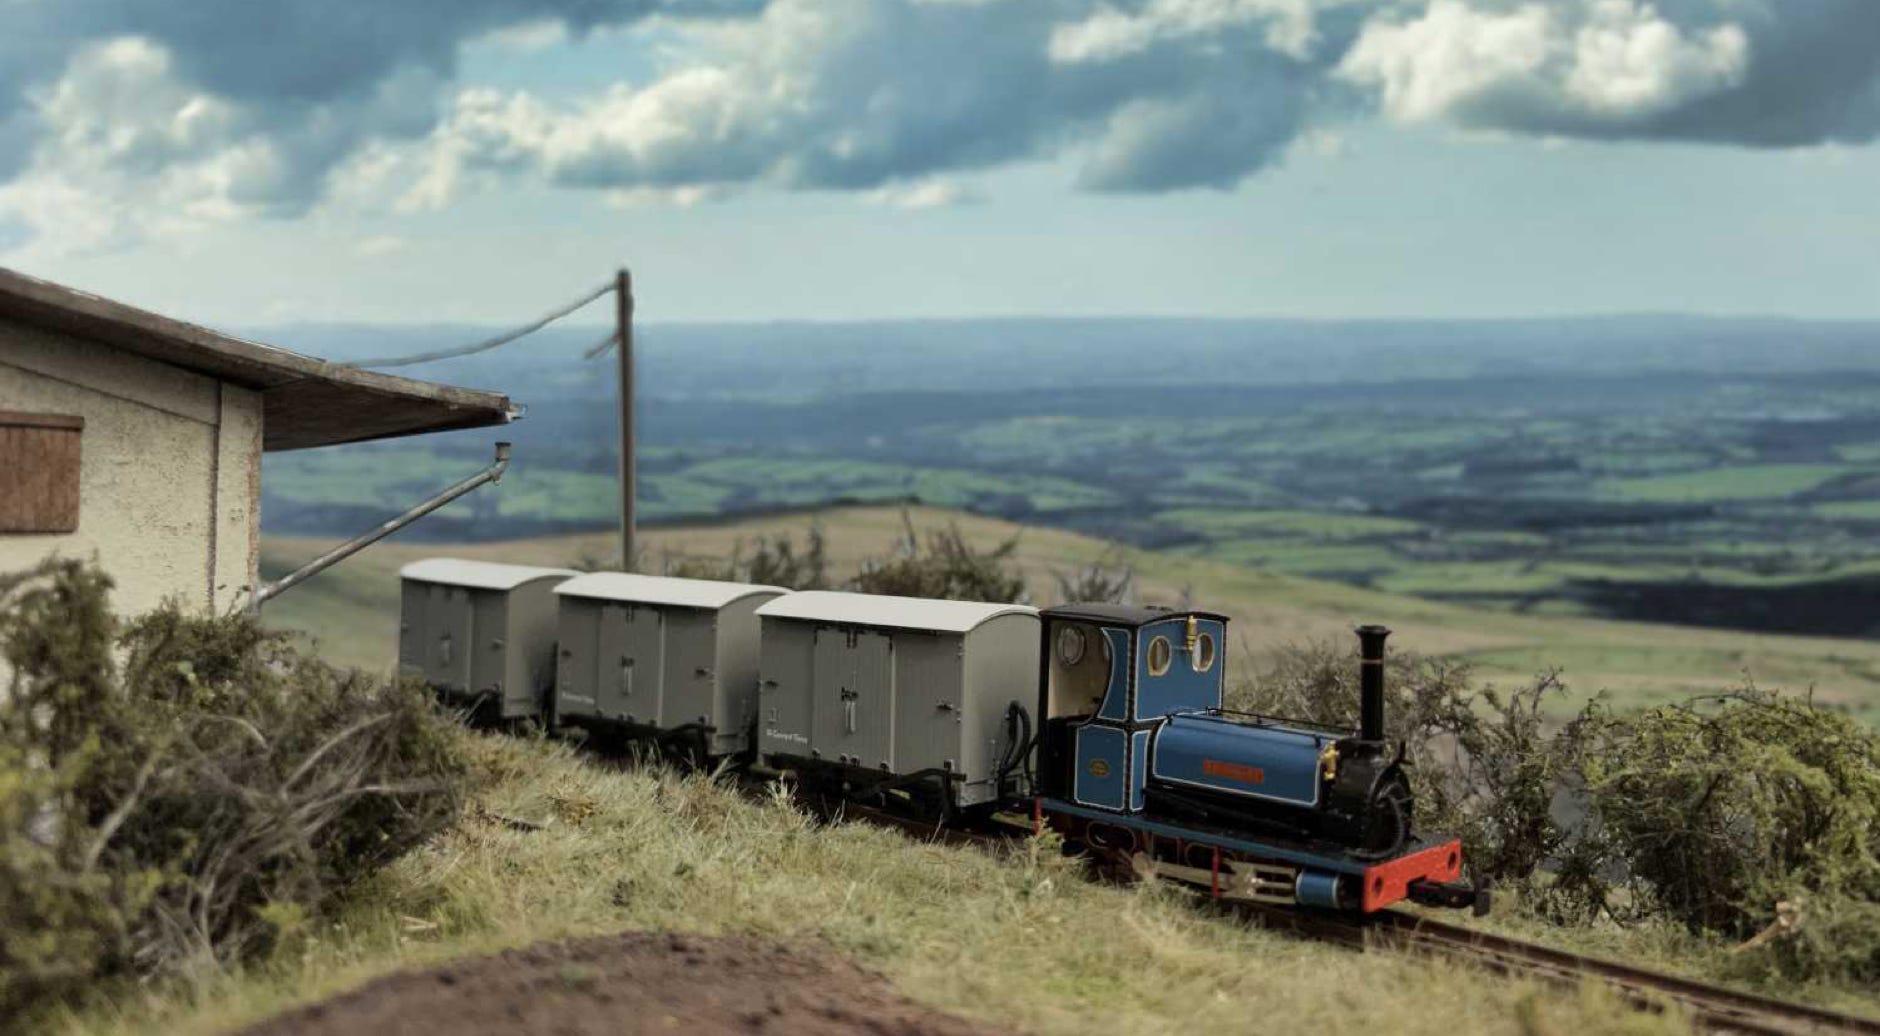
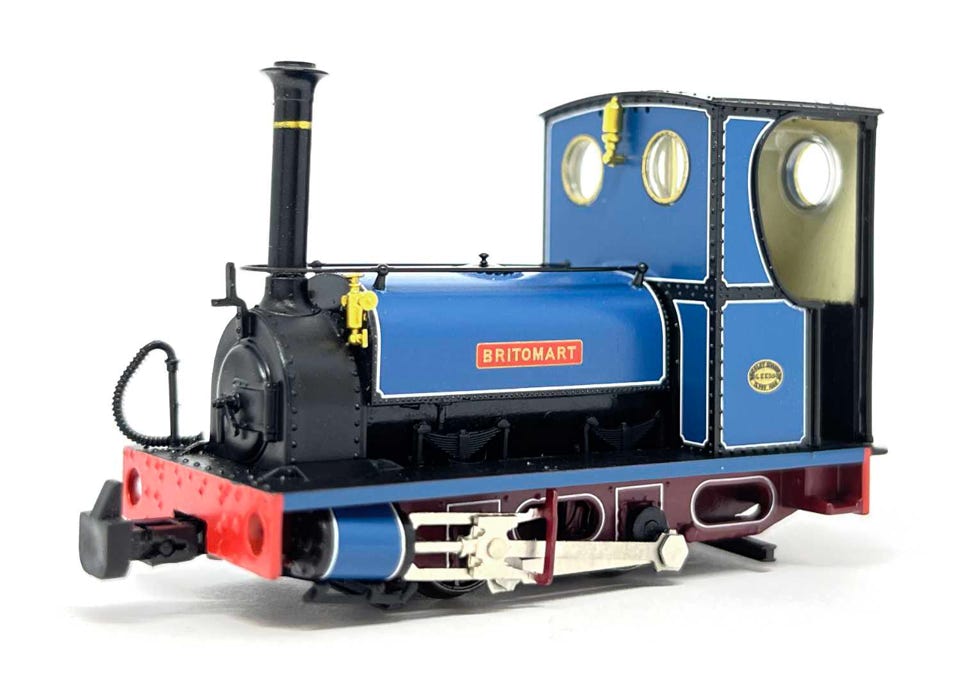
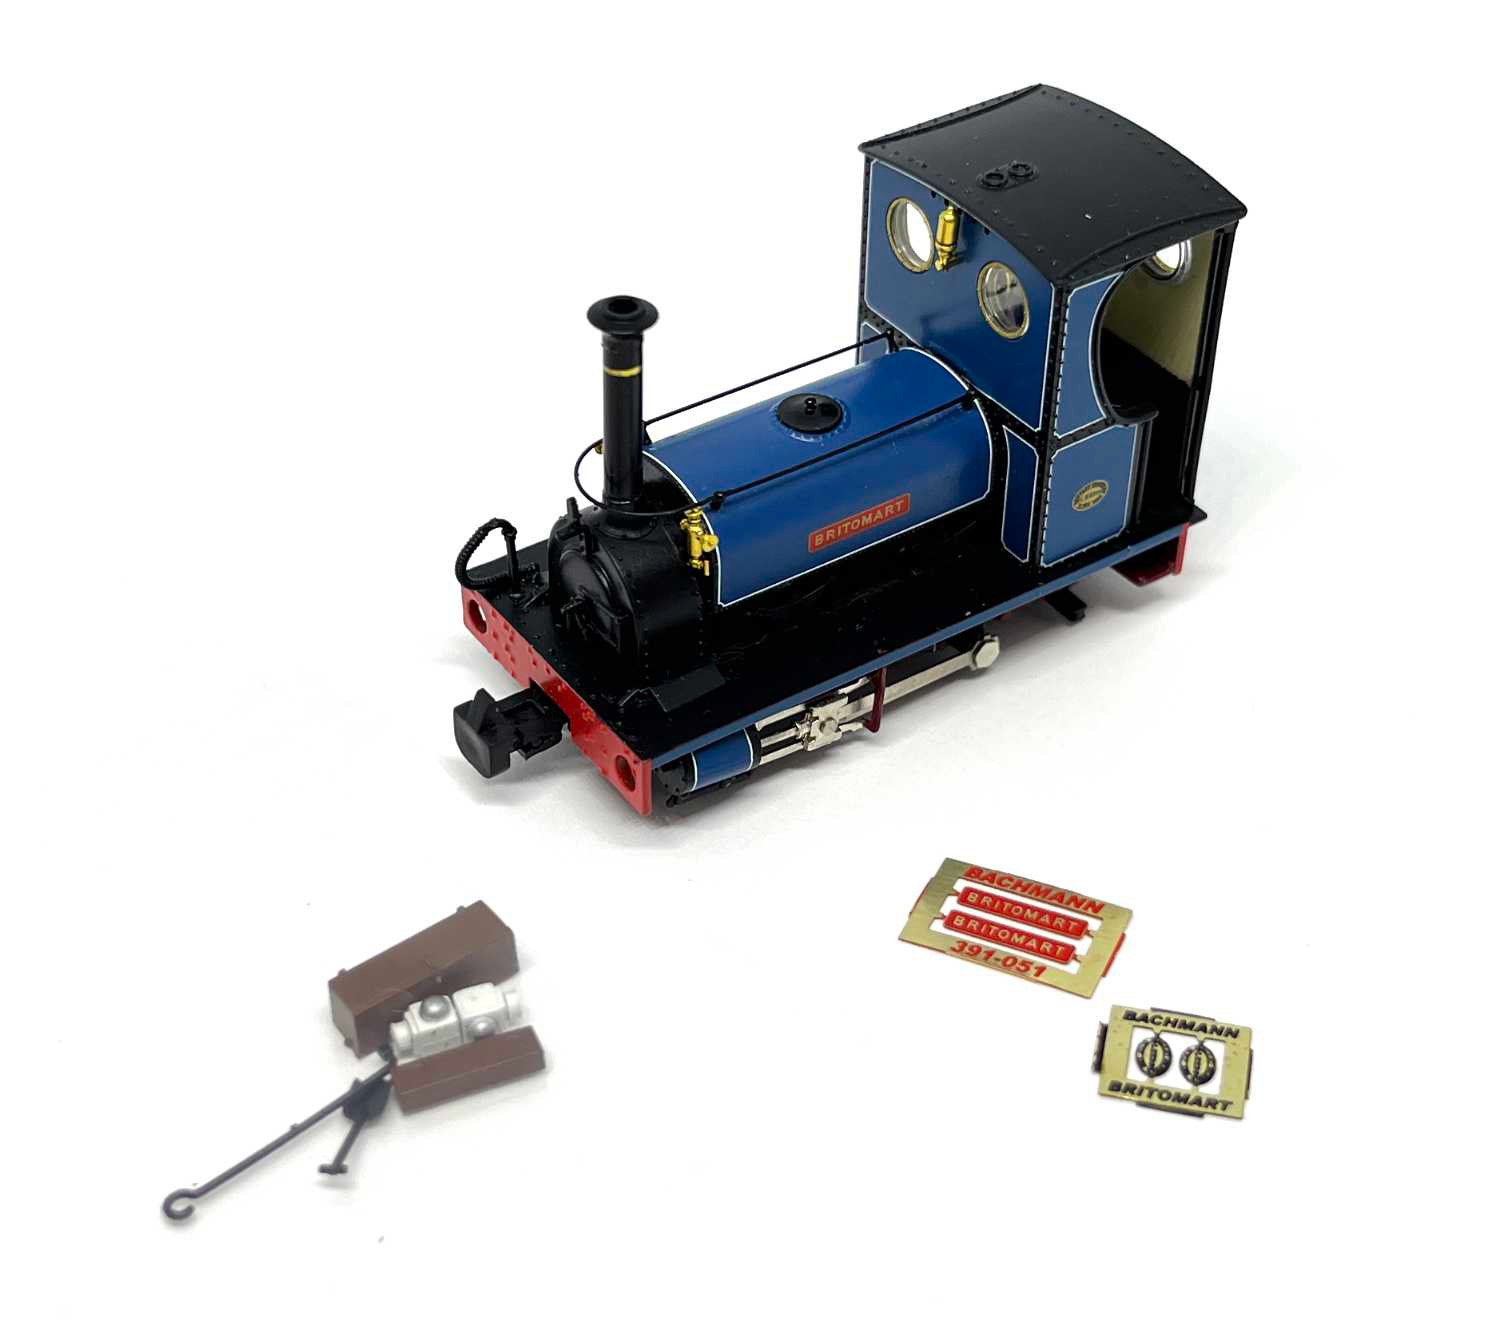
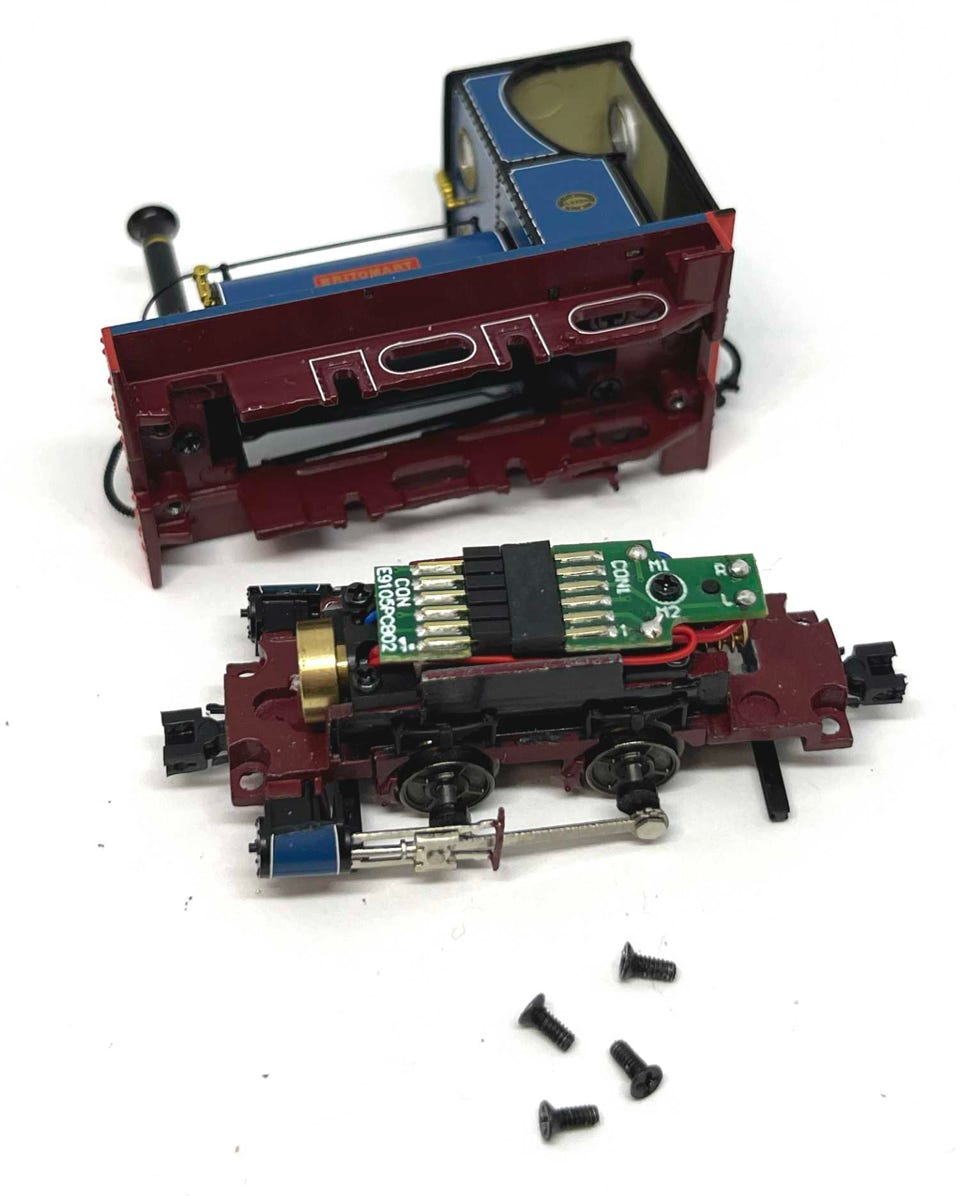
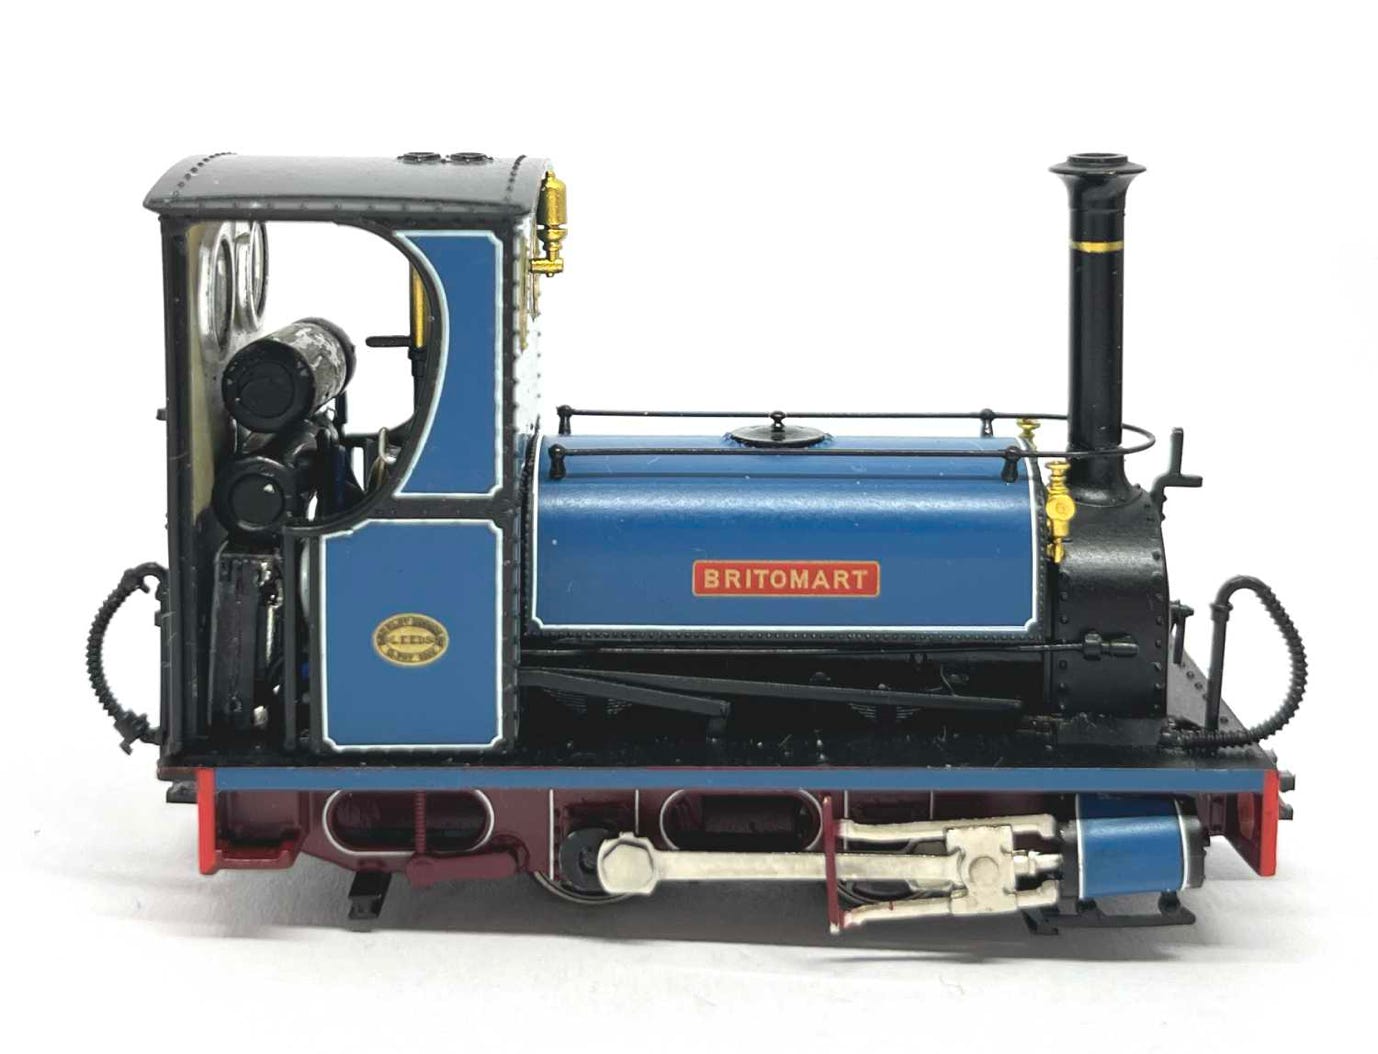
In November 2022, the first of the Bachmann Quarry Hunslet was finally released, after being first announced in 2018. After a 10 minute test run, I took the model apart to see what’s in there. Let’s have a look.
Length: 47.6 mm
Width: 23.4 mm
Weight: 33 grams
Wheelbase: 13 mm
Wheel diameter: 6.5 mm
Released: November 2022
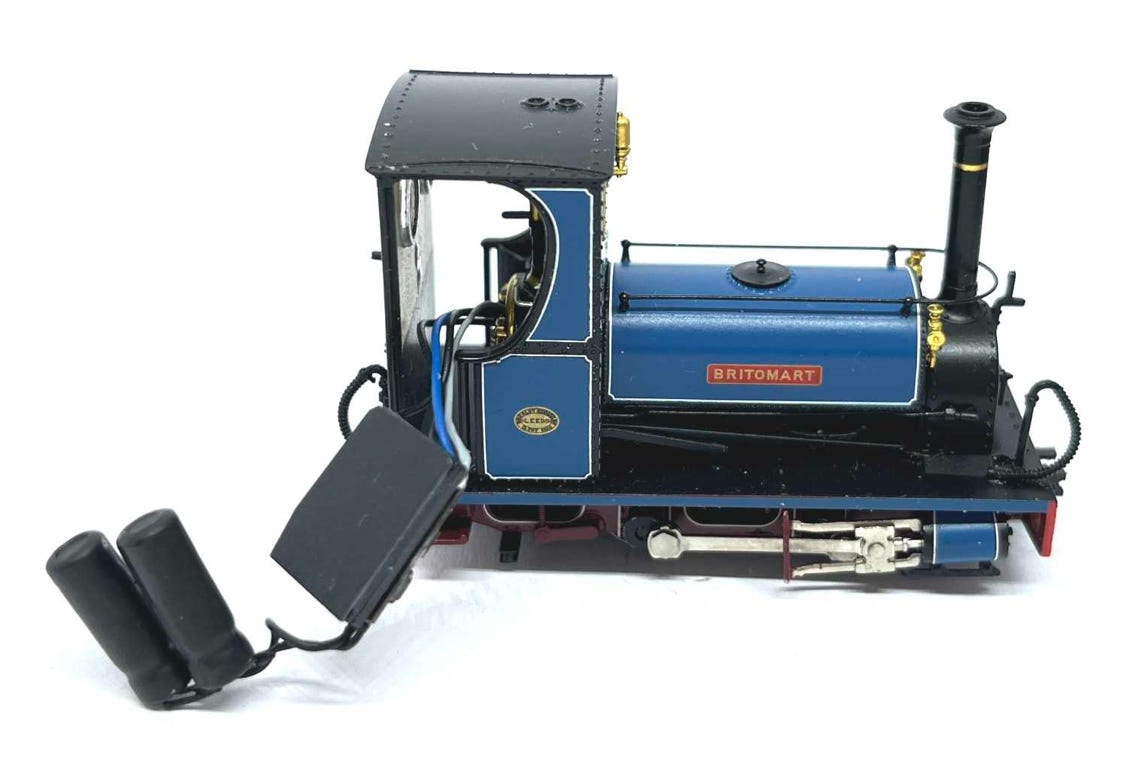
It’s a very pretty model, which runs just as beautifully. At least analog, I haven’t tested it in DCC.
It comes with some nice additional parts, including, surprisingly, lamps. These slide over the pins at the front and back.
Take apart
During the process, I keep the housing on a piece of foam, to protect it from damage.
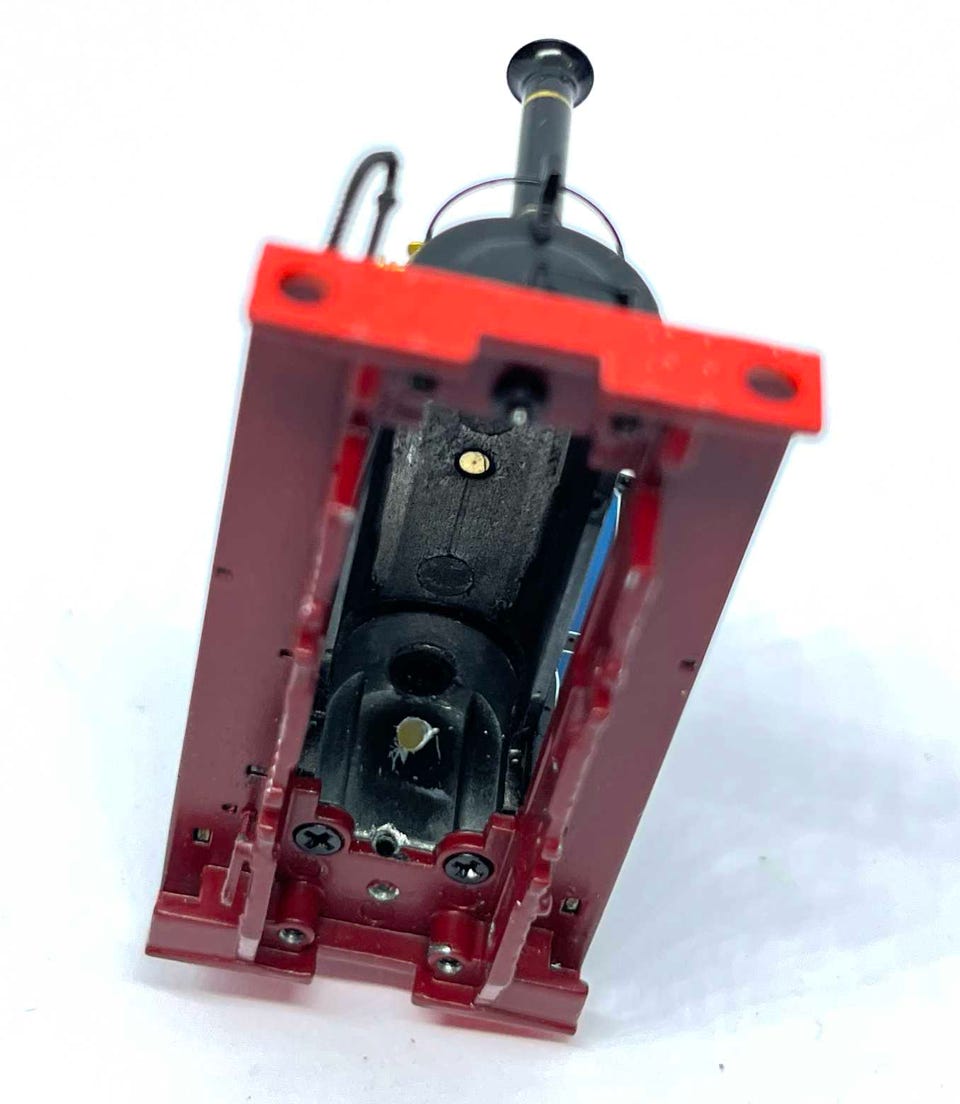
Remove the 4 screws indicated.
Image right: Removing these three screws don’t do anything. The front comes loose, but the back can’t be removed. At least, I couldn’t discover how. It seems all stuck.
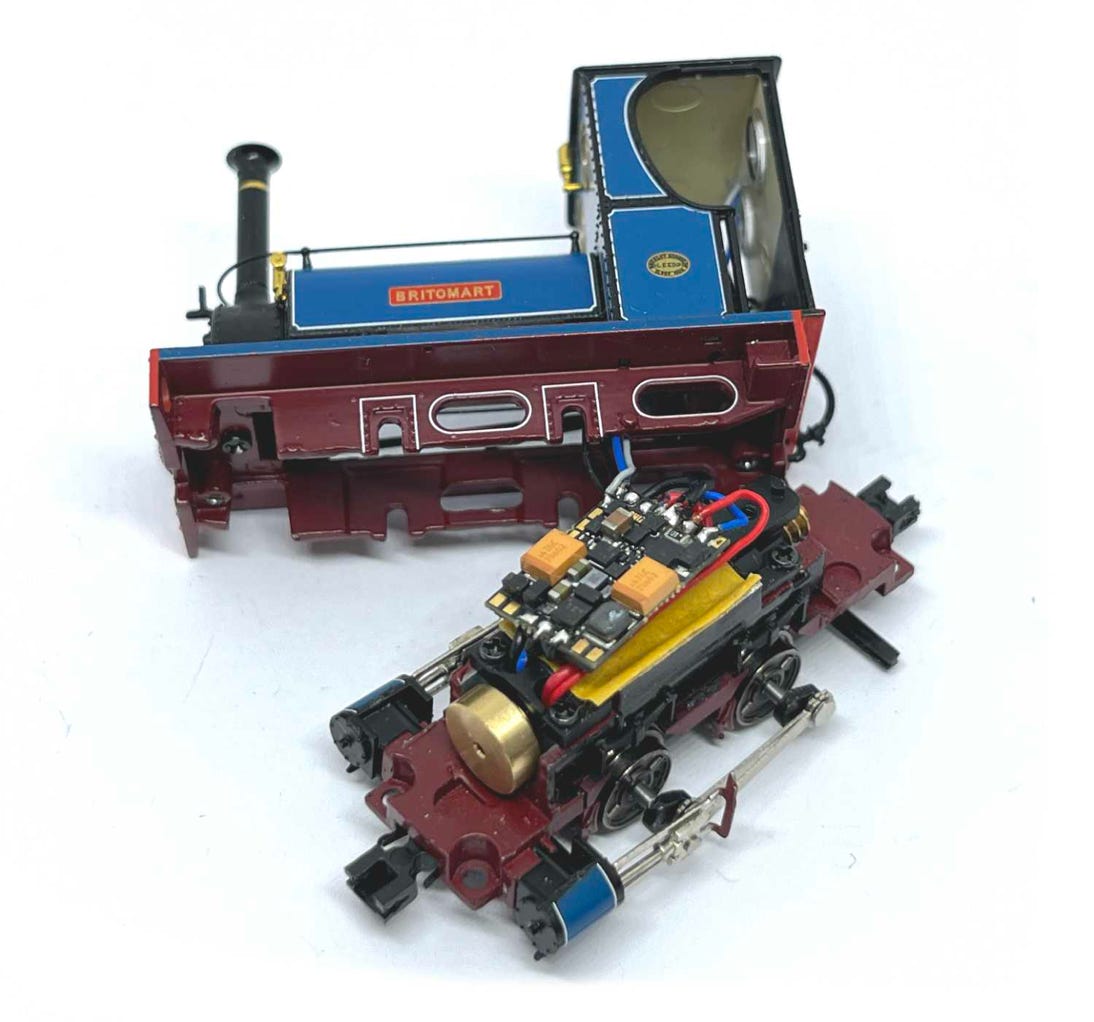
I’m digging a little deeper in the model out of curiosity. Removing the one screw that holds the board in place, reveals more of the motor. The motor is a 0716D motor, which means a replacement is available from the Tramfabriek. The gears are M0.3.
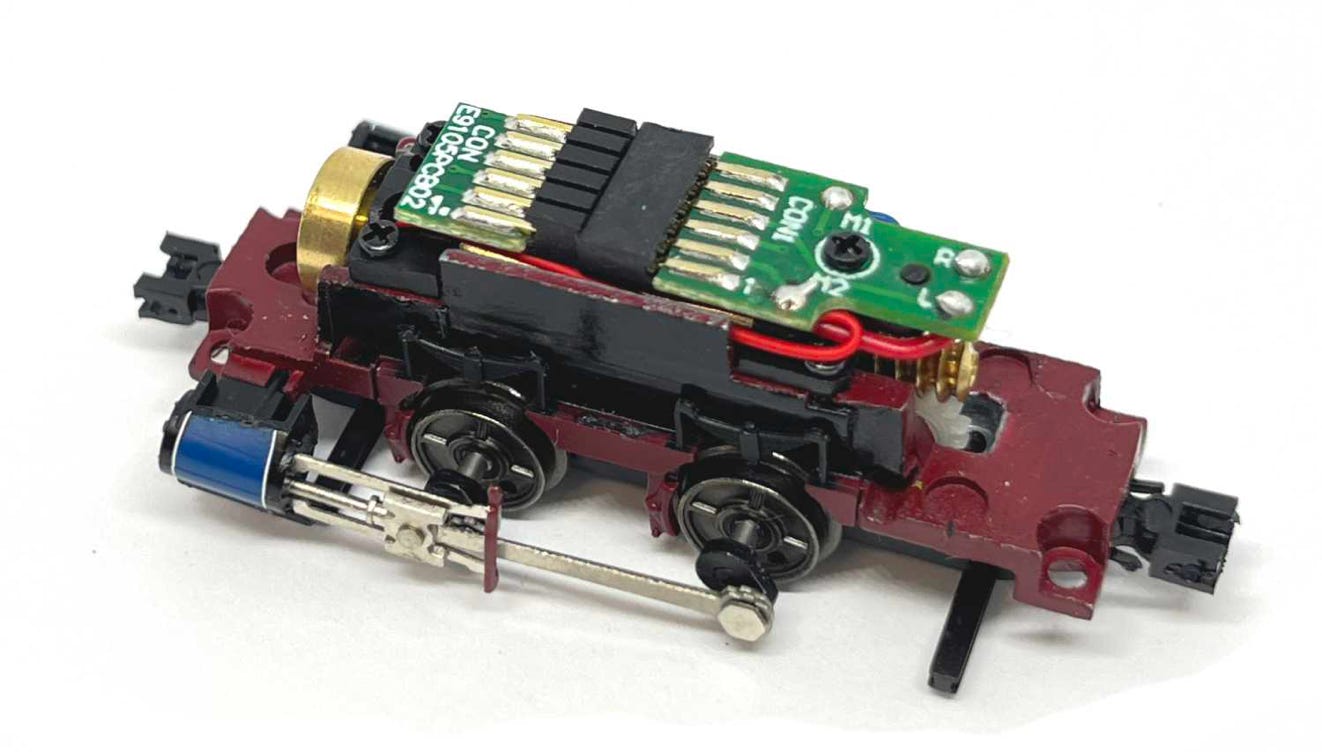
If you got that far to take the board out, you will have problems refitting it. But not if you start at the worm end, so the wires are on the outside of the black plastic below. Then you can pivot it to close.
Screws holding the motor in place:
4 x M1.2 L3

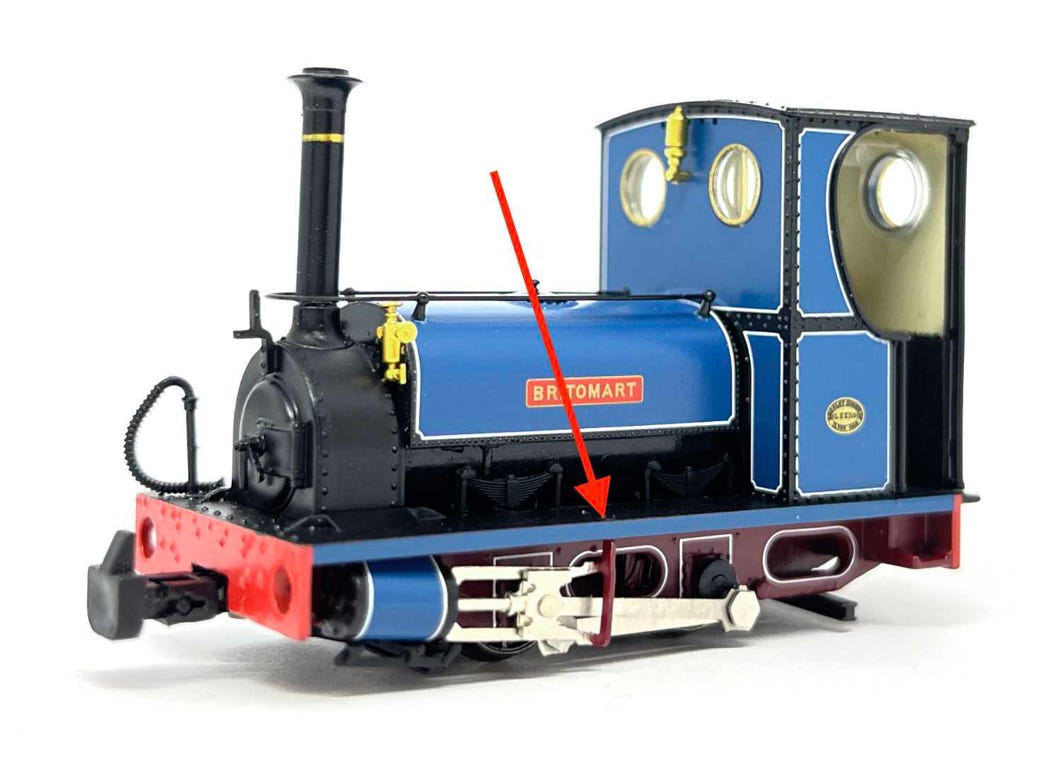
When refitting the housing, please make sure the pin of the valve gear slides back into the foot plate, indicated with a red arrow. On both sides of the model!
Sound installation

Next I’ll be doing the sound installation. I warn you ahead of this: the running performance without stayalive is pretty poor, so I would advise you only to go ahead of this if you are prepared to install a stayalive.
Parts required
Easiest installation is with the MS490 with wires
Alternatively, the MS490 with pins to save a bit of money. Solder wires yourself.
Optional but in my experience essential, is the Stayalive.
Tramfabriek 9 x 16 speaker
Black Ultra Thin Wire
Installation

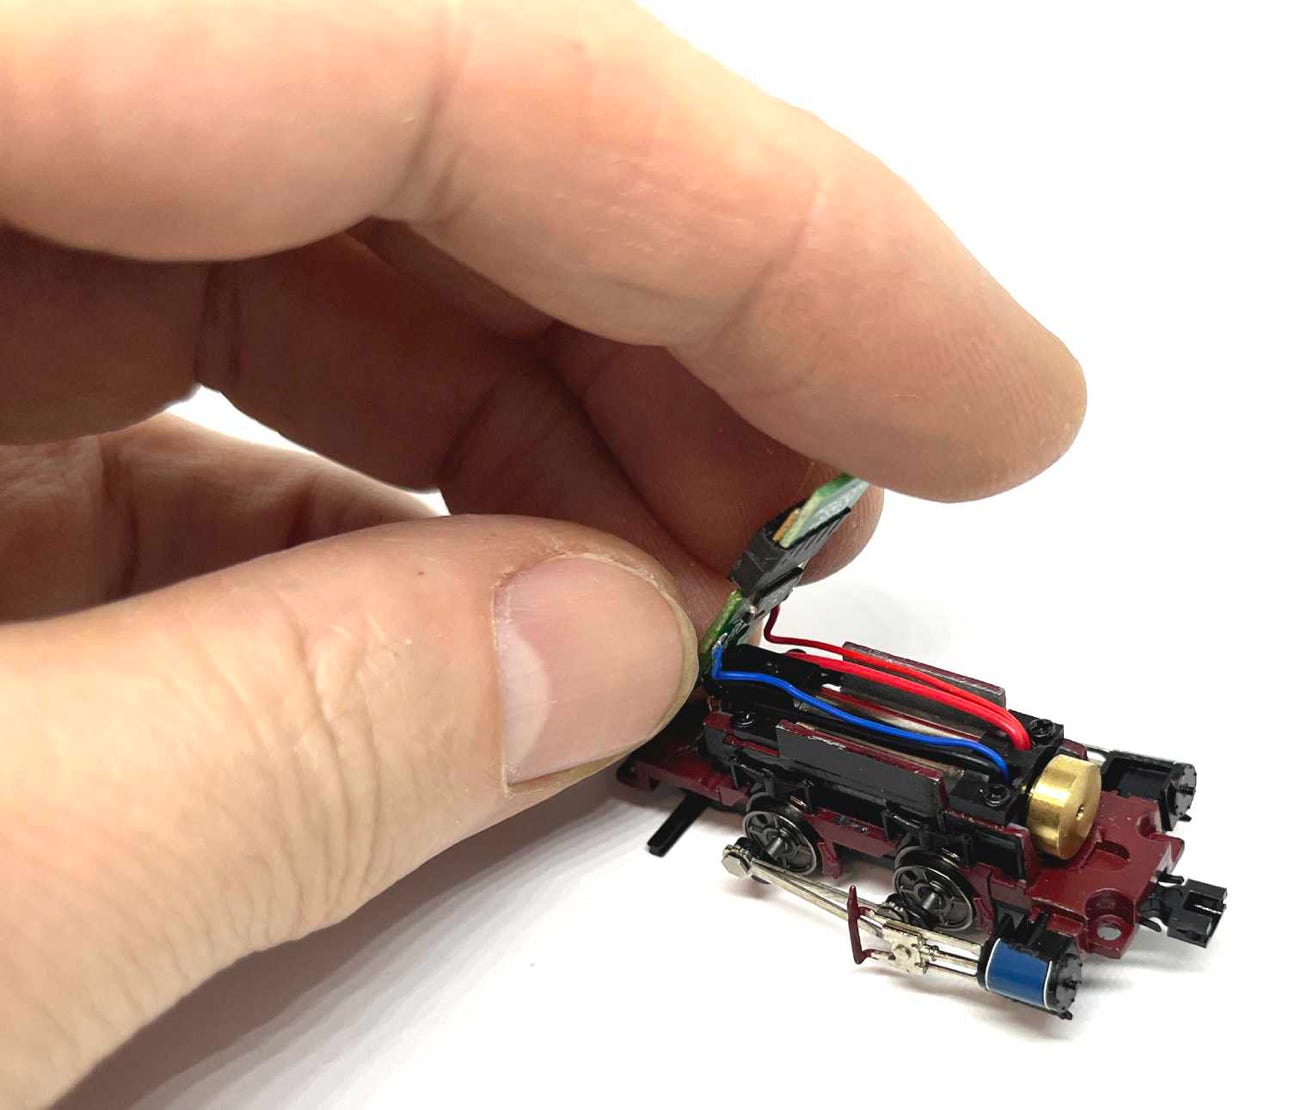
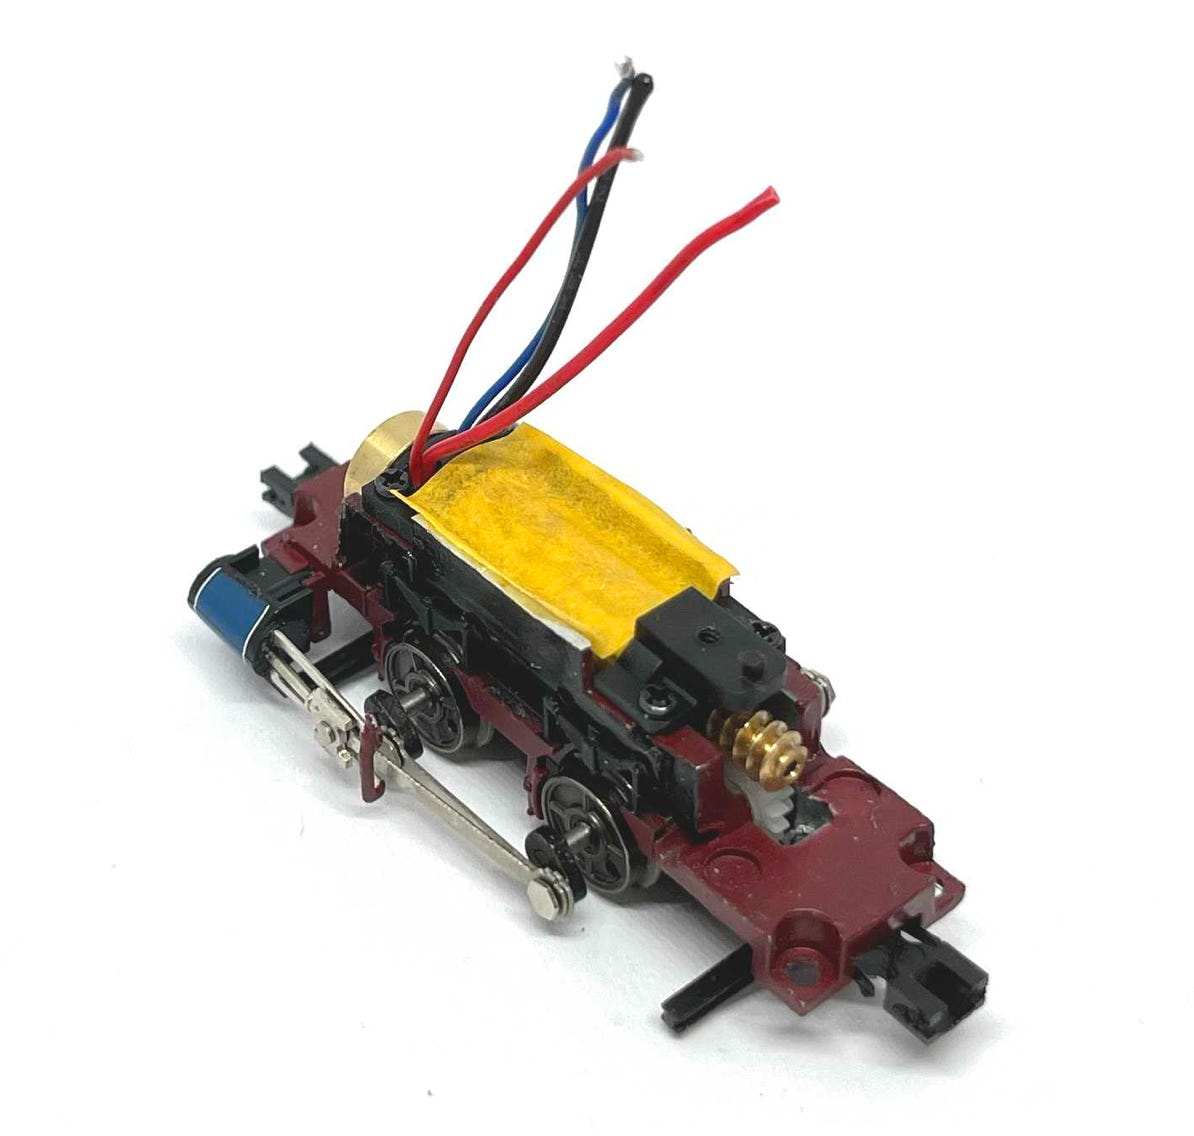
The four wires (wheel contact and motor) are being desoldered from the PCB. We will not need the PCB anymore.
Ignore that the black plastic piece on the worm is not here. It should stay fitted.
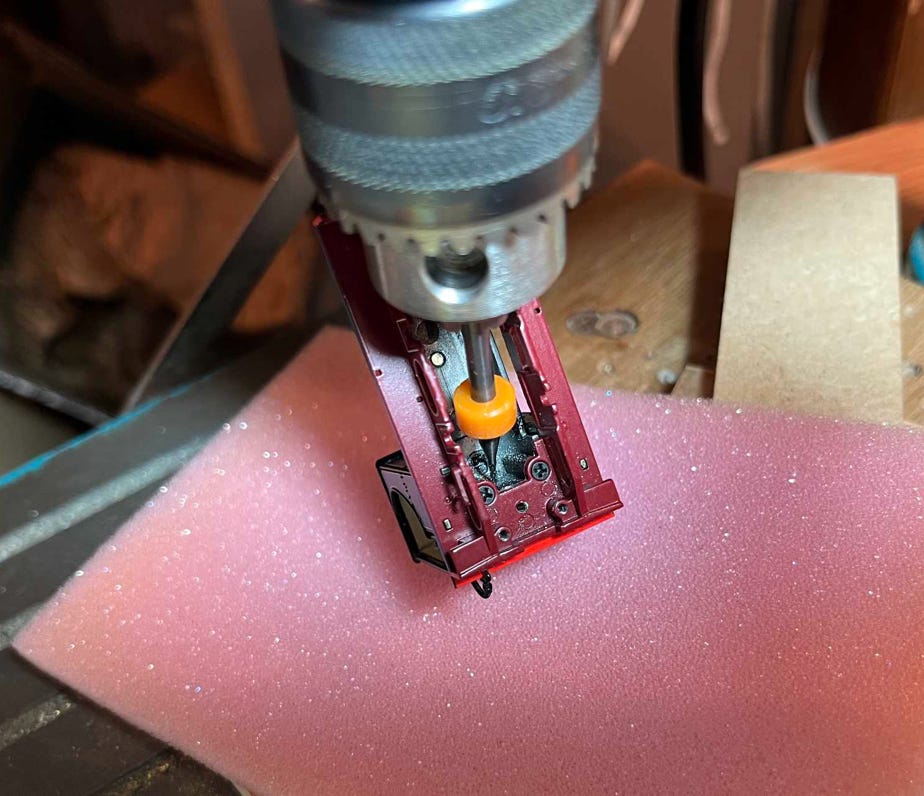
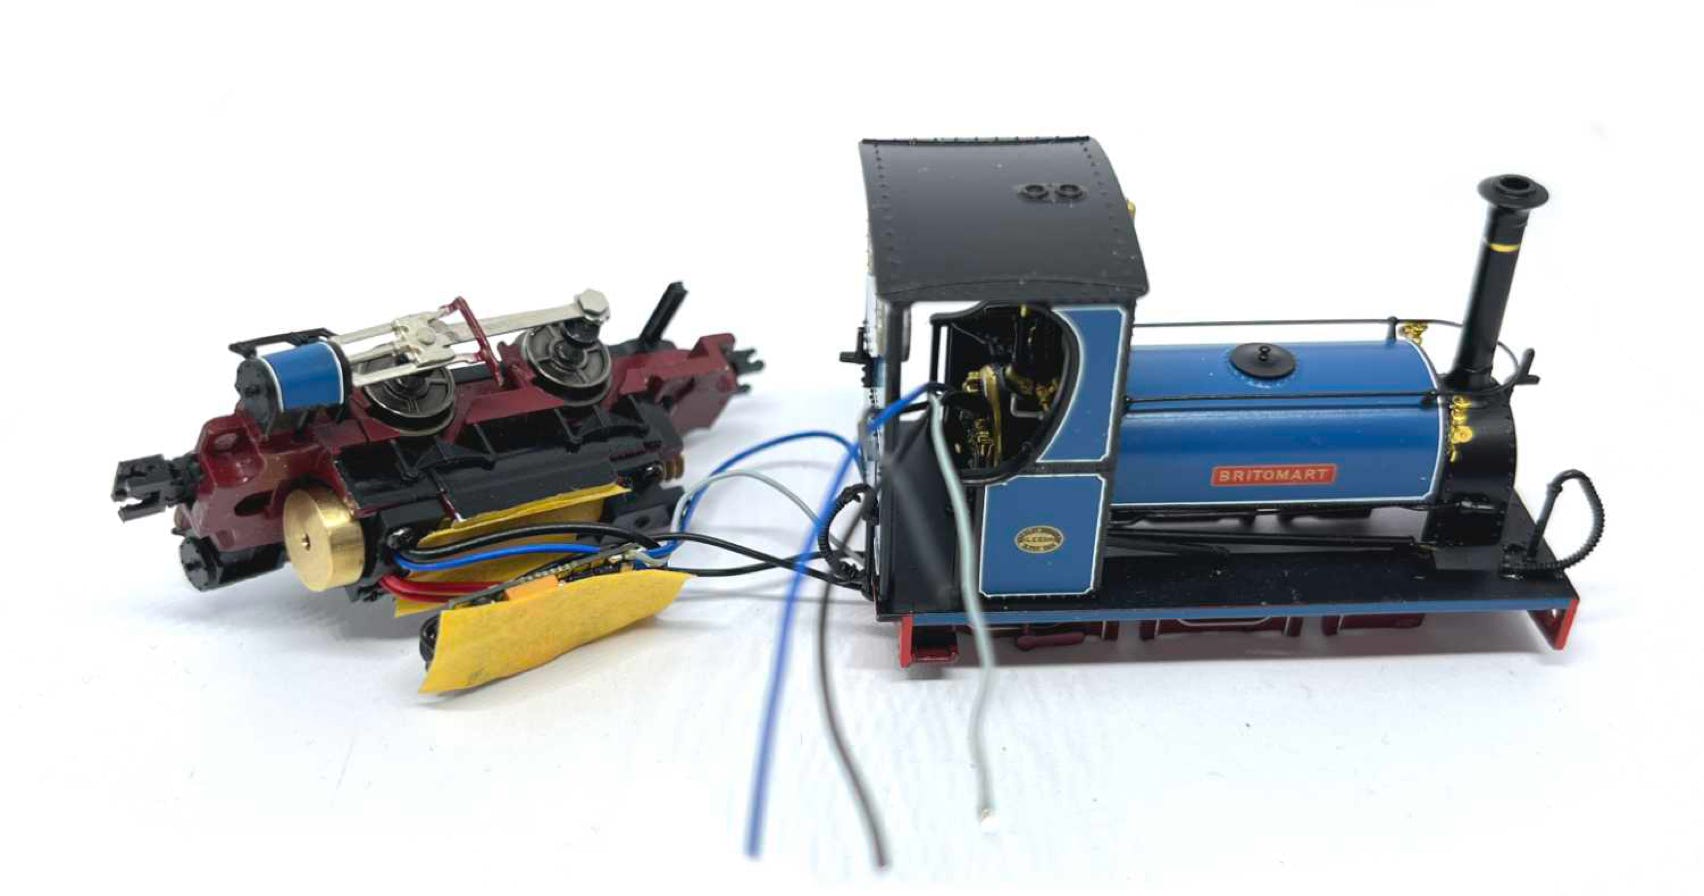
It is advised to use the Zimo MS490 as it is a perfect fit. It is small enough and will fit between the sides of the frame. I used initially the Zimo MS500 sound decoder, but it needed some milling. This is not needed with the MS490.
Drilling a hole through the boiler is needed to lead the wires of the speaker and stayalive to the footplate. I’m not an experienced machinist and the metal was hard and thick, so my solution was to use an 1.0 mm milling bit and after that 1.5 mm to make the hole large enough for the wires. You need to be patient, as it takes about 5 minutes to get to the other side. When you drill at the height of the regulator, which has to be removed, you have a bit of extra thickness of the metal there to go through.
The location of the hole is high up, about 2 mm from the top. You CAN NOT do it close to the footplate, as that is where the gears go. The wires would not be able to pass.
Back to the chassis. I put masking tape on the motor and the metal edges. This is of course to protect the decoder from shorts.
Desolder all the wires from the Zimo MS490 decoder, except the stayalive (blue/grey) and sound wires (purple).
You can see I decided to guide the motor and wheel contact wires under the decoder and fit them at the other end of the decoder. I did this while still finding my way around, so I had some extra wire to move the decoder. But you can also cut the wires short and fit them at the front end of the train to the decoder.
Now the 4 wires, 2x stayalive and 2x speaker, are pushed through the hole in the boiler. I’ve replaced the default purple speaker wires with Tramfabriek black Ultra Thin Wire, so they don’t attract attention on the footplate.
I super glue a piece of 0.25 mm black styreen on the 9x16 mm speaker (I tried the smaller speakers, as seen on the image, but they are inadequate in this model). In my experience, it doesn’t matter at this scale if you put a small resonator box or a thin, flat piece of styrene on a speaker. The sound quality and loudness is the same. When placed in a model, the model itself will give it a louder sound. Also with this model. I did a comparison.
My (disputed) opinion: Resonator boxes only make a difference when they are remarkably larger, but most of our 009 models are too small to have that space.
Shown is the Zimo MS500 decoder, but the motor and wheel contact wires are at the same location.

You can see the rectangular piece is the 0.25 mm styrene on the speaker. I’ve painted the two supercaps black. Later I decided to wrap them in black insulating tape, so they stay close together. In that case you only need to paint the ends. For correct connection of the stayalive and supercaps, check the manual that comes with it.
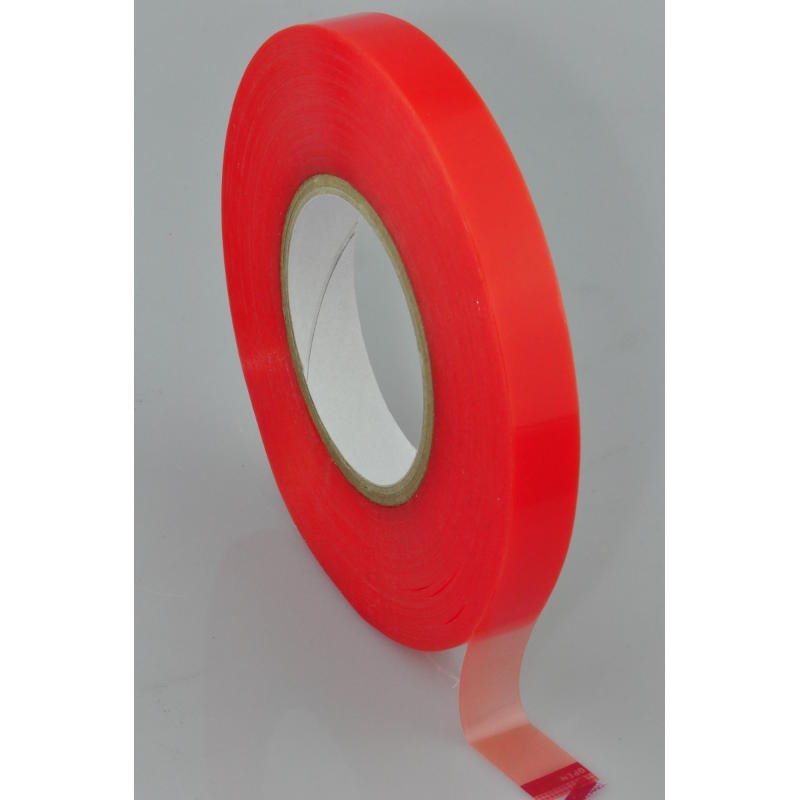
The stayalive is glued on the speaker with 0.25 mm double sided tape. I don’t know how long the link stays active, but this is the brilliant stuff I use for many things: https://www.ebay.co.uk/itm/282379903218 It is available from different sellers.
I created my own sound file for it, which you can get for free here.
Regarding the stayalive: some use Tantalum capacitors. The Tantalum capacitors will only give you a fraction of a second. And I blew one up when trying to install one. Really, blew up, with a big bang, fire and smoke. The stayalive is much safer to work with, if you don’t know much about it.
The speaker and supercaps can be hidden with two figures. You can also get those for free here.
Again, you might be tempted to install a sound decoder without power backup, but believe me: don’t. It will be a very frustrating experience.
•