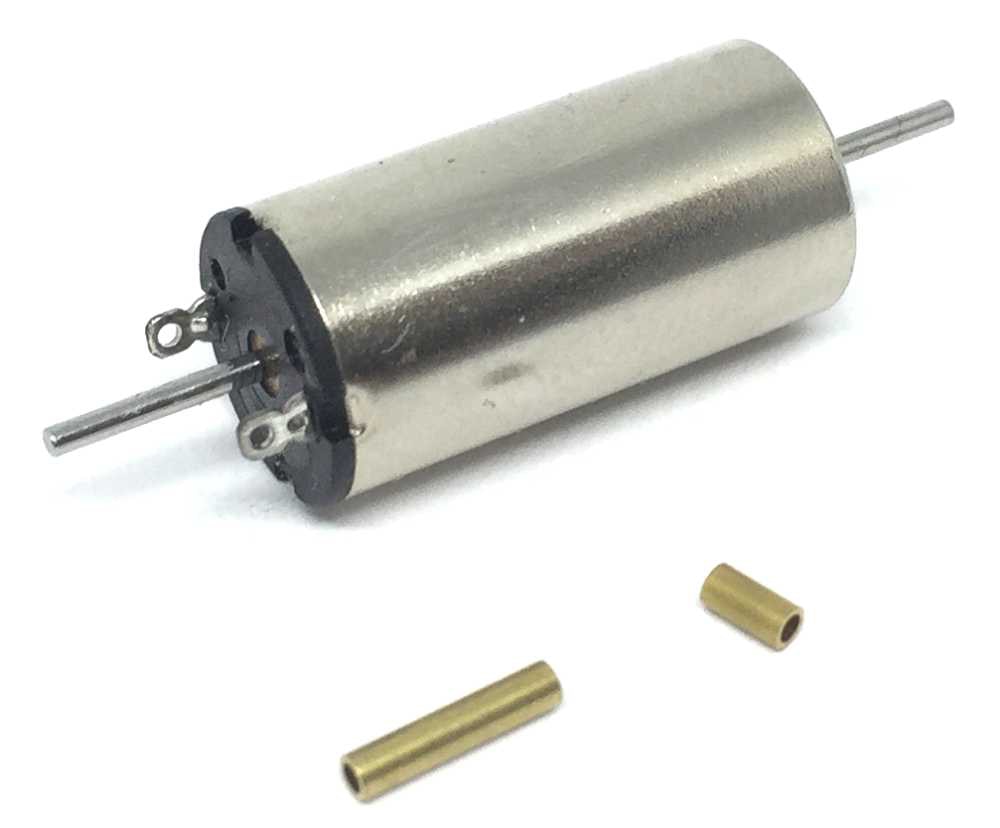
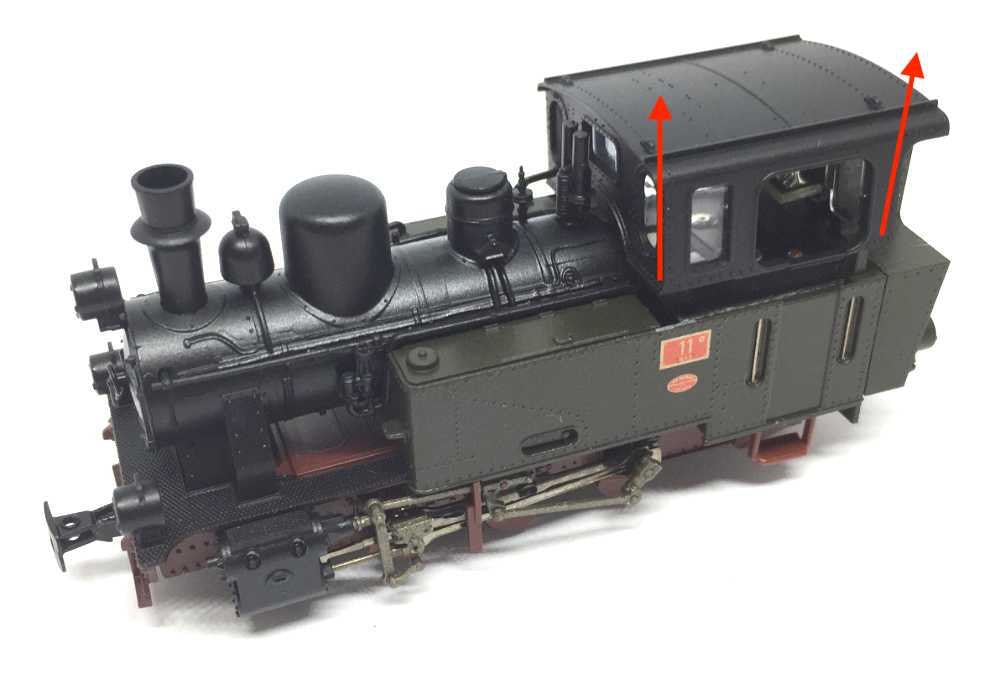
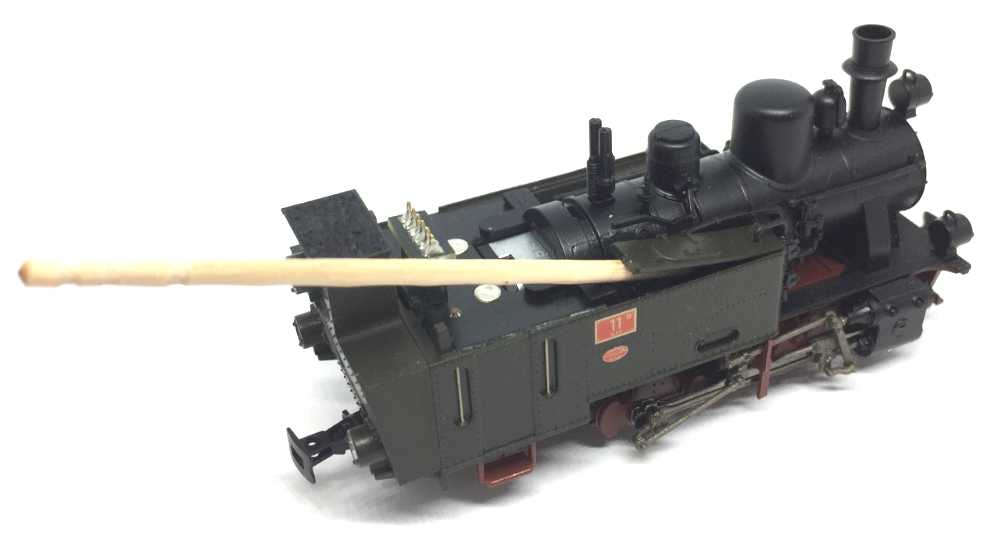
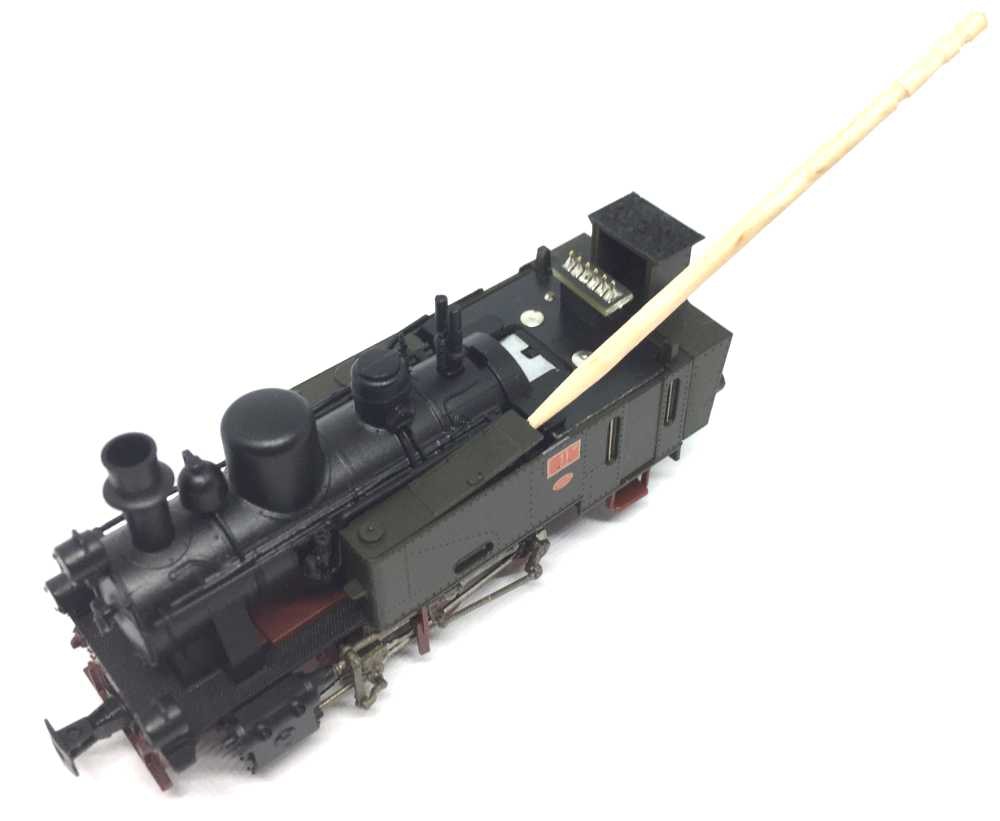
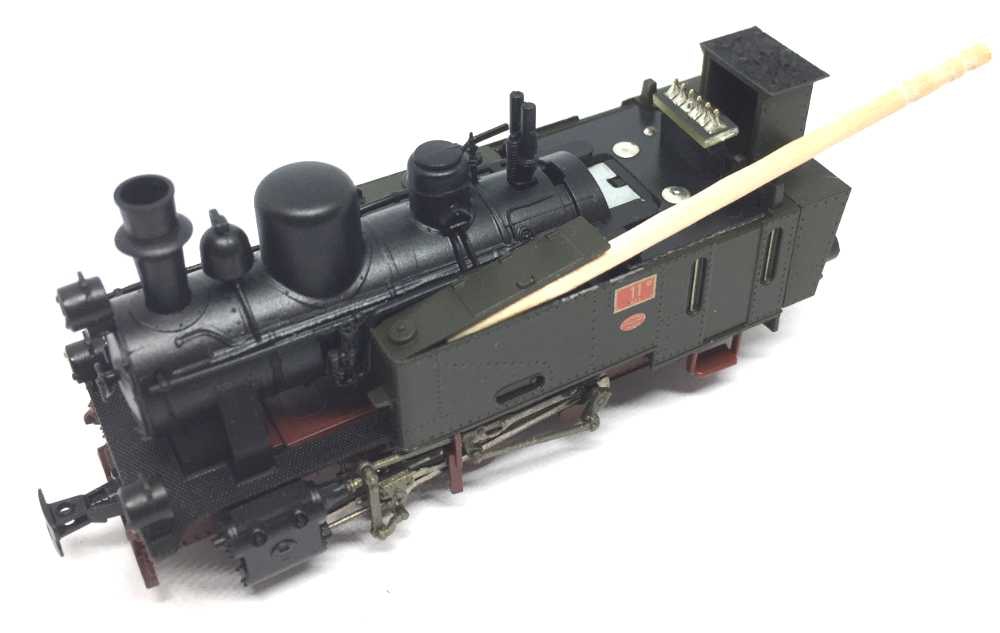
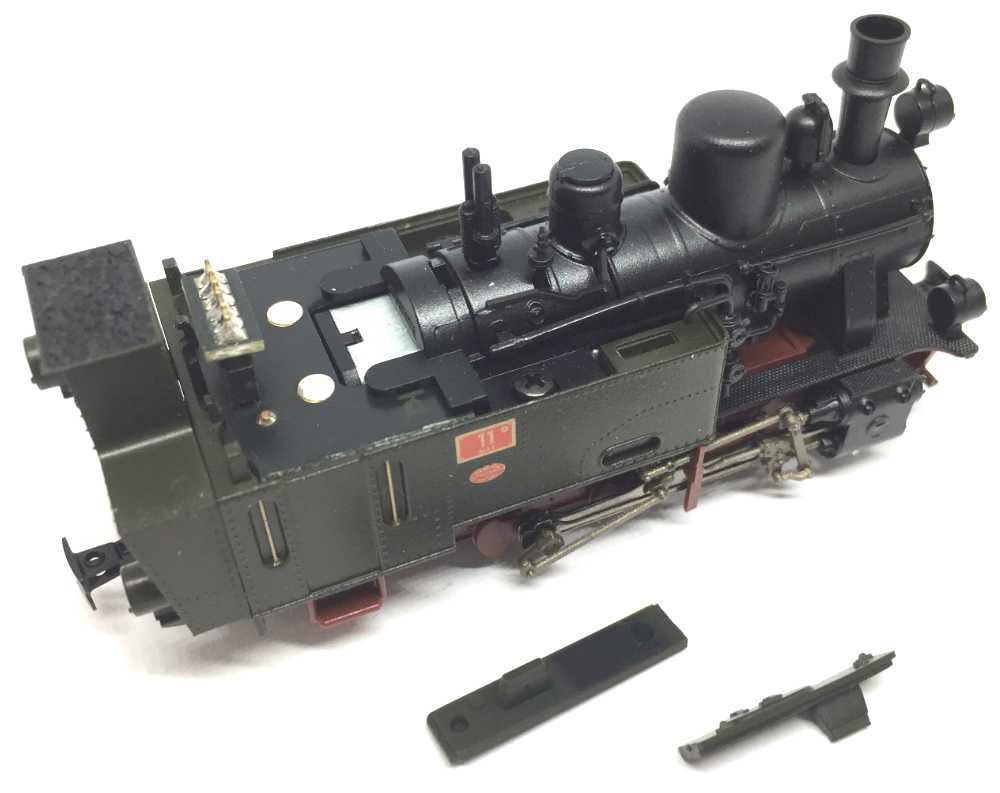
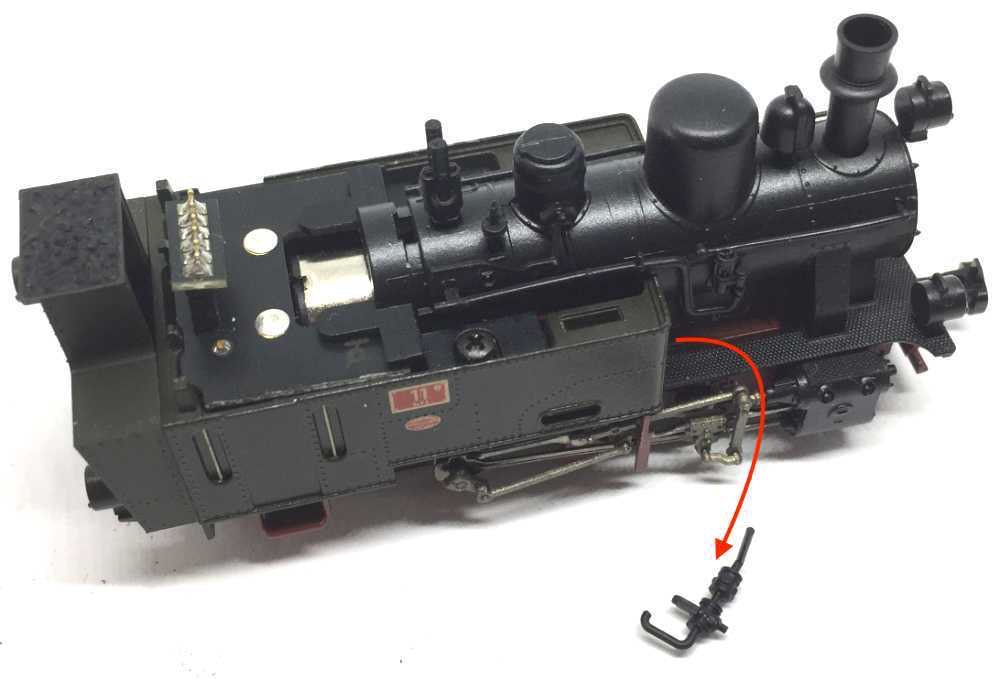
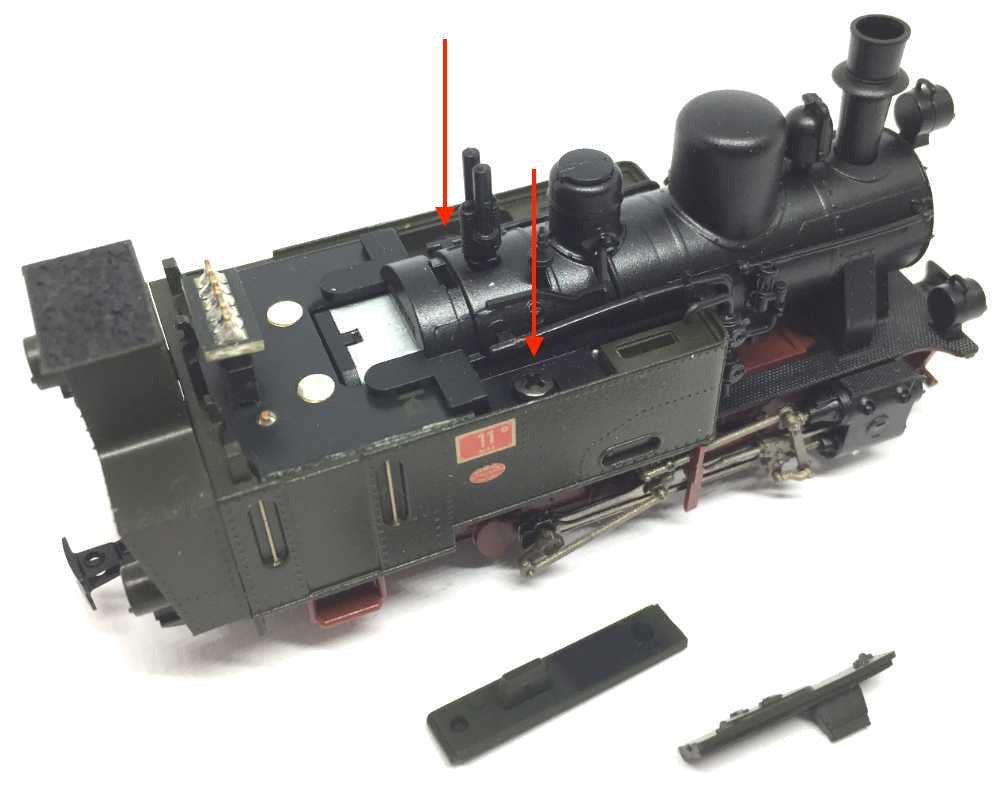
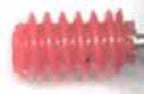
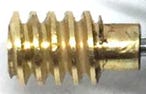
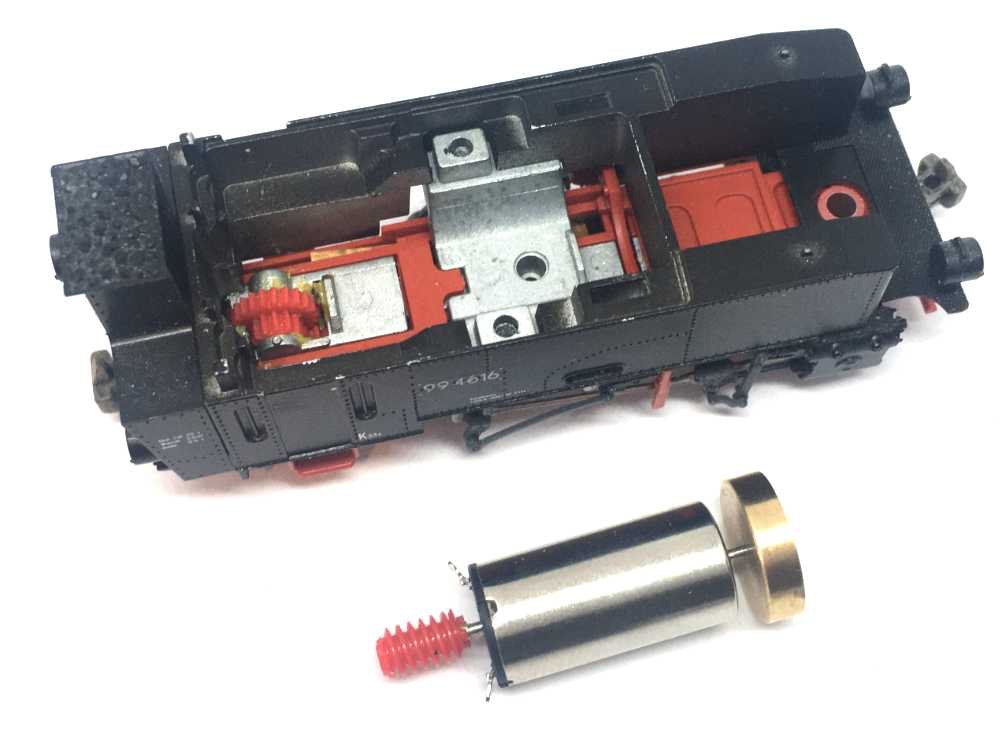
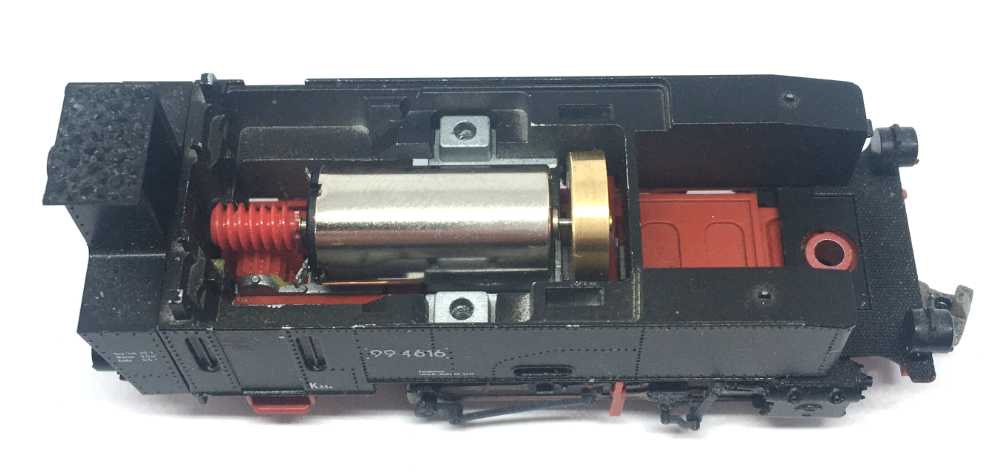
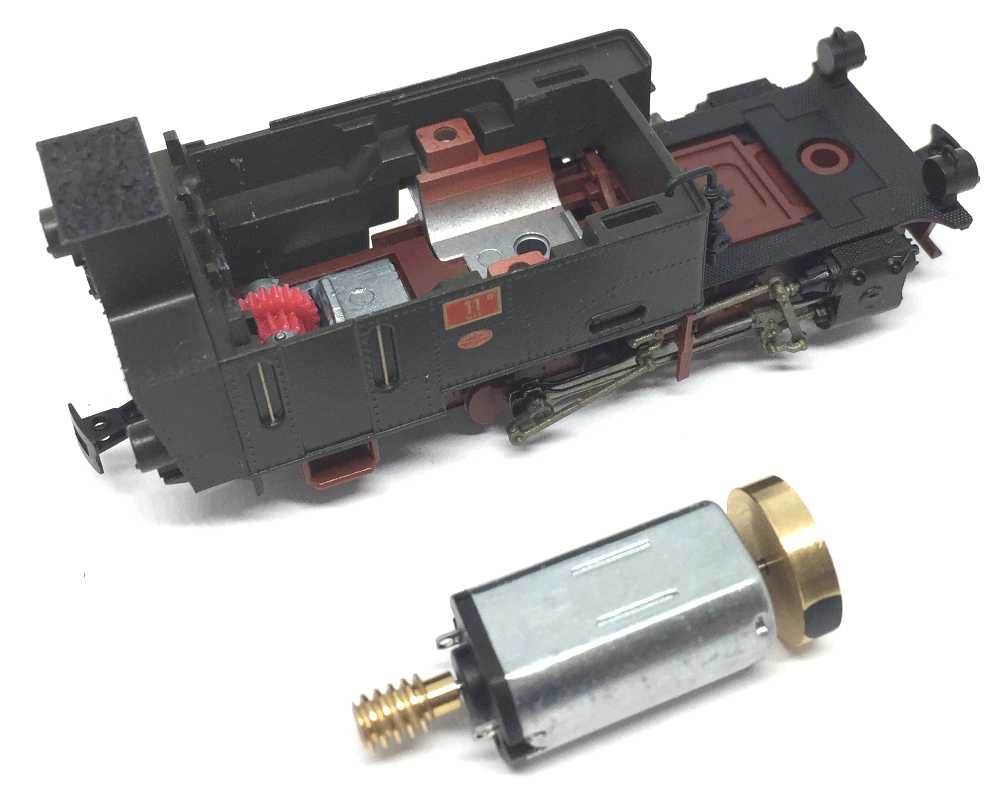
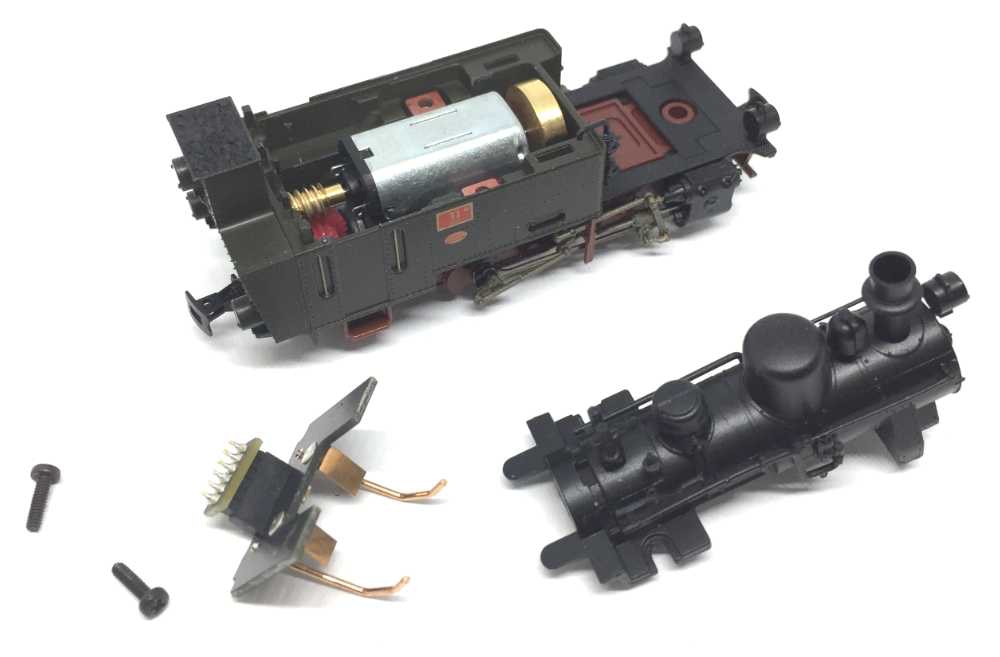
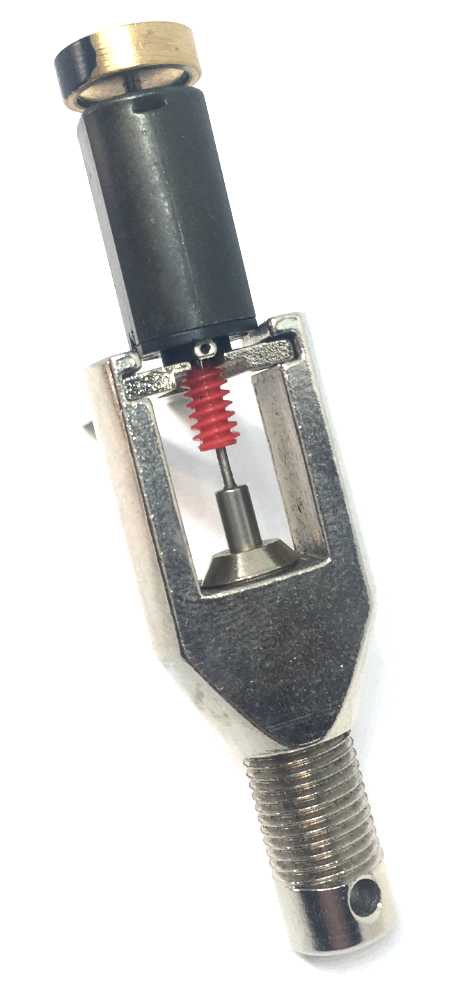
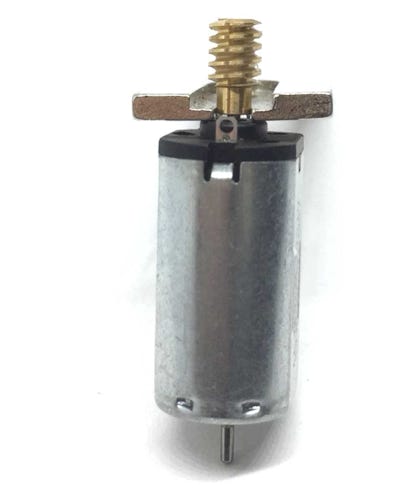
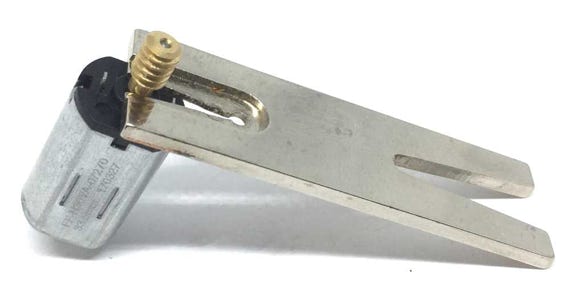
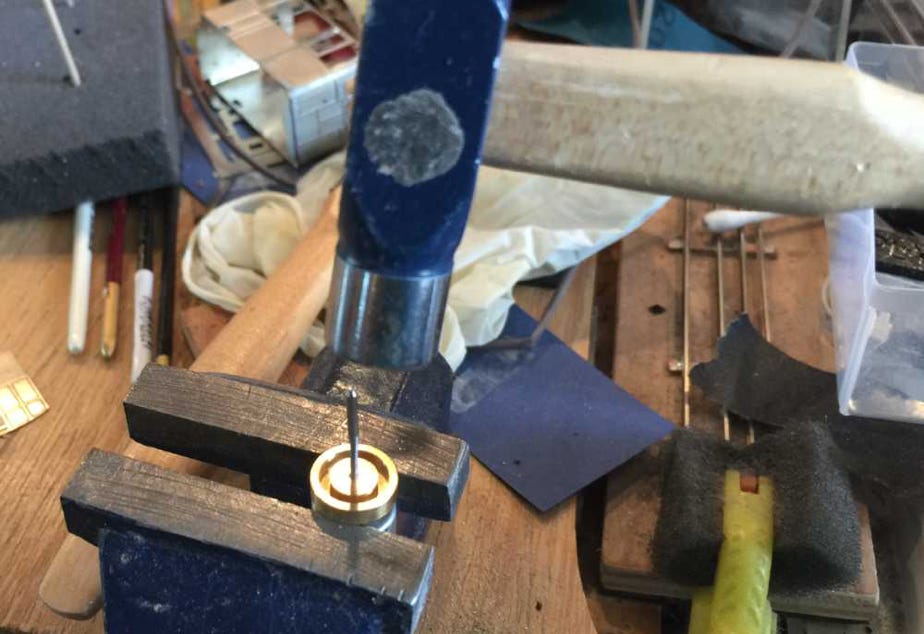
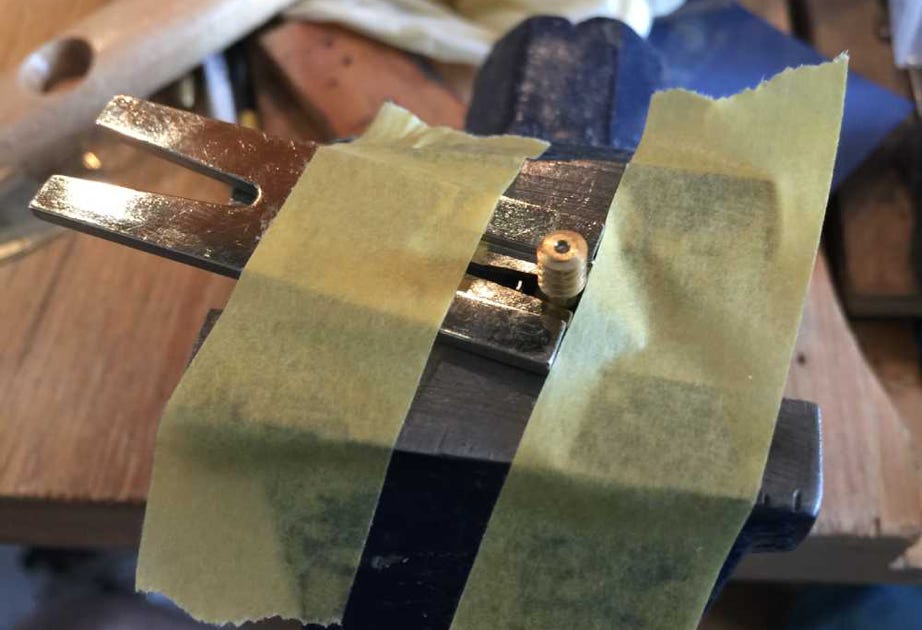
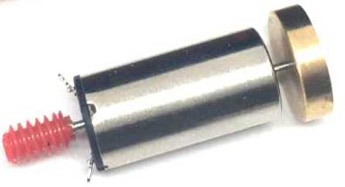
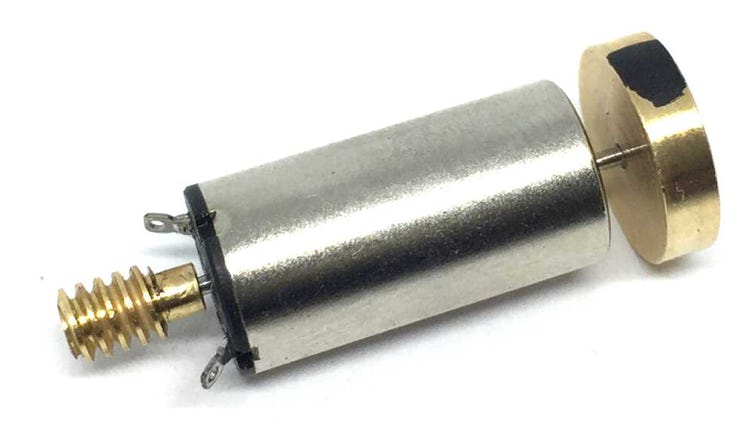
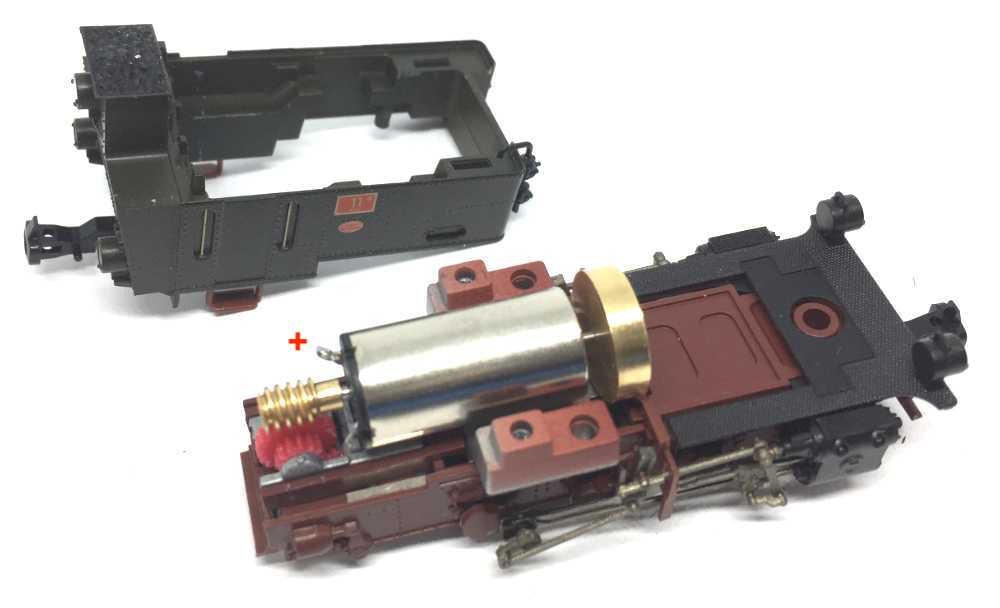
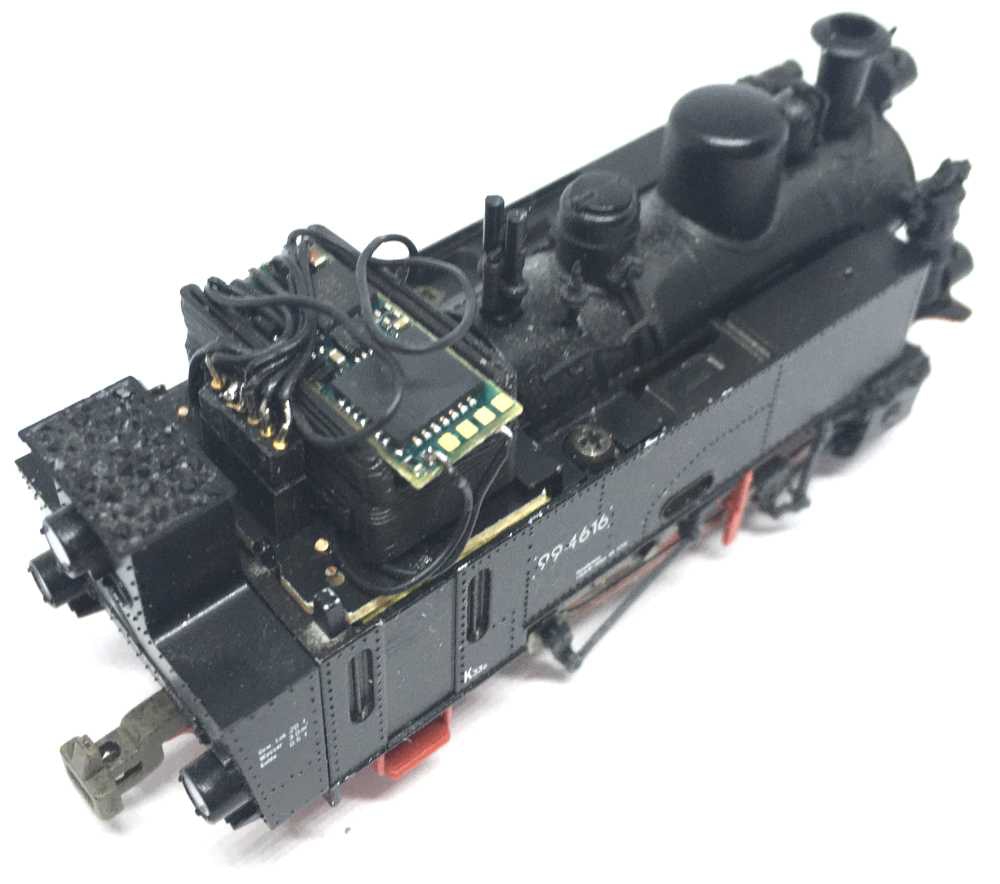
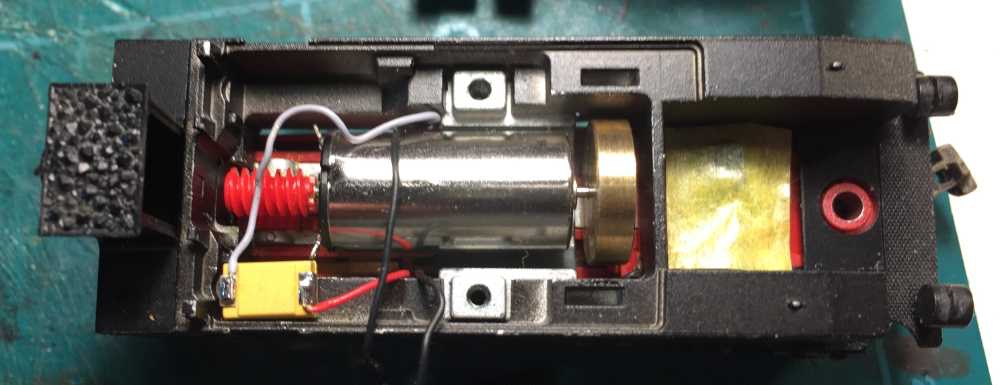
Conversion Roco HF110c

to 12V coreless motor

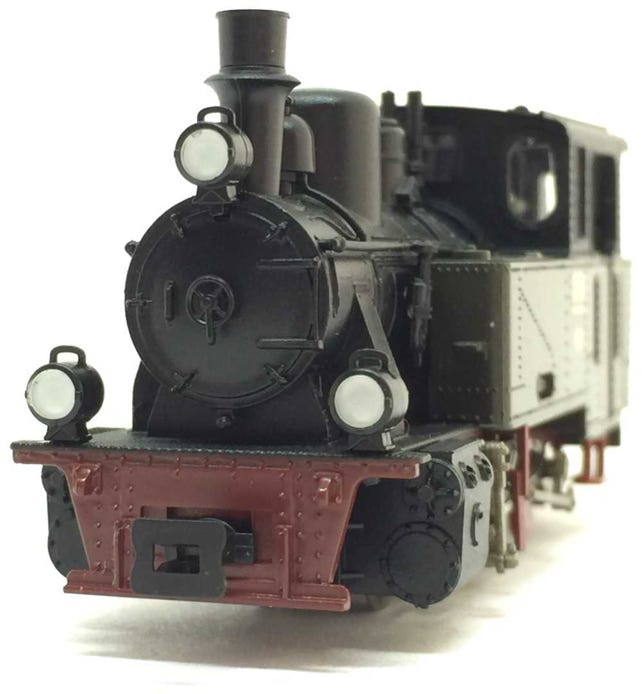
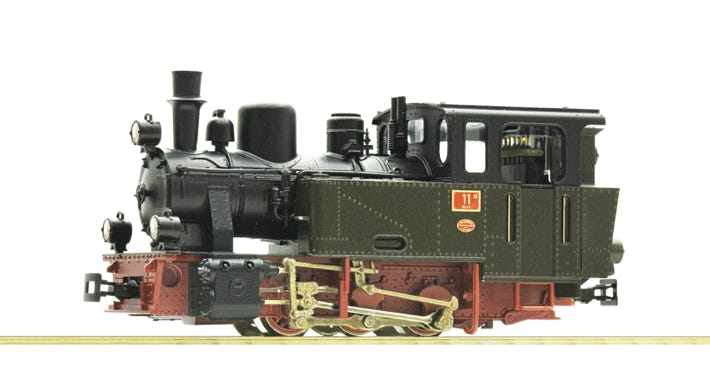
Fits Roco Art 31020, 31031, 33230, 33231, 33232, 33233, 33234, 33236, 33237, 33238, 33250, 33261.

KASTENLOK INDEX

Question? Just reach out!

What you need for conversion set

- The model and upgrade kit

- Small flat screwdriver

- Soldering iron 15W/25W


Good to have:

- General modelling tools

- Gear Puller


Installation time: Around 1 hour

Art. code: RCHF11


Contents of the kit

1x 10x20 mm motor double shaft

2x brass adapters

1

Pull the cabine off by lifting it straight up.

2

A

Remove housing

Use a tooth pick to lift the top of the watertank off, on both sides. Don’t use a screw driver, as you might damage the paint on the metal chassis. Press the tooth pick through, as seen on the picture.

B

3

Optional: if your model has this replica of an air pump, you might want to remove it.  It is easy to pull it out, in the front direction of the model.

There are two motor versions known to me:


4

Remove the 2 screws, then you can lift the boiler and cabine cover plate off.

The older version - One motor has a plastic worm and a brass flywheel, fitted on an 1.5 mm motor shaft.  Follow the instructions below.

The newer version - This has a brass worm and brass flywheel on an 1.0 mm motor shaft. Follow the instructions below.

5

Lift the motor out. It is not attached to anything.

6

Next up is removing the worm and flywheel. Don’t be daunting with the job, it is not as difficult as you would think.  I’ve written a document about this, with photos and a video here: http://tramfabriek.nl/worm-removal.html . I think you might find it interesting. Very handy for removing these parts (and future projects) is the gear puller offered by the Tramfabriek. 

The easiest is the older motor with the plastic worm. You might be able to take it off with your fingers, or use a gear puller.

For the brass worm, you can use the gear puller or hammer it out (see worm removal page). You’ll have to use a torch to heat up the worm, so it comes off without too much effort. The “fork” part below is part of the gear puller kit.

The flywheel needs to be taken off with a gear puller or hammer it out.

Push it on the motor shaft until the end of the motor shaft is about aligned with the flywheel. Check in the model if it runs freely, when the motor is aligned to the metal tab on the side of the gears.

7

8

9

You can lift the metal housing off, so you can check if the worm is nicely centred above the gear. Then using epoxy glue put three dots with a match stick/cocktail stick on the frame, then place the motor with the + side in the indicated direction. If you put the plus on the other side, your model will drive in the opposite direction of all your other trains. Align the motor to the frame metal on the gears side. 

You’re done! Test the model with the boiler and cabine cover plate (with contacts) back on, then you can put all the parts back on. 

Glue the short brass adapter in the flywheel. Push the long brass adapter in the plastic worm. Both might stay with friction on the shaft, otherwise use Loctite or Granville bolt/lock thread. 

Bend the contacts a bit outwards. The left motor show the best angle.

The inner diameter of the brass worm and flywheel are the same (1.0 mm) as the Tramfabriek replacement motor. This makes it just a matter of pushing the parts on the new motor. When pressing the flywheel on the shaft, press on the black plastic part of the motor, so that plastic part is not pushed out of the motor housing.

Digital conversion

When you are sure it is working in analogue mode, you can fit a decoder. Train-O-Matic sells a 90 degrees decoder (part nr 02010221, available from the Tramfabriek), the best choice for this model. If you want to go further, you can install a sound decoder.

The Roco model with long boilers has the advantage you can hide a Stayalive (here a Lifelink by YouChoos) under the boiler, under the yellow tape at the right. The 470mF capacitor is the yellow block at the left bottom of the image. This works very well. With other models you probably have to put it in the cabine.

Update 16/12/23: I would now install a Zimo stayalive.

Doehler & Haass SD05A decoder with custom connection, 11 x 15 mm speaker and custom printed casing (free on request when purchasing this sound decoder from the Tramfabriek).