UK based
Prices for UK customers are shown inc 20% VAT
Other countries, inc EU, prices shown are ex VAT.
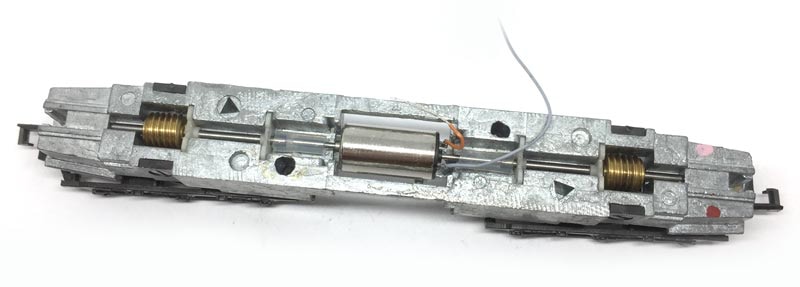
upgrade to 12V coreless motor
Question? Just reach out!
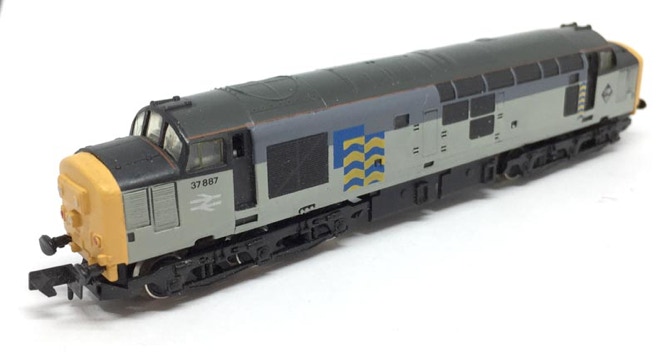
This upgrade kit is for Graham Farish models in production 1981-2000: Art 8014, 8015, 8035, 8036, 8037, 8038, 803D, 803E and other compatible models.
Kit comes now with faster motor @ 17,800 RPM
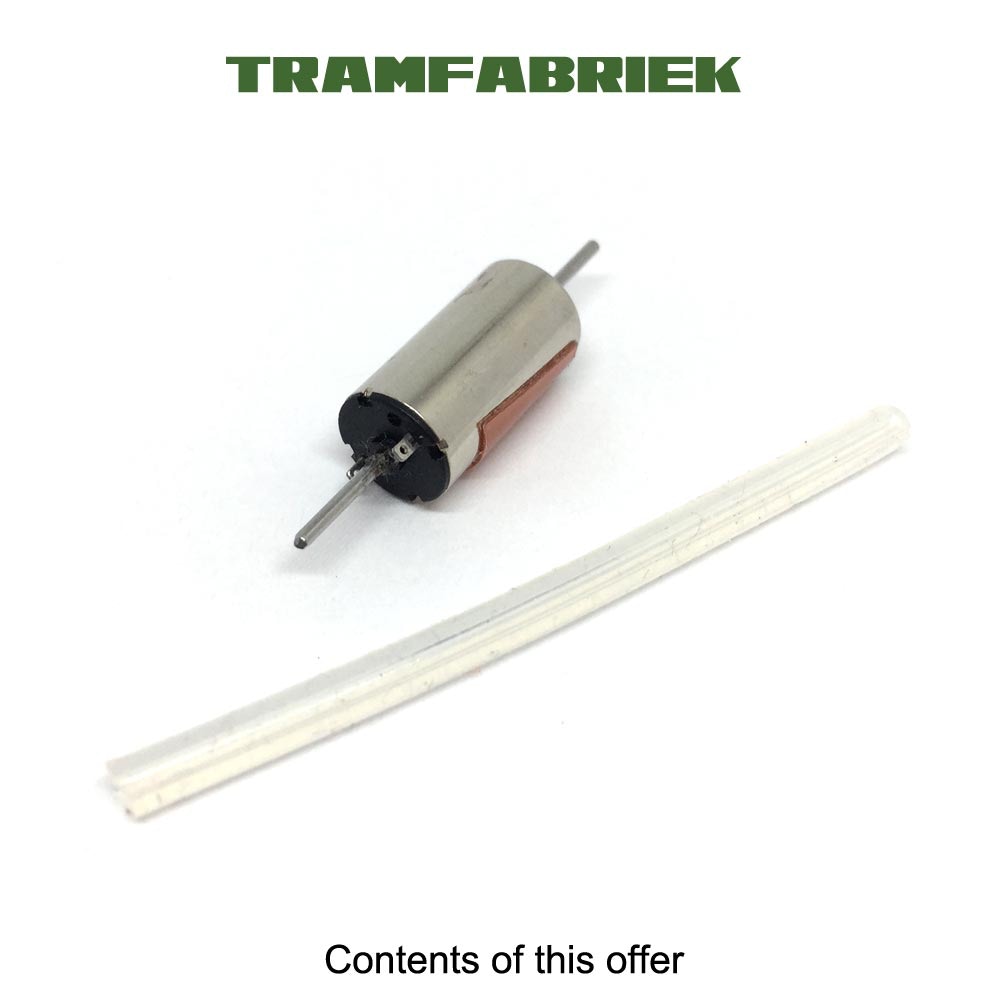
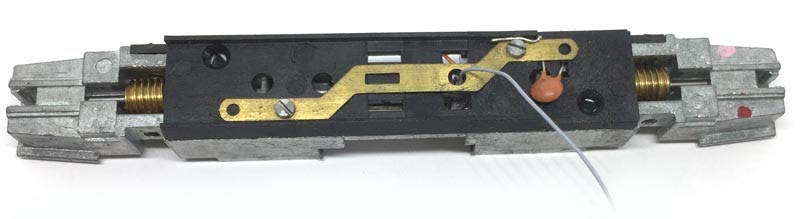
Contents of the kit
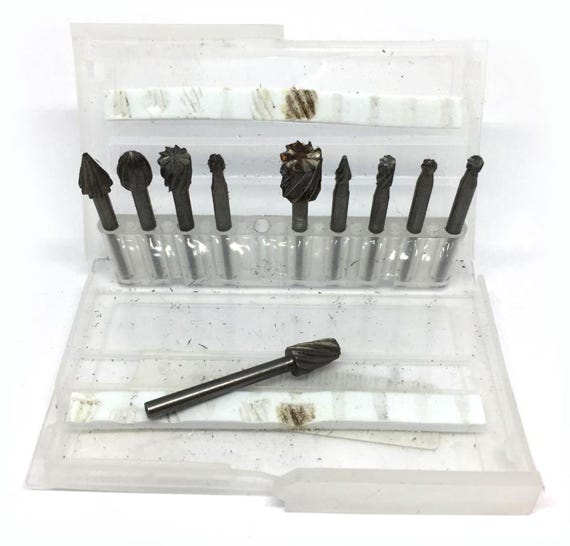
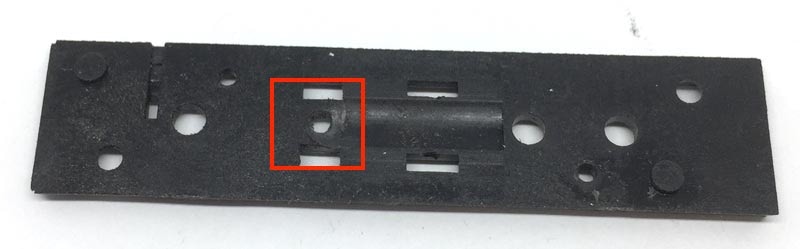
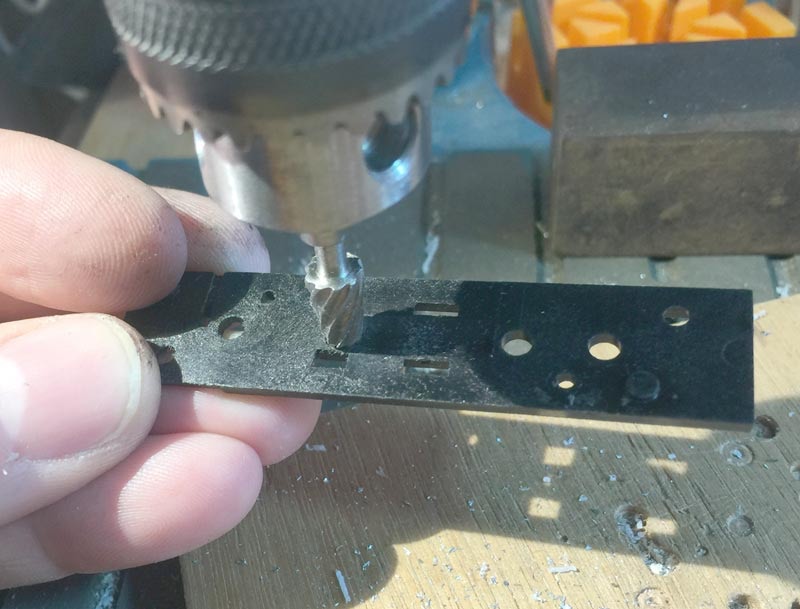
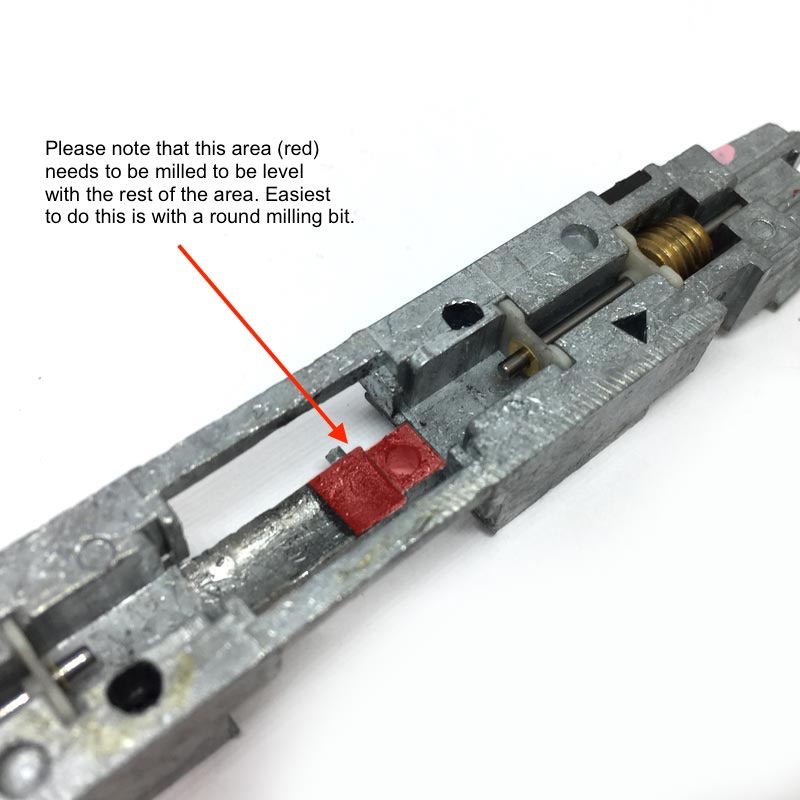
You’ll need to get a round milling bit like this, from for example eBay >>>
1
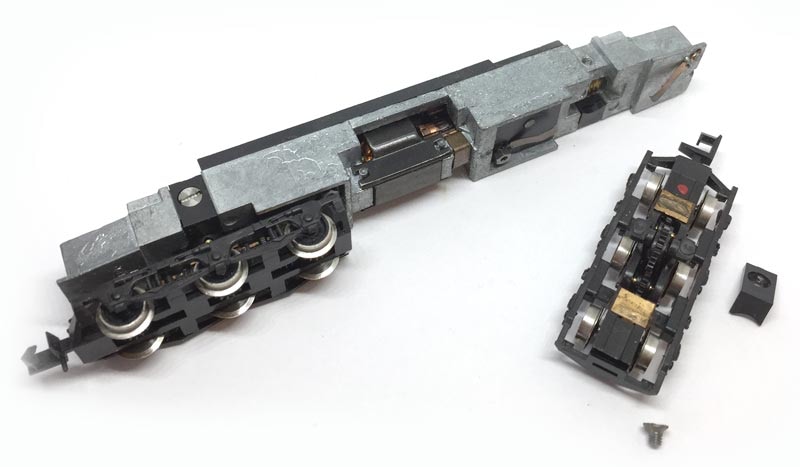
To open the model. Easiest is to use cocktail sticks on the four locations indicated. Then you can easily pull the chassis out (other model shown as example).
2
4
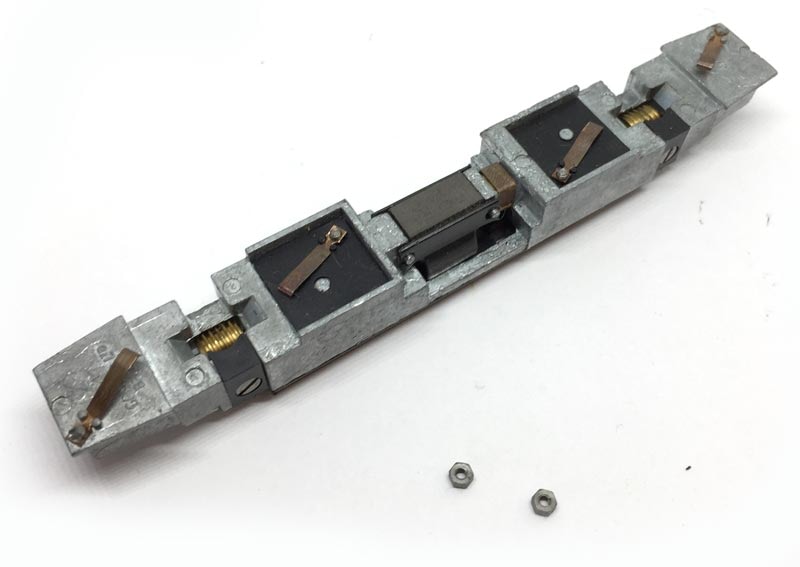
3
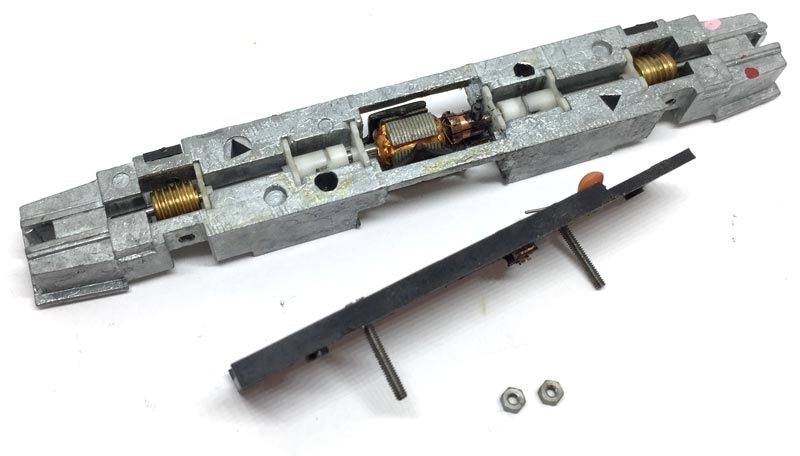
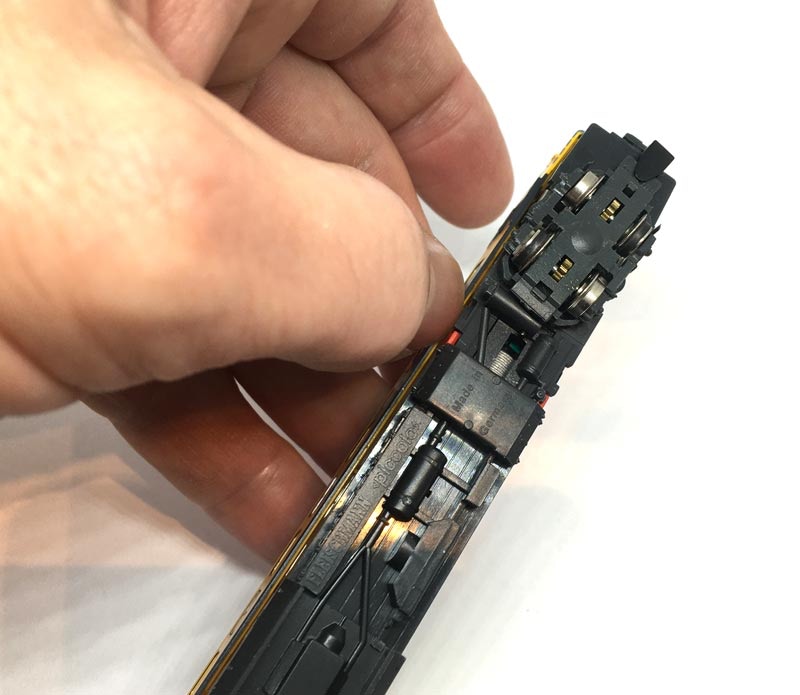
Remove the two screws and take the electronics board off. Two bolts will come off when you release the screws. Those are also holding the power contacts in place, so be careful not to loose those.
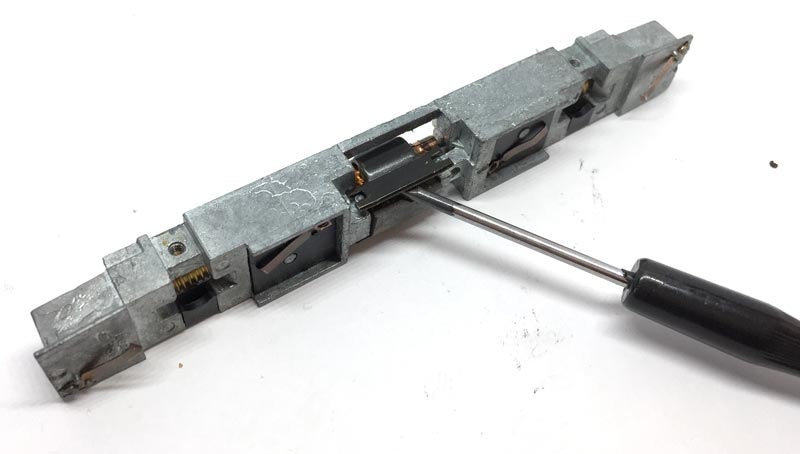
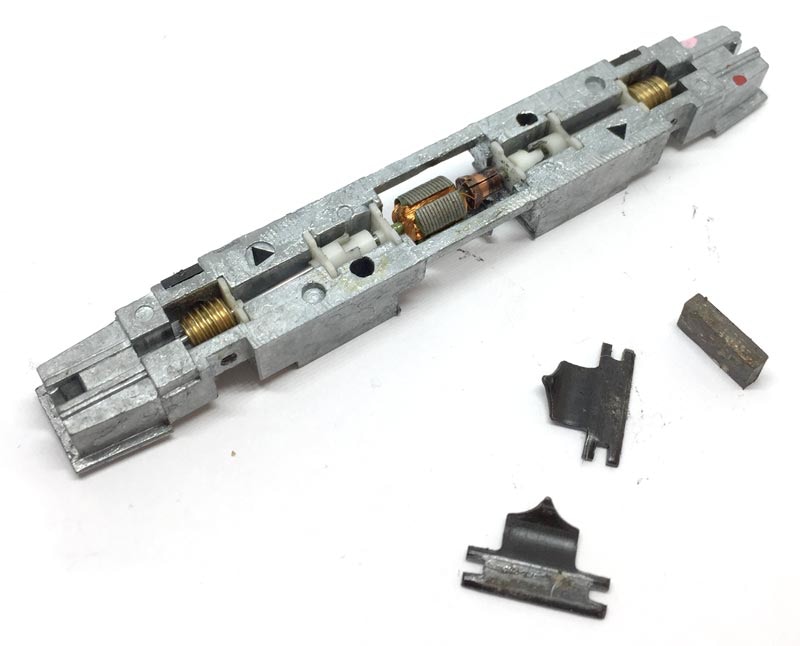
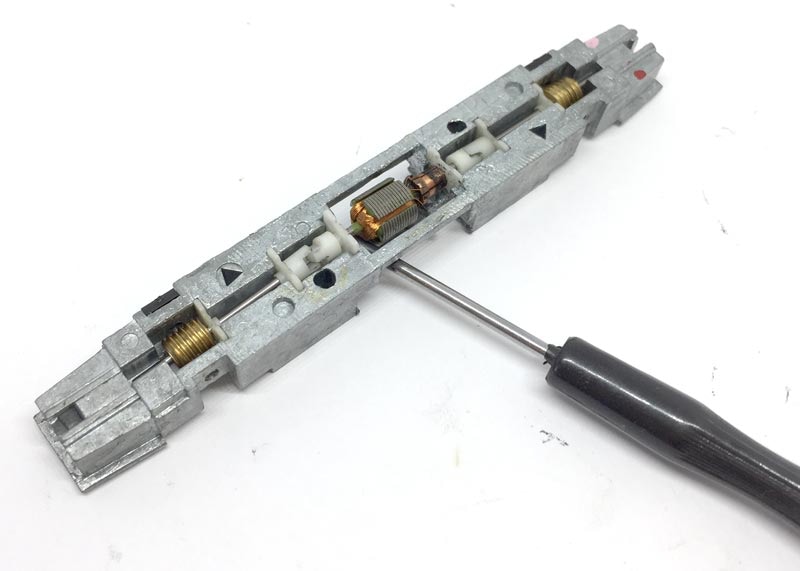
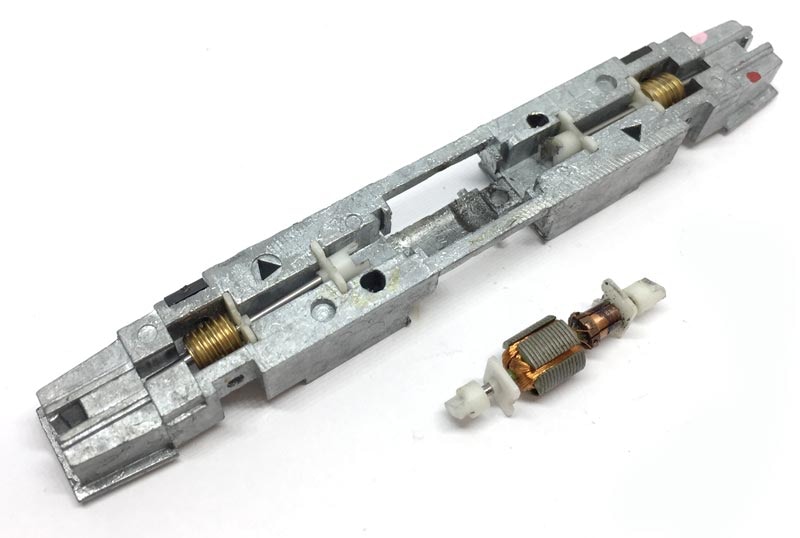
Remove the motor shield with a flat screw driver. All the parts that come off, including the motor brushes and springs, are not needed anymore.
What you need for conversion set
- The model and upgrade kit
- Small flat screwdriver
- Soldering iron 15W/25W
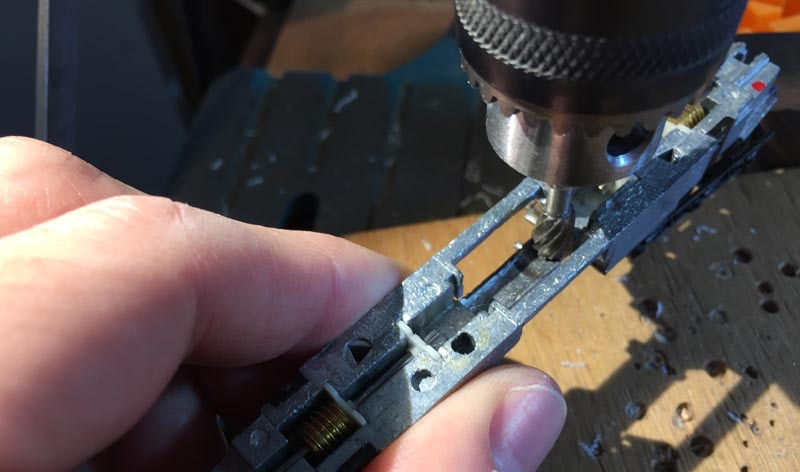
- Milling bit with round head
Installation time: Around 40 minutes
Difficulty: Pretty easy to do. Don’t let the milling scare you off. With the right milling bit, it’s easily done.
Graham Farish Class 37


IMPORTANT INFORMATION: SPLIT GEARS
Check the gears on the wheelaxles. On my model, 5 out of the 6 gears where split. You need to replace any split gear in order to have a well running model. These 16 teeth gears (Bachmann art GF2504) come in packs of 6 and are not expensive. They can be bought from 'farishnspares' in the UK, who ship world wide. With a Tramfabriek Gear Puller one wheel can be taken off and after replacing the gear with your fingers, you can press the wheel back on with a vice. It really is not a difficult job. Be aware of the spring of the coupling that might jump out, when you remove the bottom of the bogie.
Remove both of the bogies (US: trucks) by taking out one screw above the bogie.