

UK based
Prices for UK customers are shown inc 20% VAT
Other countries, inc EU, prices shown are ex VAT.

KASTENLOK INDEX


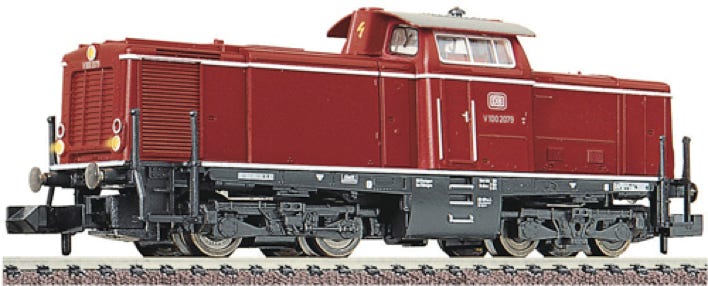
Conversion Fleischmann V100 BR 212 (1:160)
to coreless motor
UK based
Prices for UK customers are shown inc 20% VAT
Other countries, inc EU, prices shown are ex VAT.
KASTENLOK INDEX
Conversion Fleischmann V100 BR 212 (1:160)
to coreless motor


What you need for conversion set
- Diesel locomotive by Fleischmann, type V100 or BR 212
- Small flat screwdriver
- Soldering iron
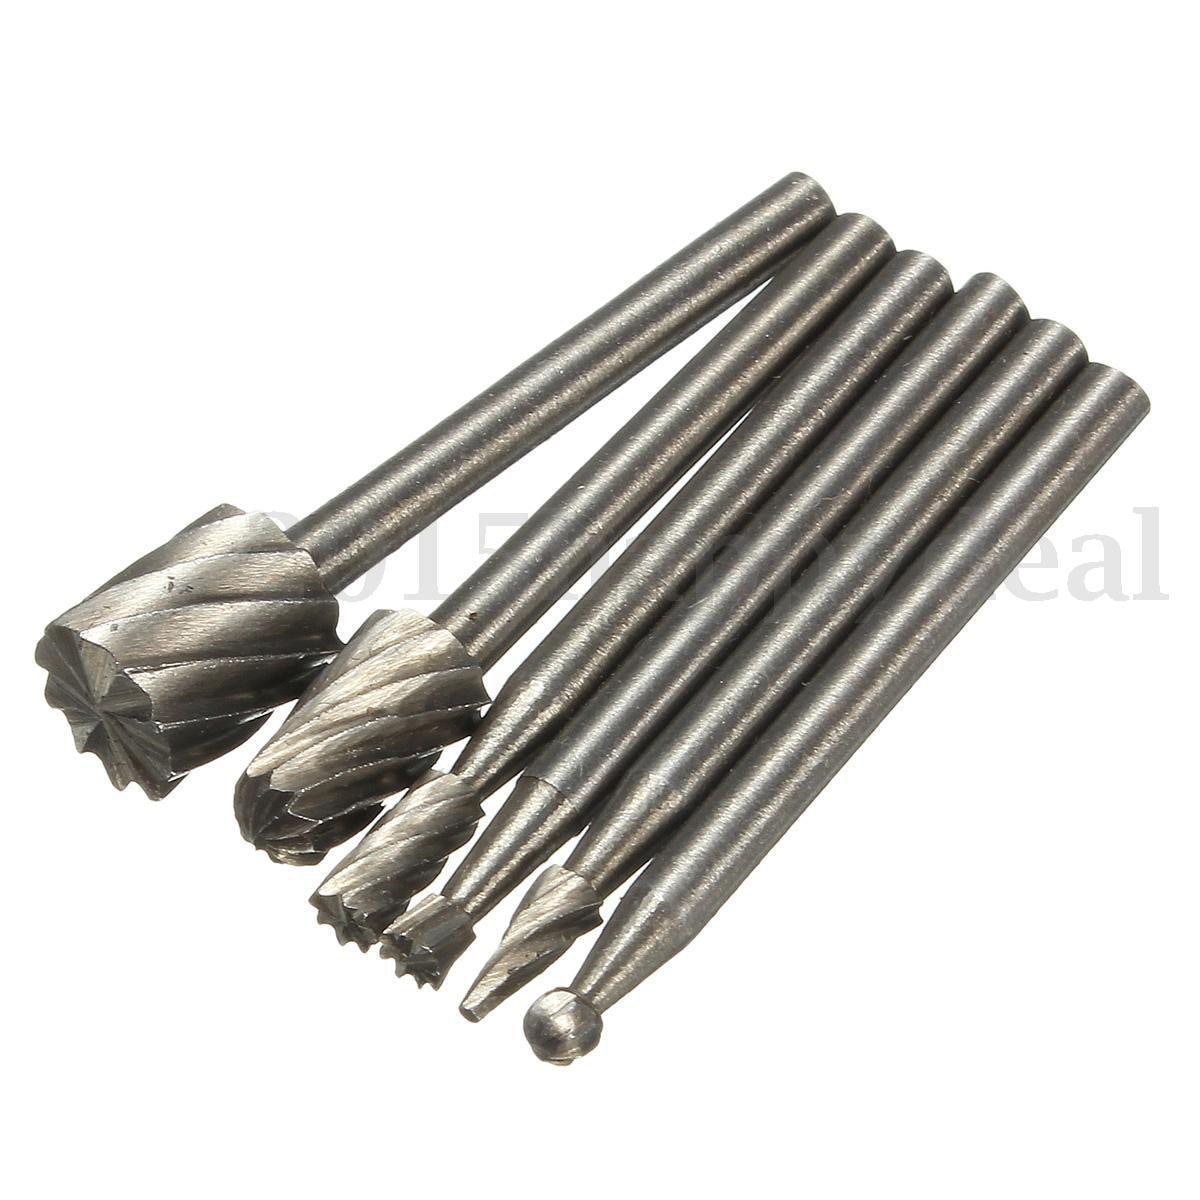
- Drill with milling bit and 1mm drill bit
- Loctite or superglue
Installation time: 1 hour
Question? Just contact Sven!
1
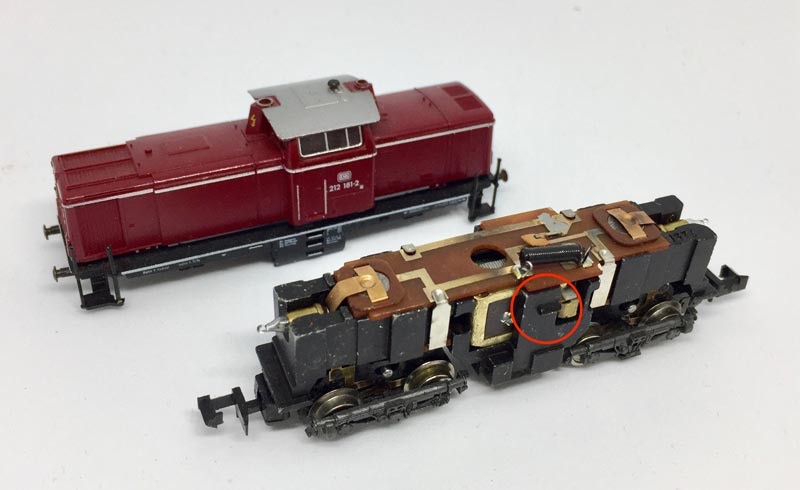
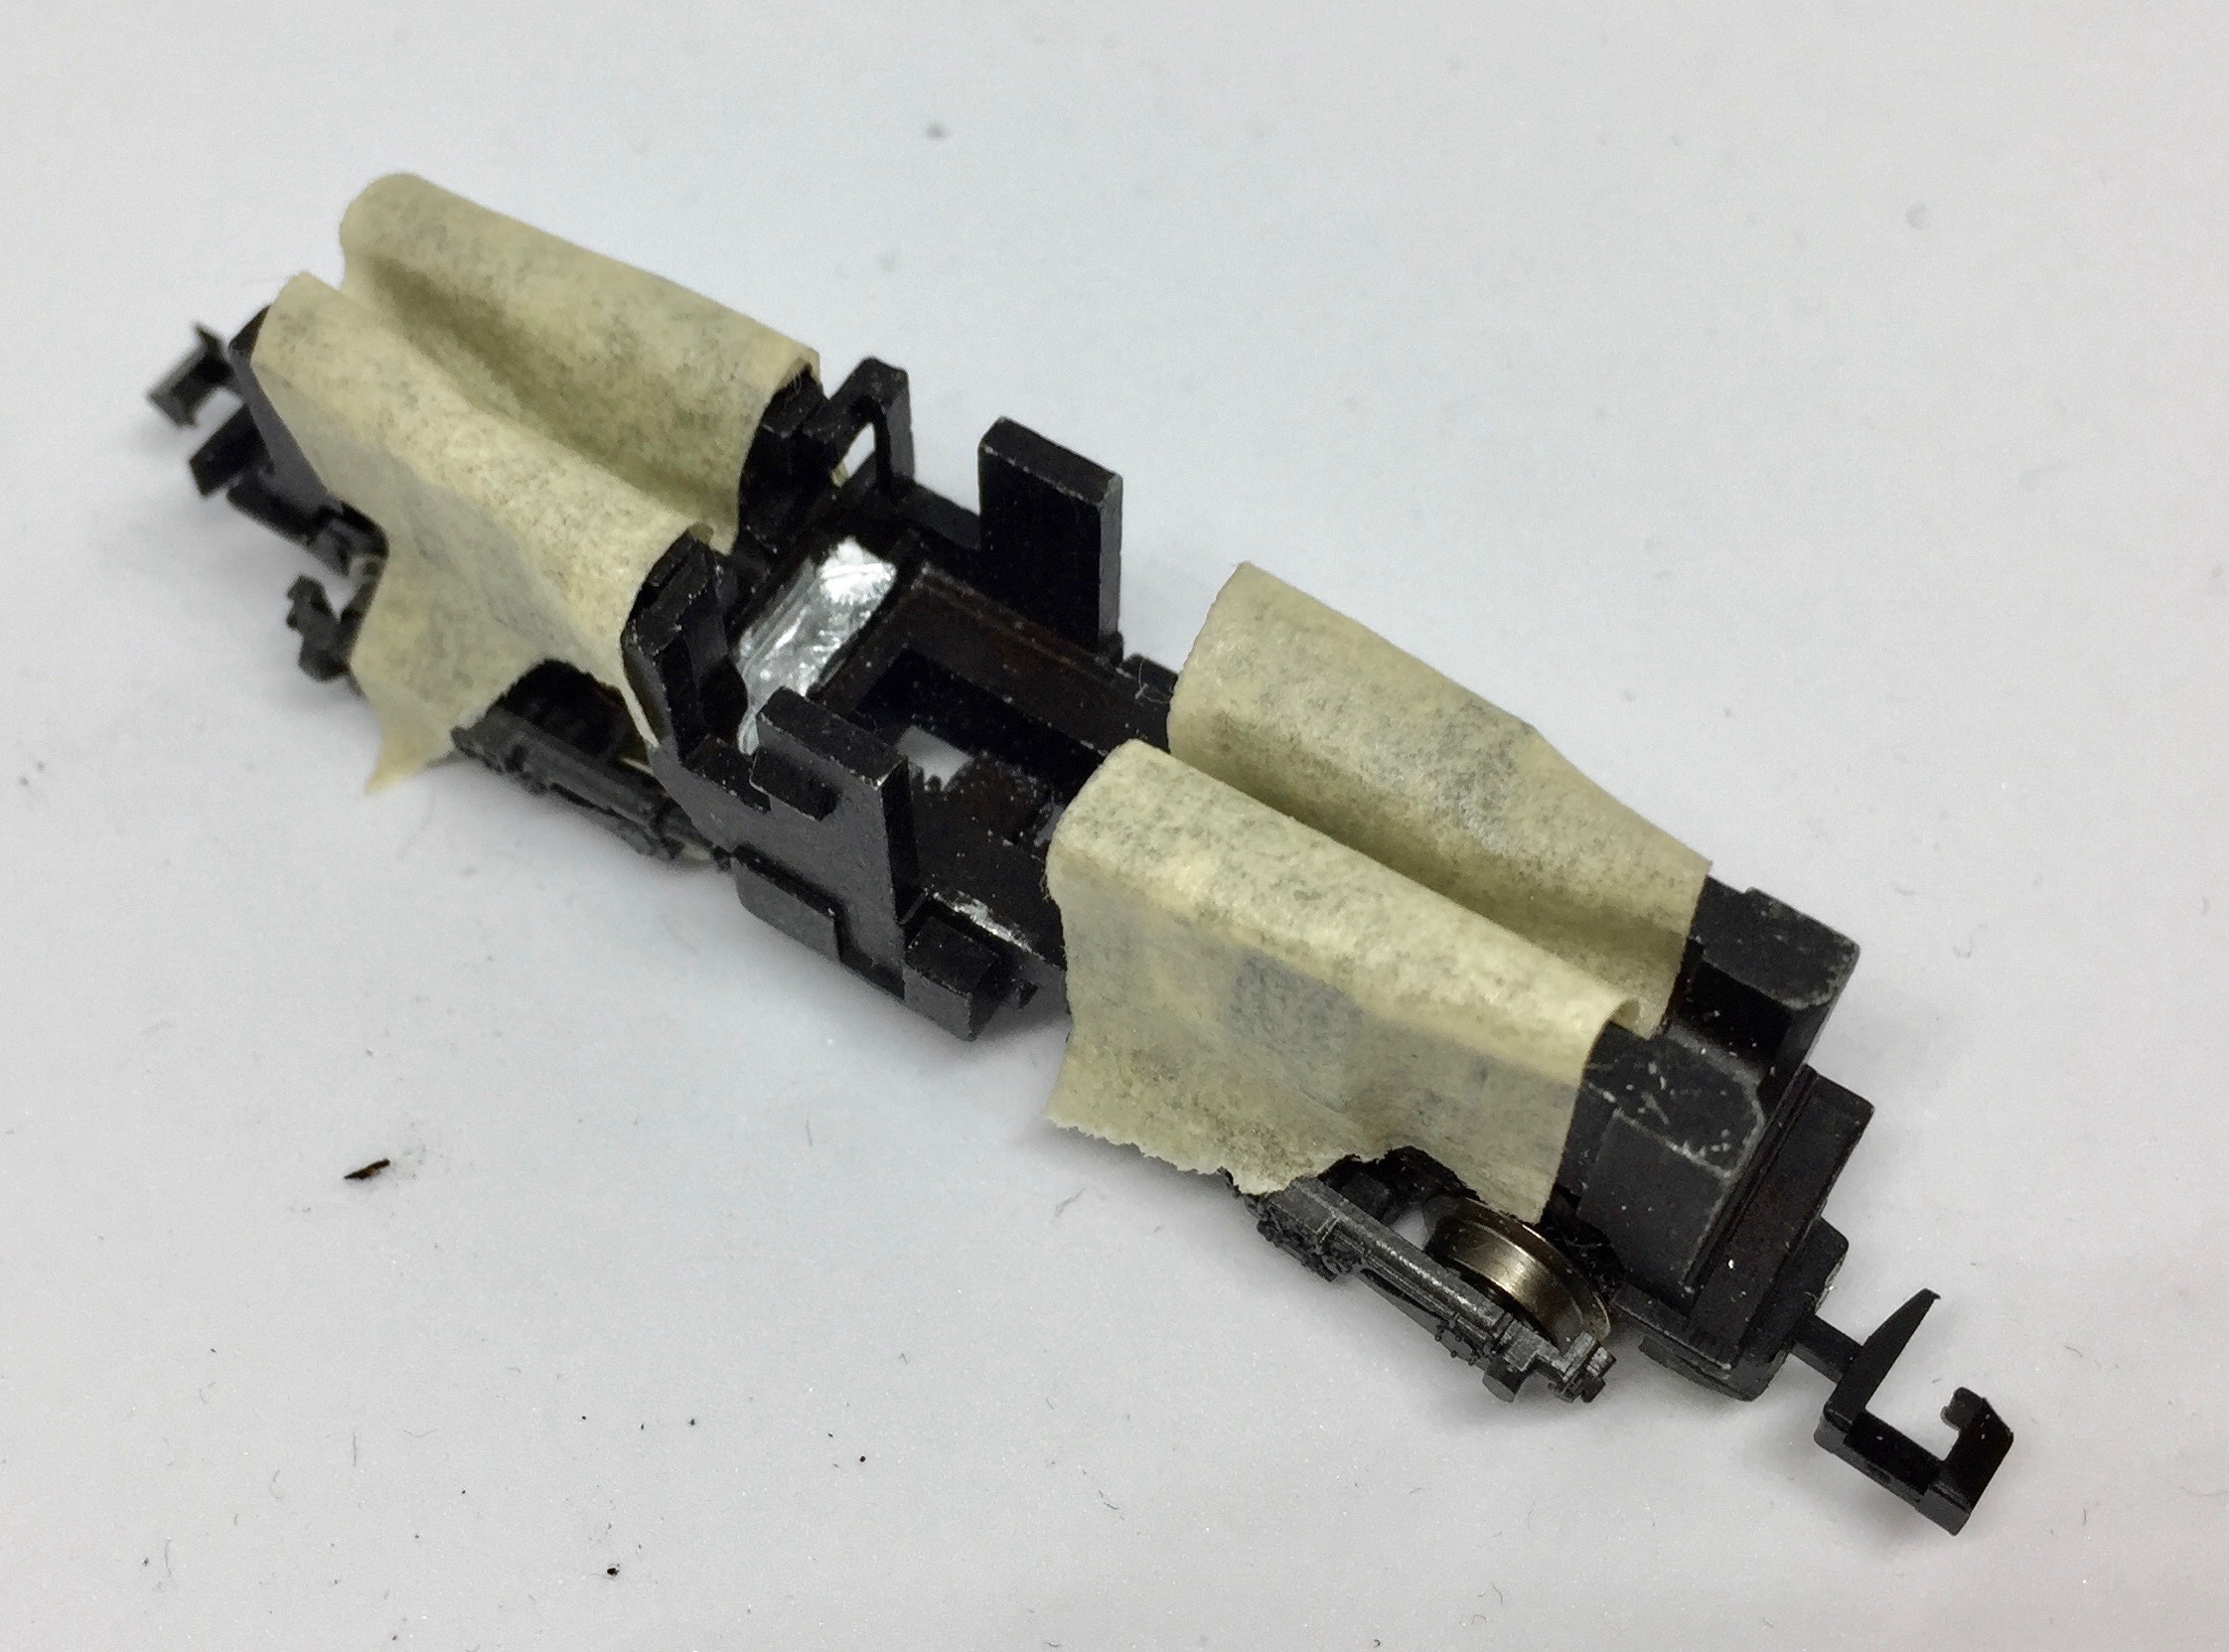
Remove plastic cover
On both sides the whole top part of the train is held on the bottom part with a tab on each side, see circle on image. Release the side from the tabs by pulling it to the side.
2
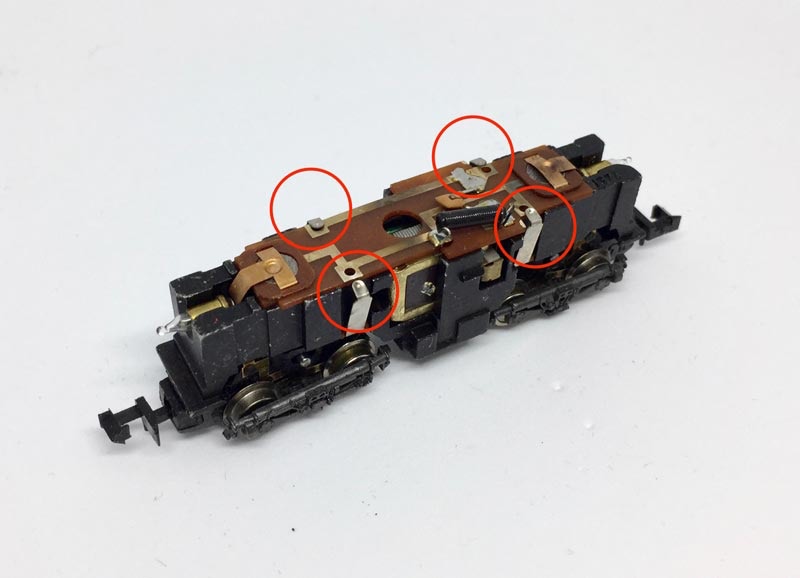
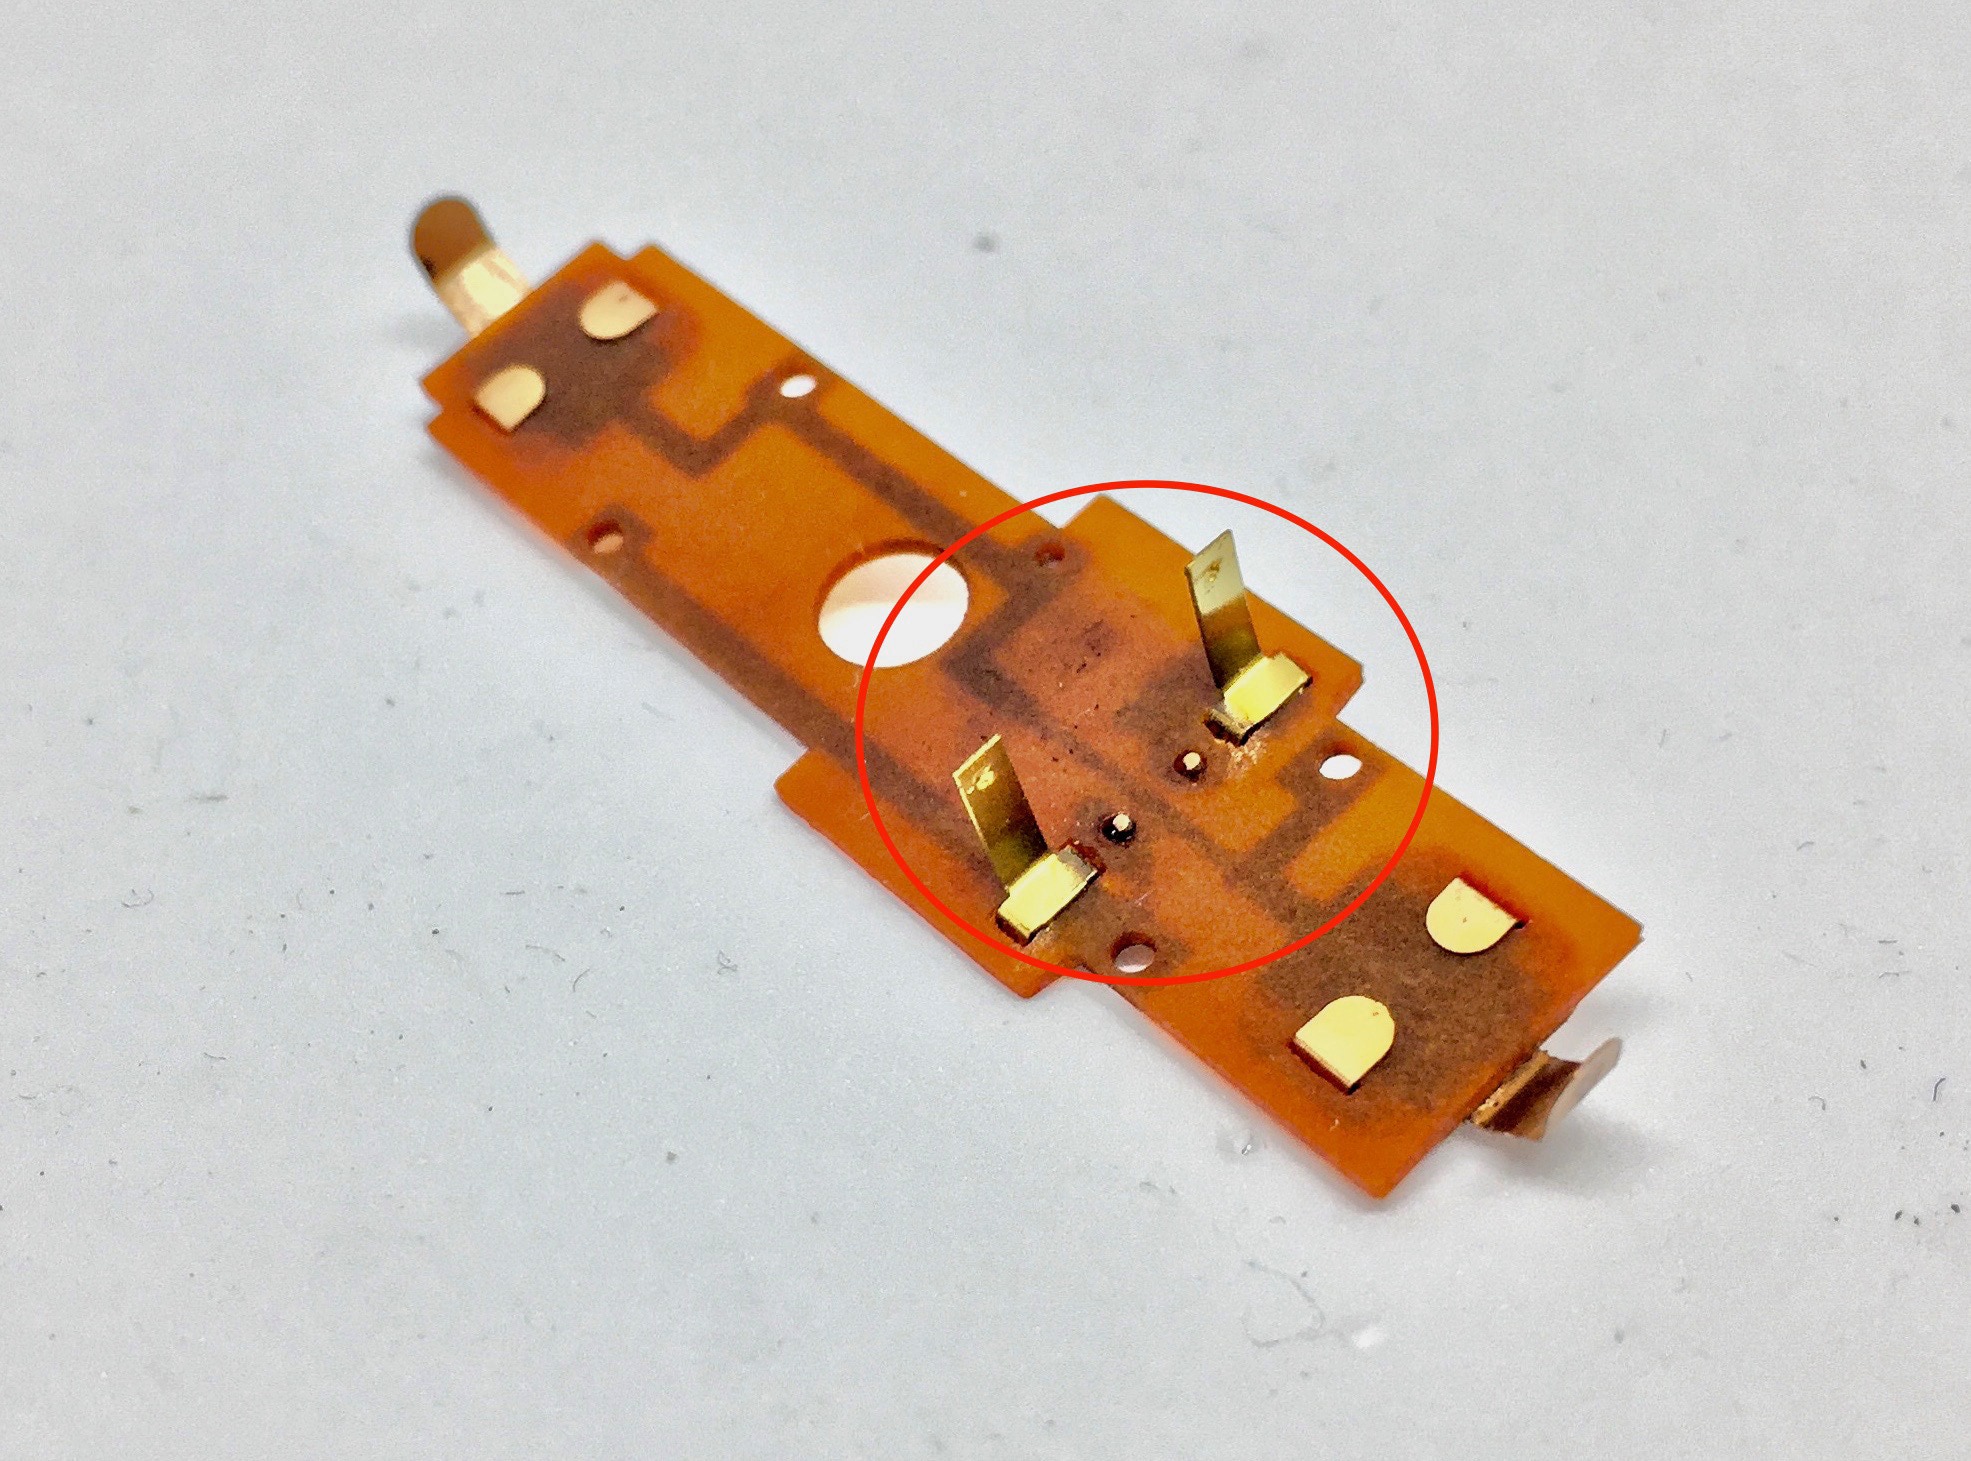
Release contacts to PCB board
Mind the two lamps on the fronts, put them aside.
Pull contacts sidewards to release PCB board. Take PCB board off.
3
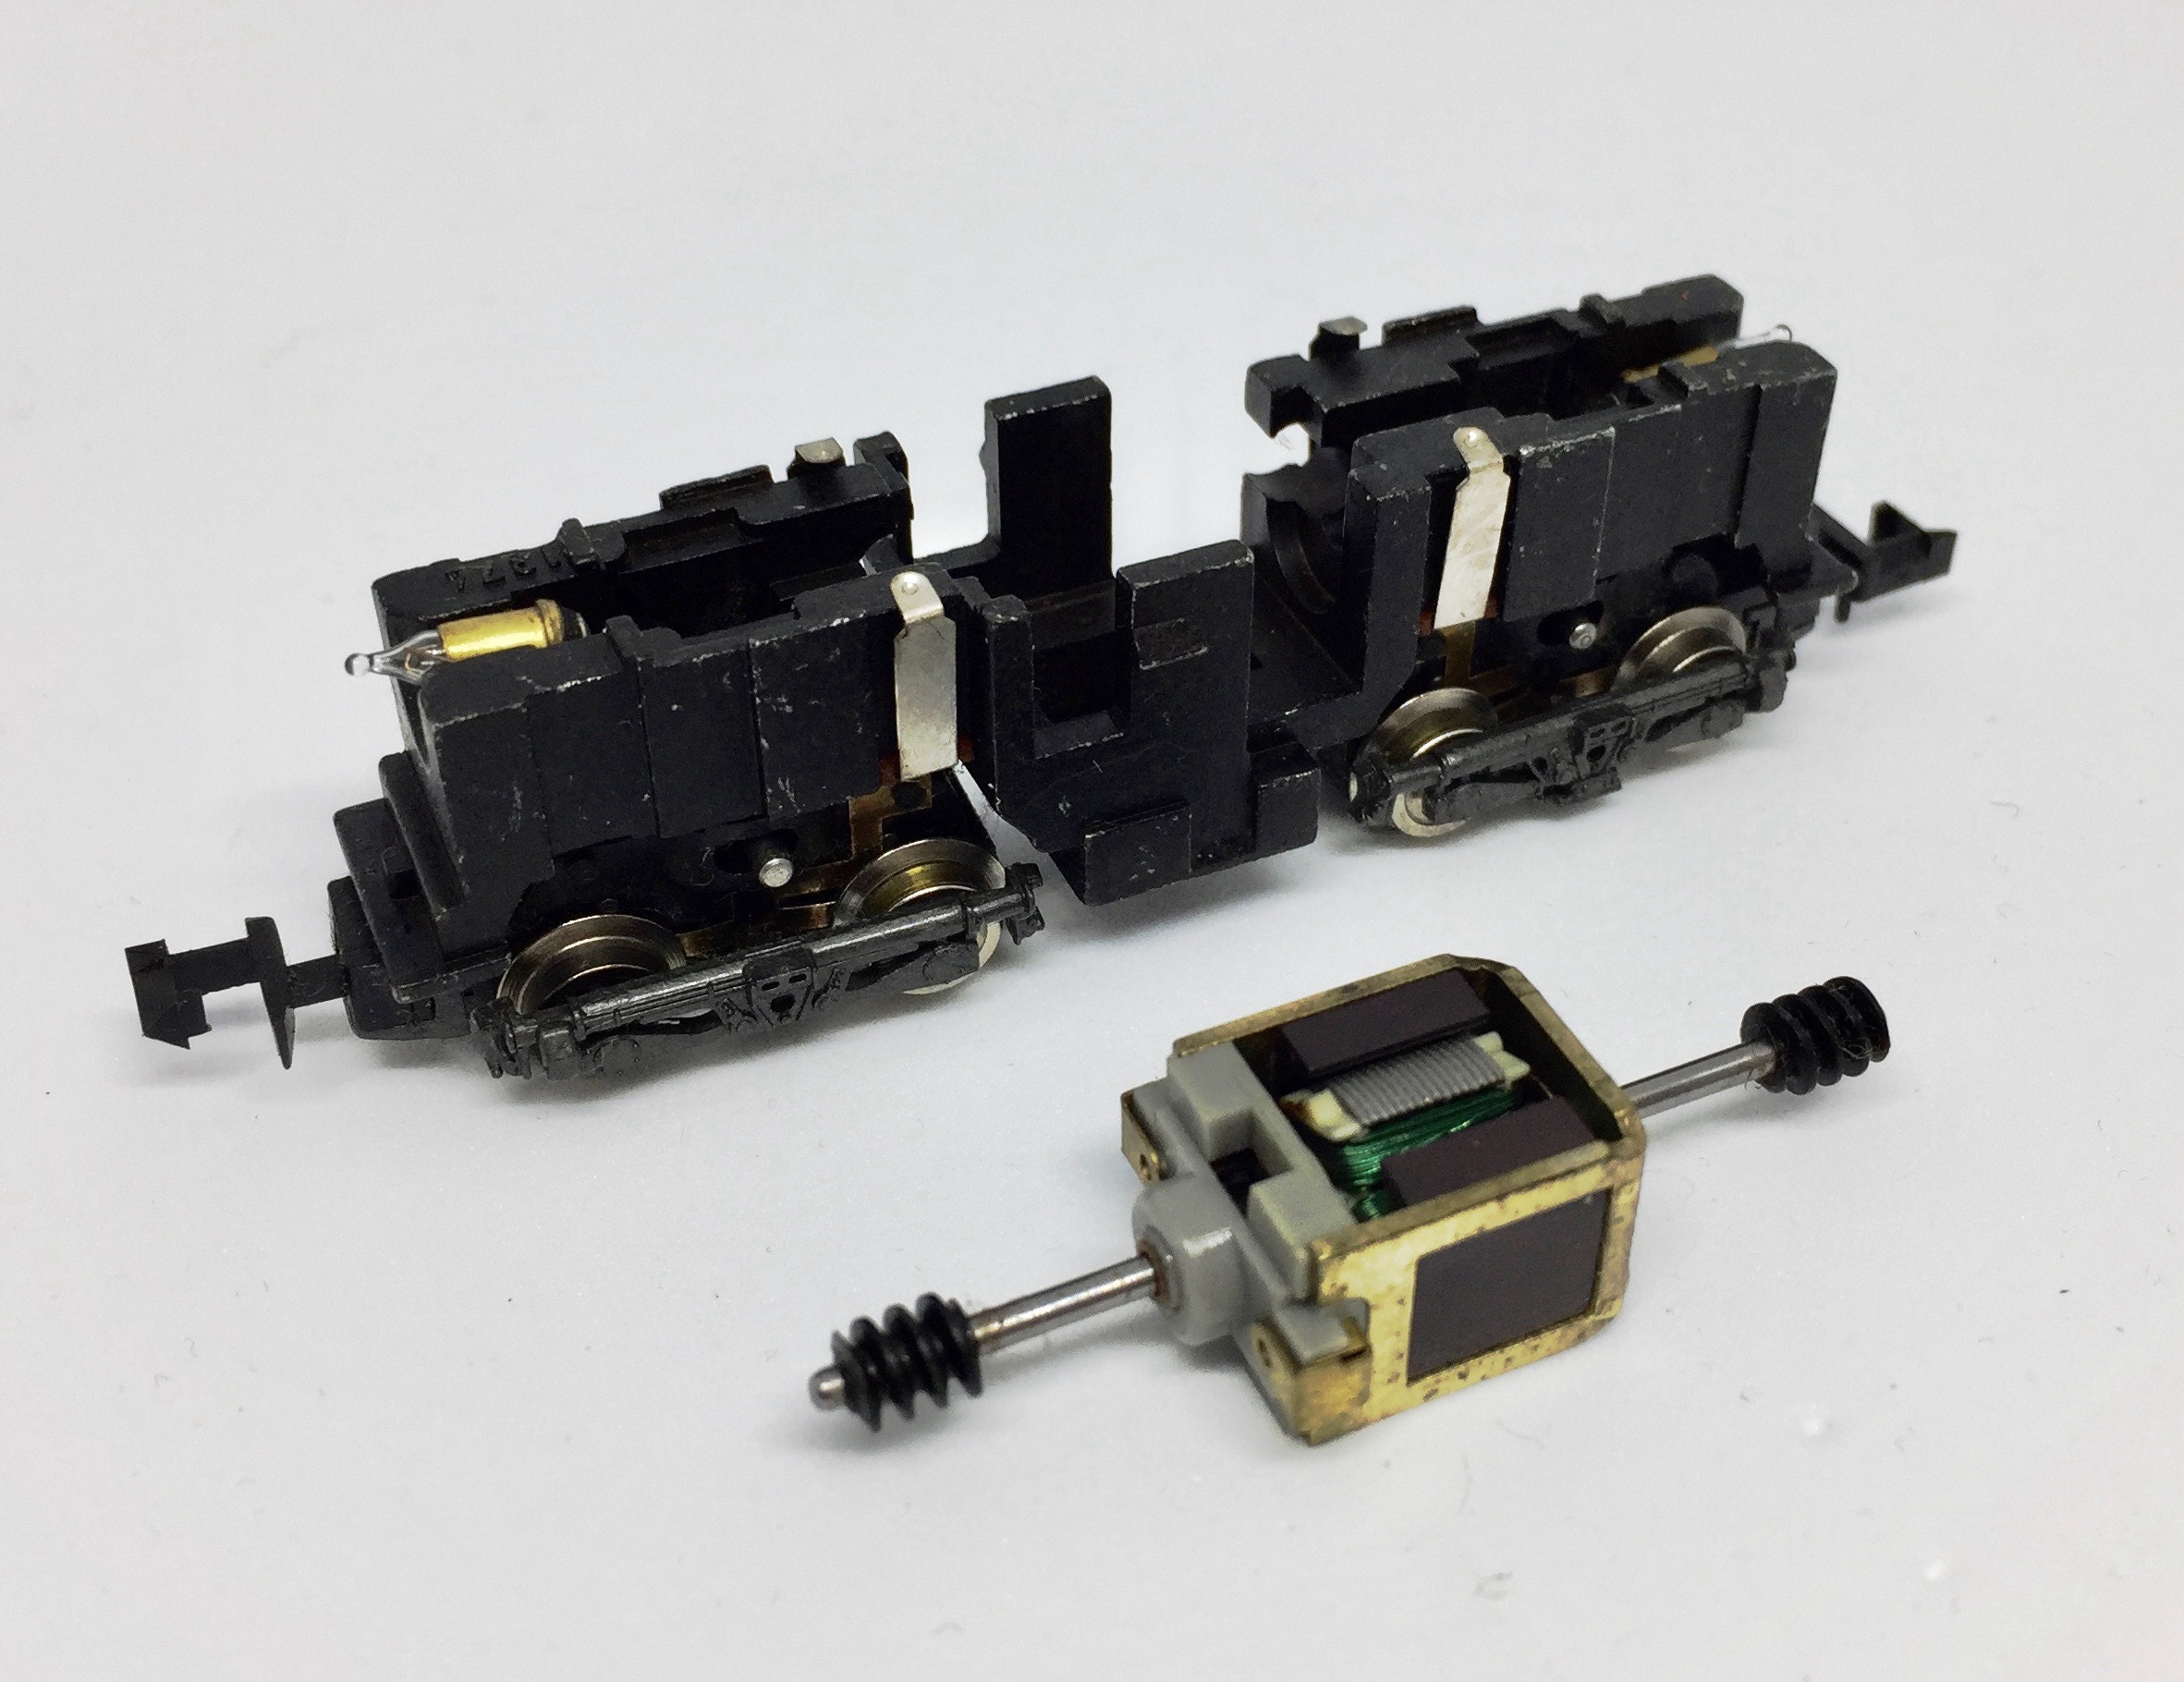
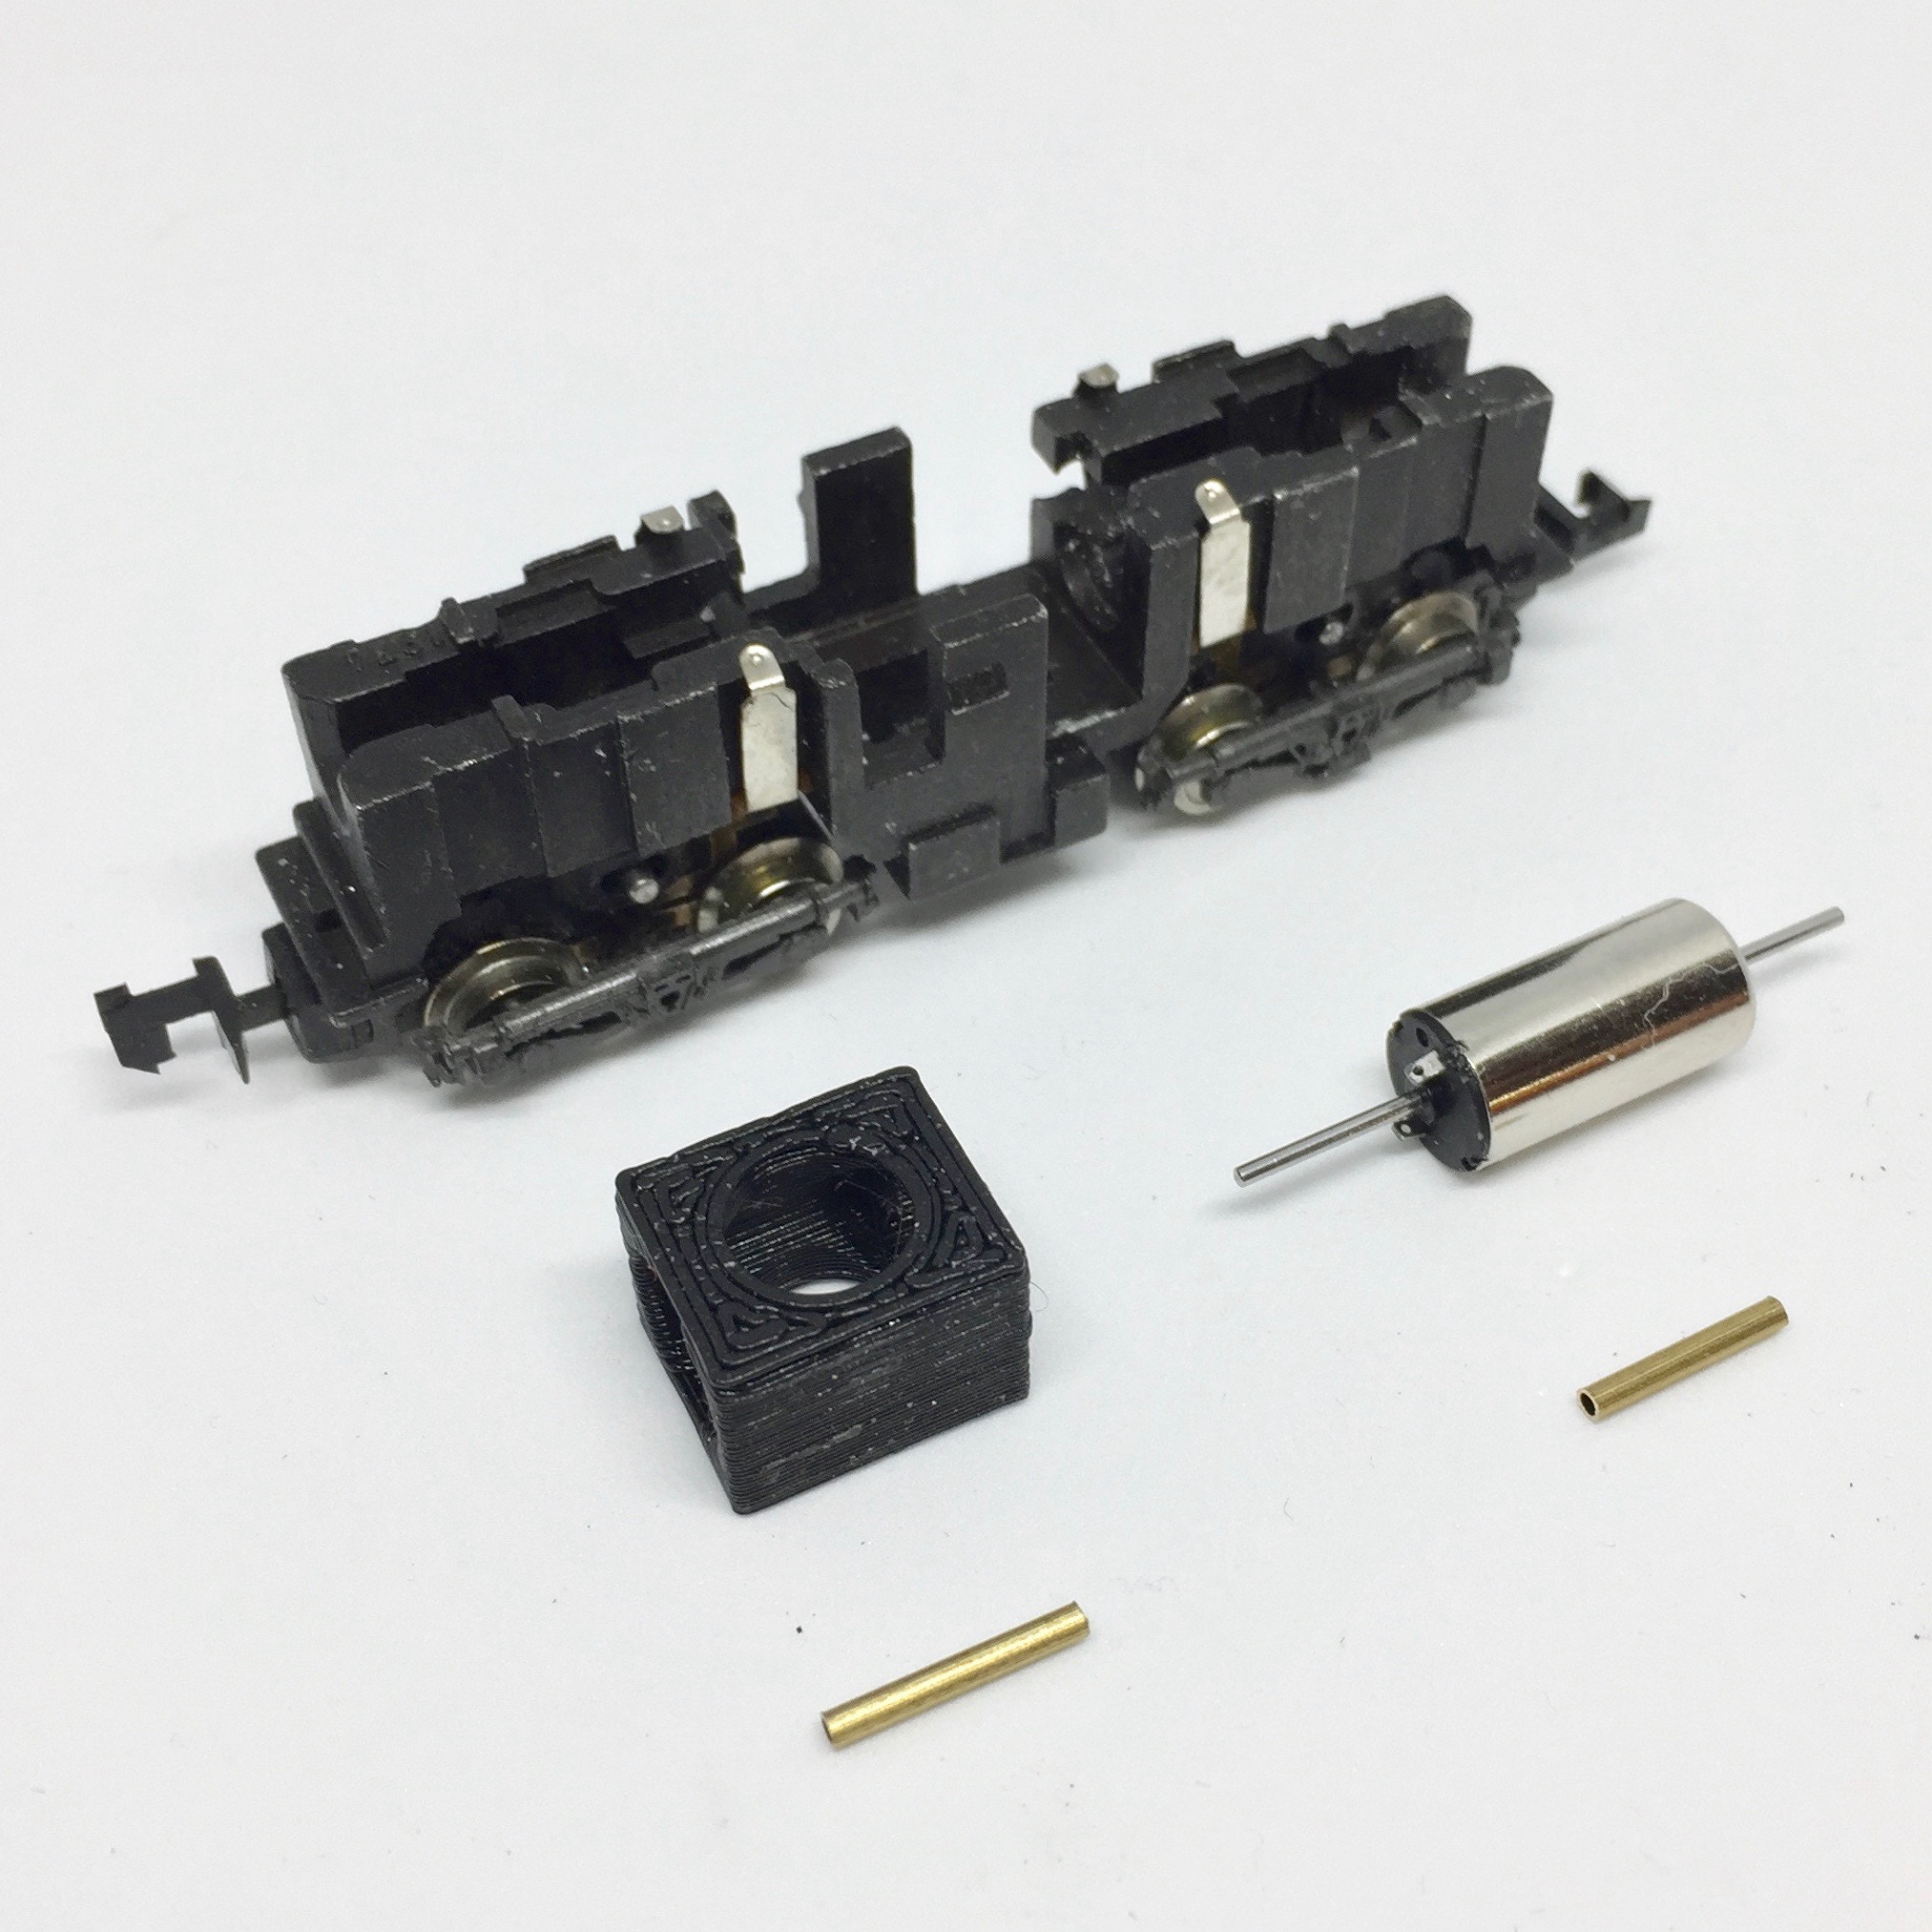
Take motor out
Just lift the motor out of its place.
4
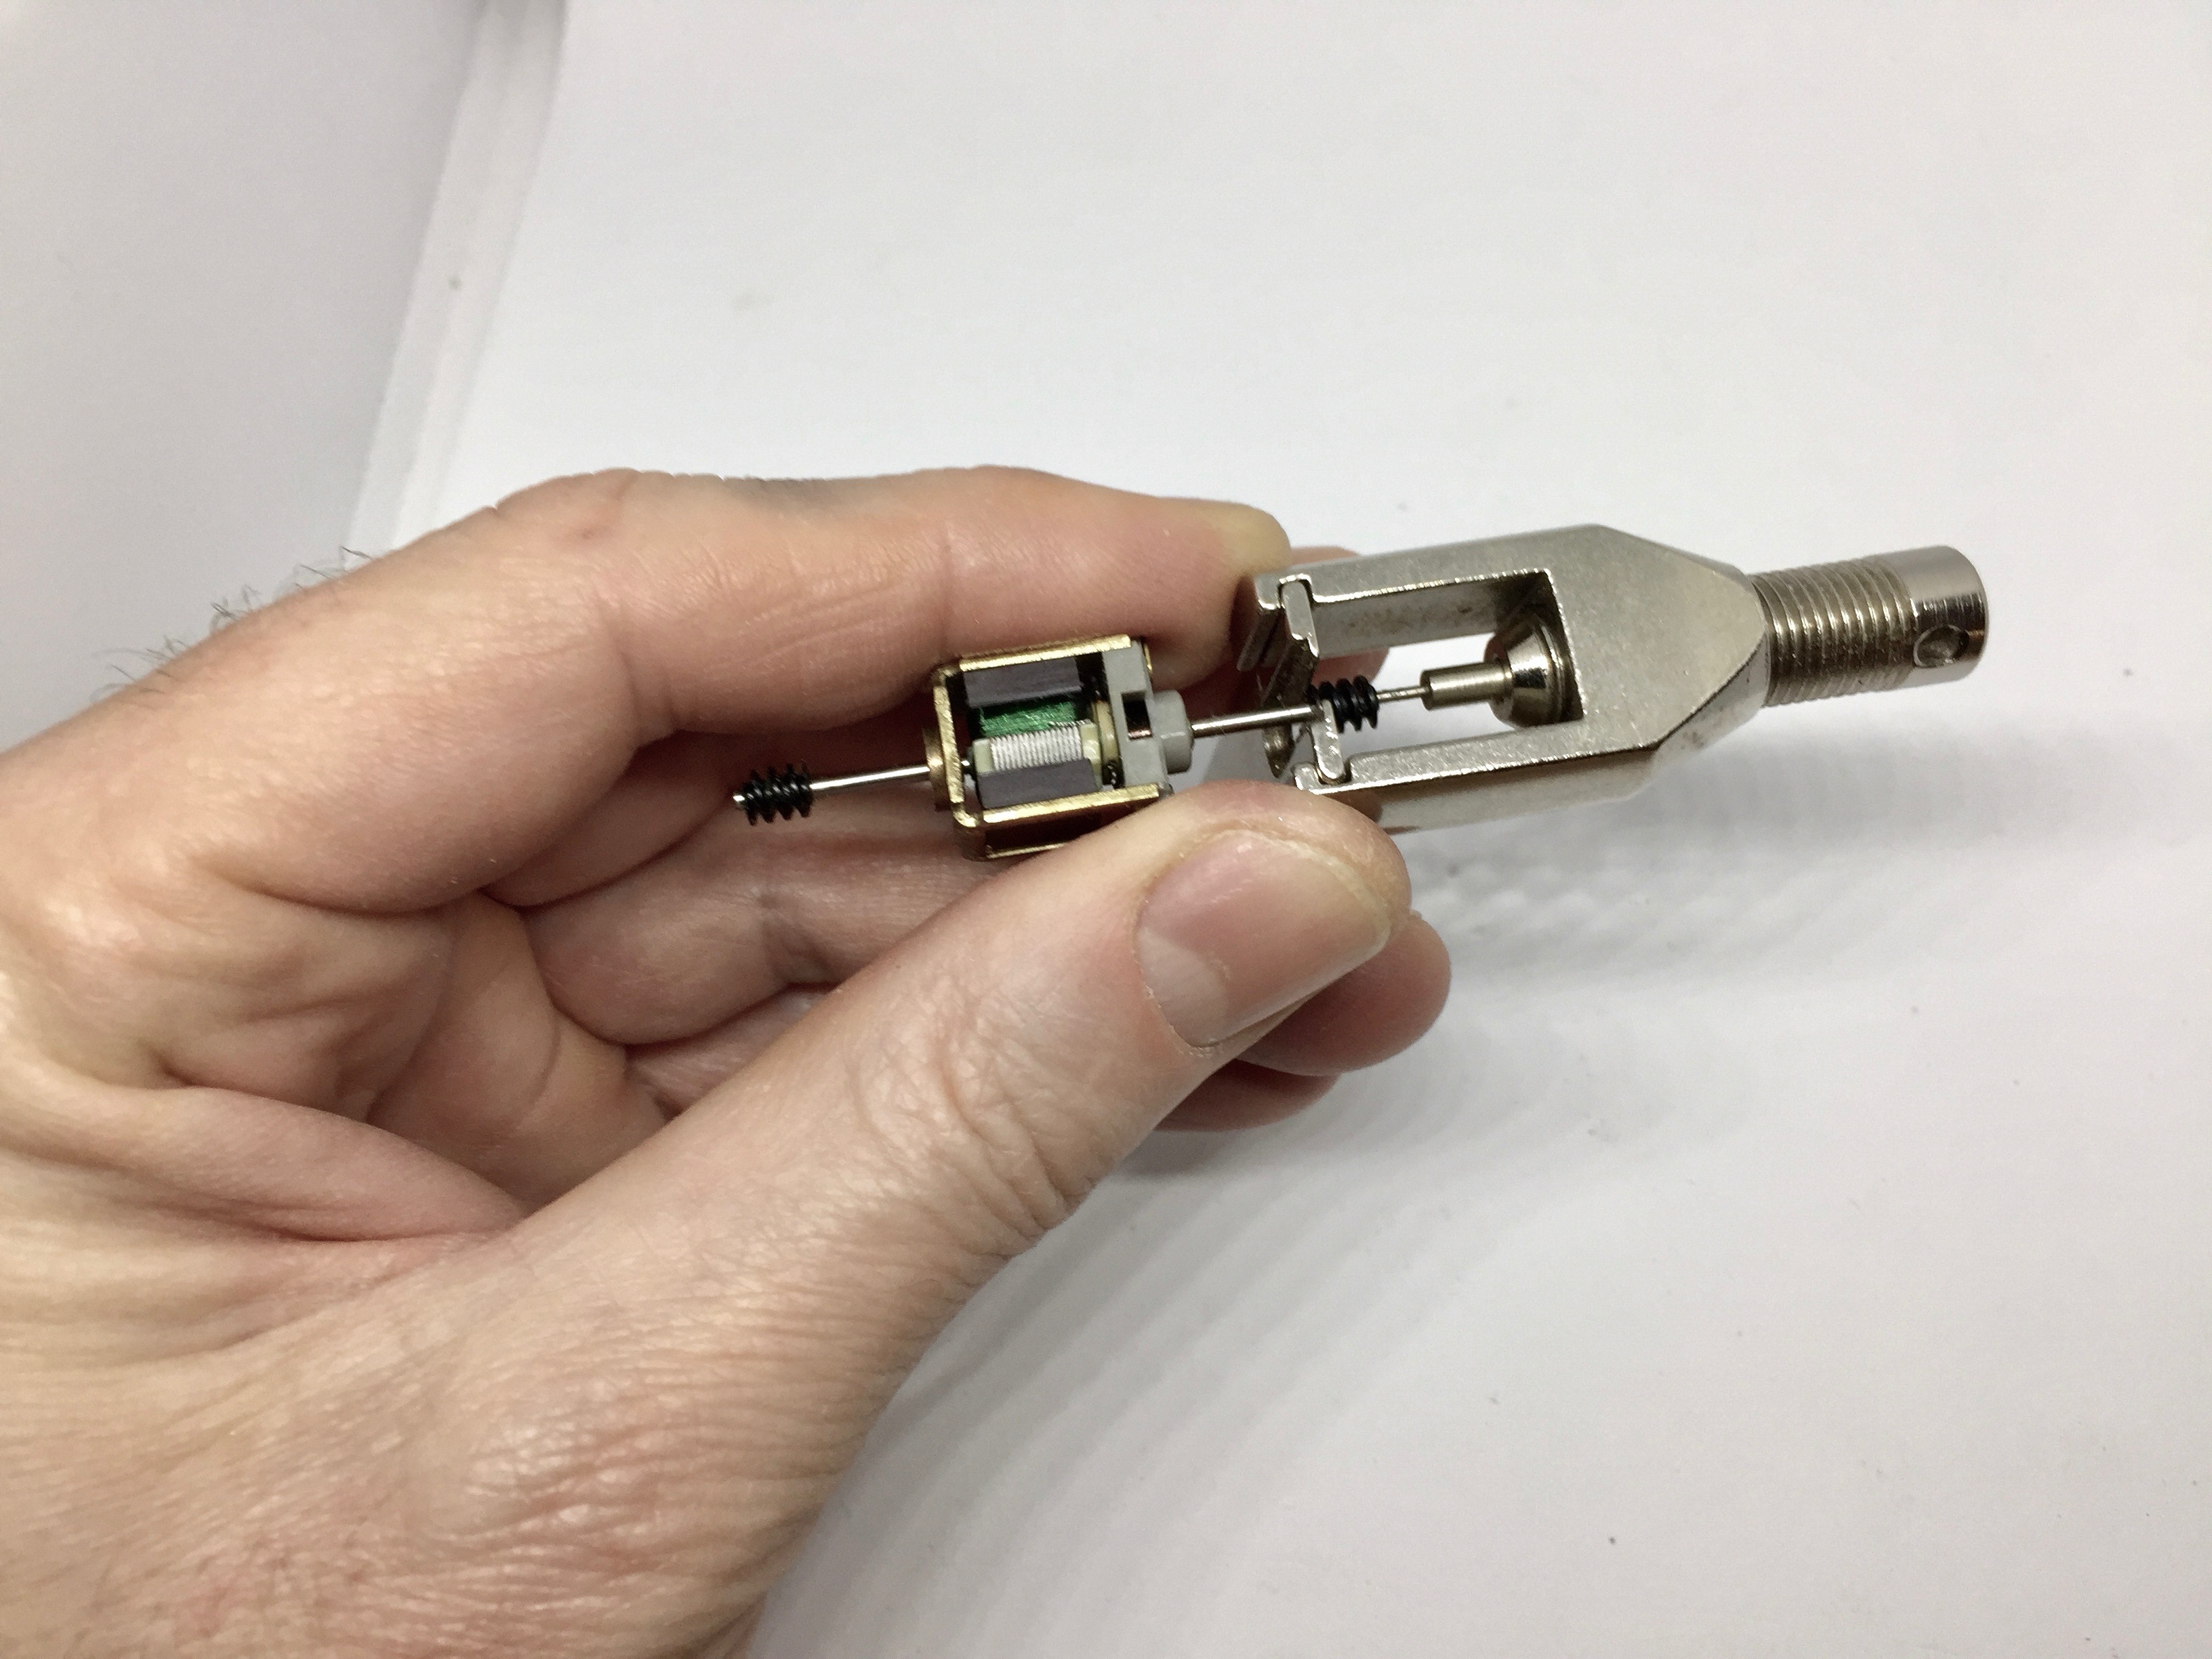
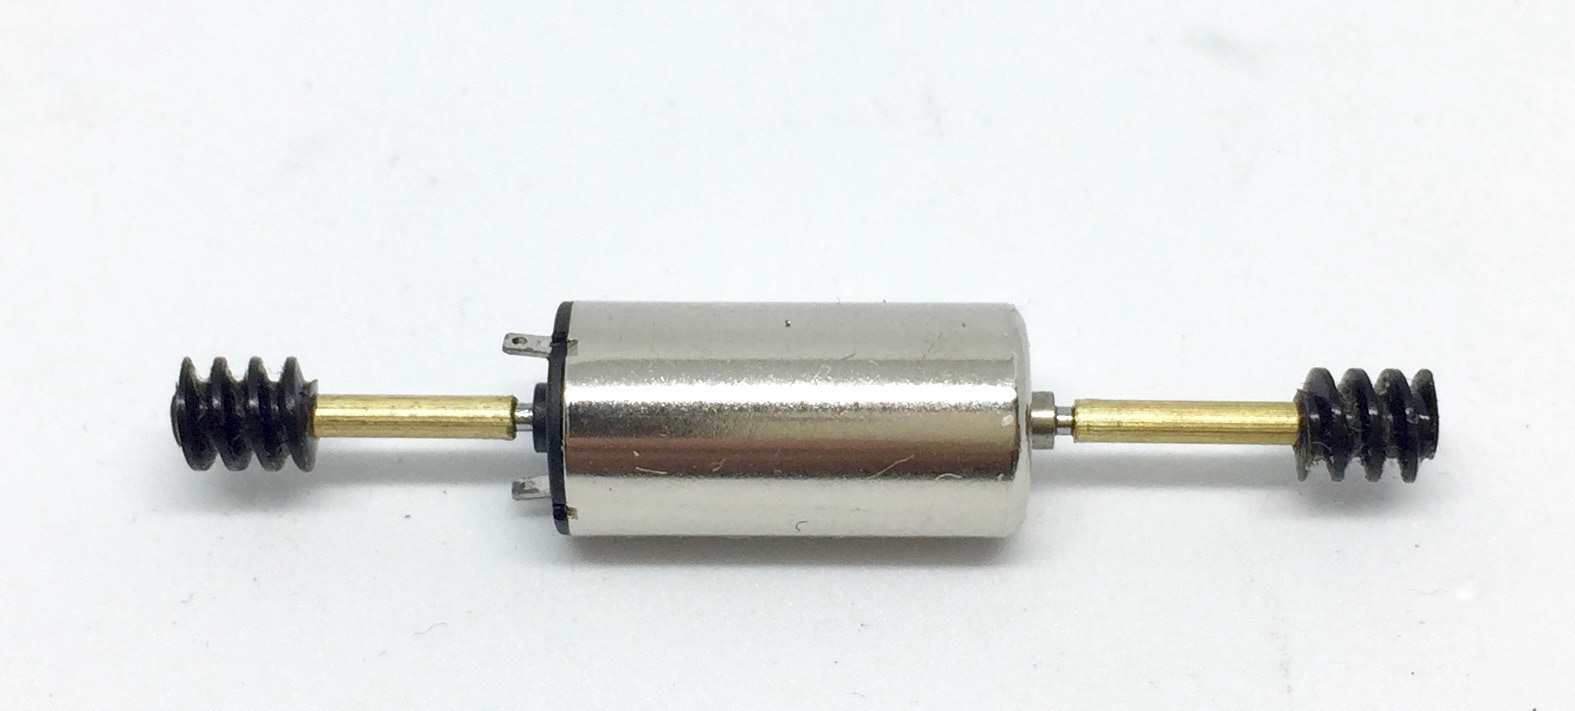
Take the worms of the motor axle
The two black worms on each side of the motor can be pulled off by hand. If it would be harder, there are two other option to remove them, see pictures.
For more valuable tips how to remove a worm, gear or flywheel, click here.
5
The brass adapters might be the same length, or two different lengths: They are both either (about) 11.5 mm or 11.5 and 12.25 mm. If you have equal lengths, you know what to do. If you have different lengths, the shorter one goes on the long motor shaft (the side with the connectors), the longer shaft goes on the short motor shaft.
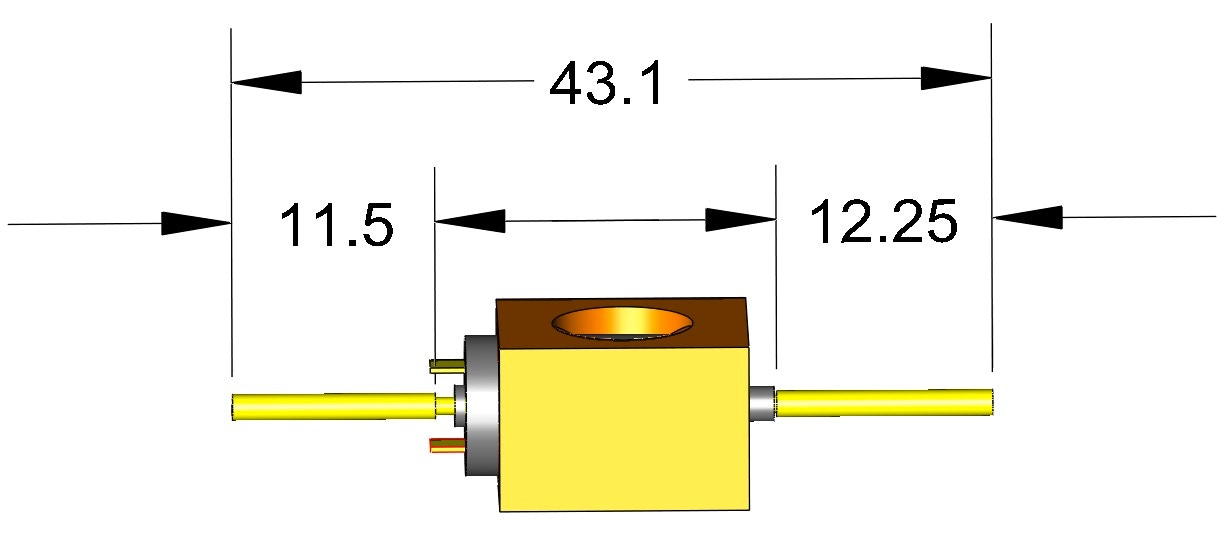
Or: 11.5
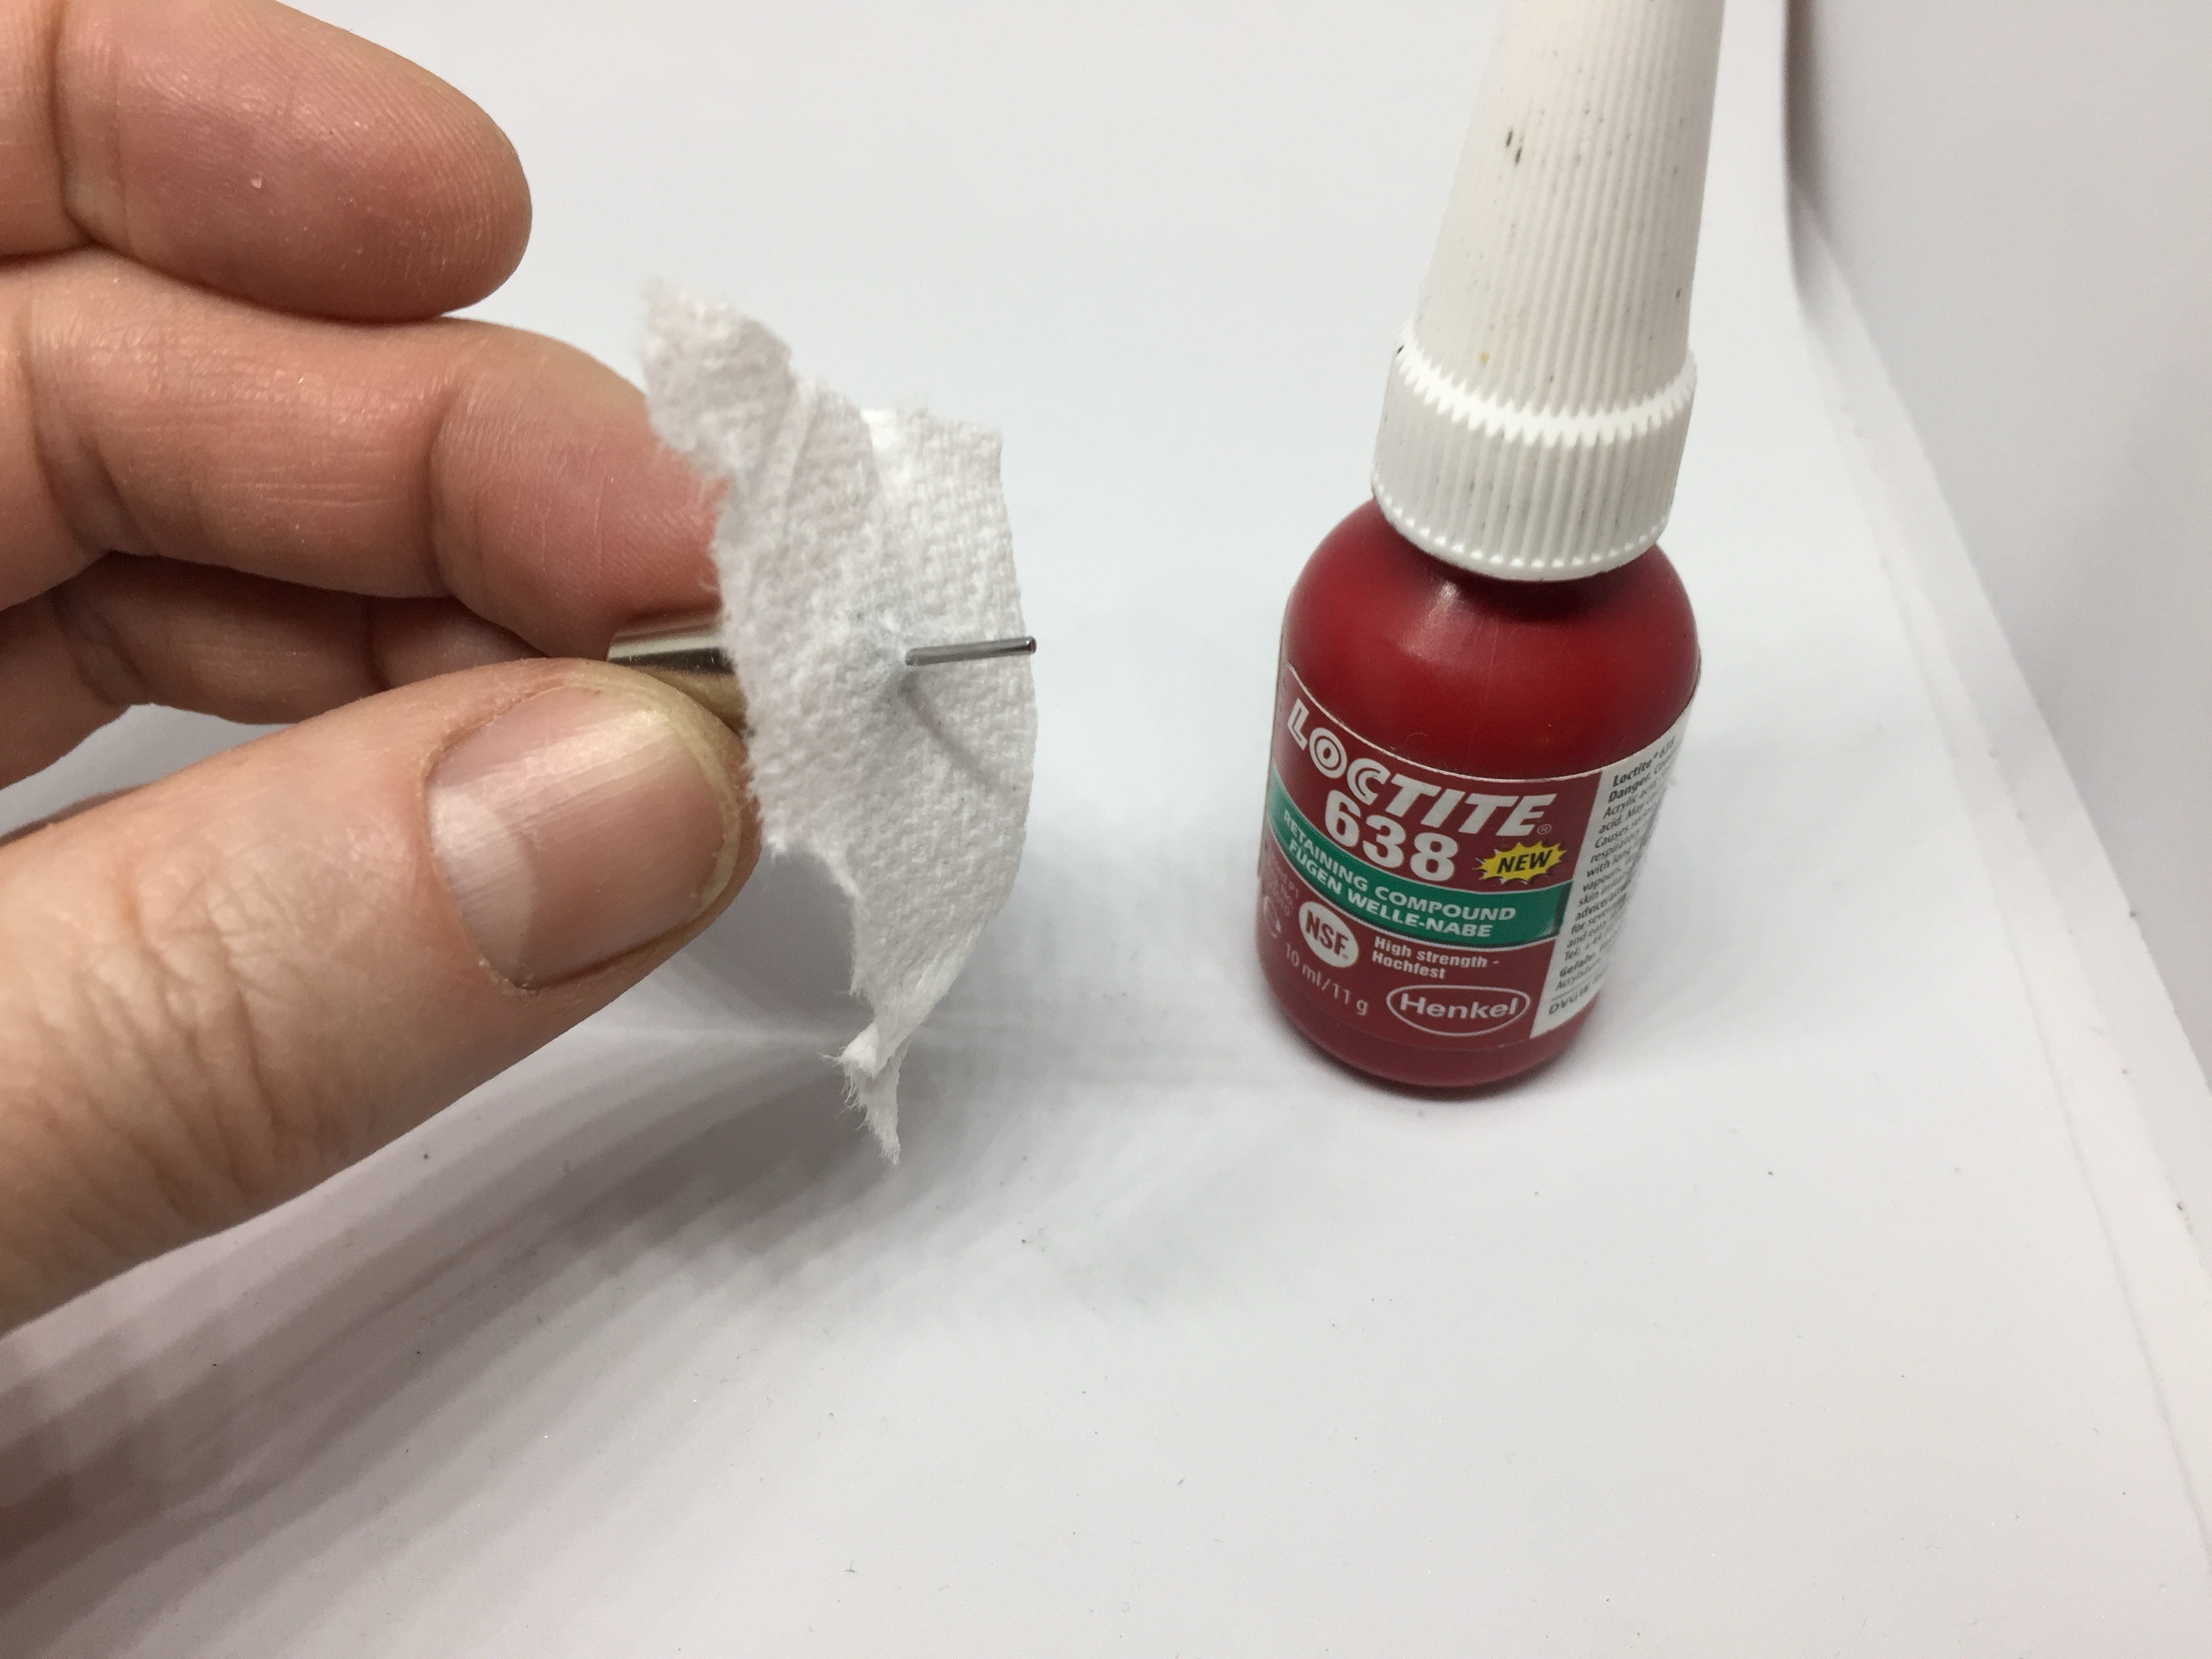
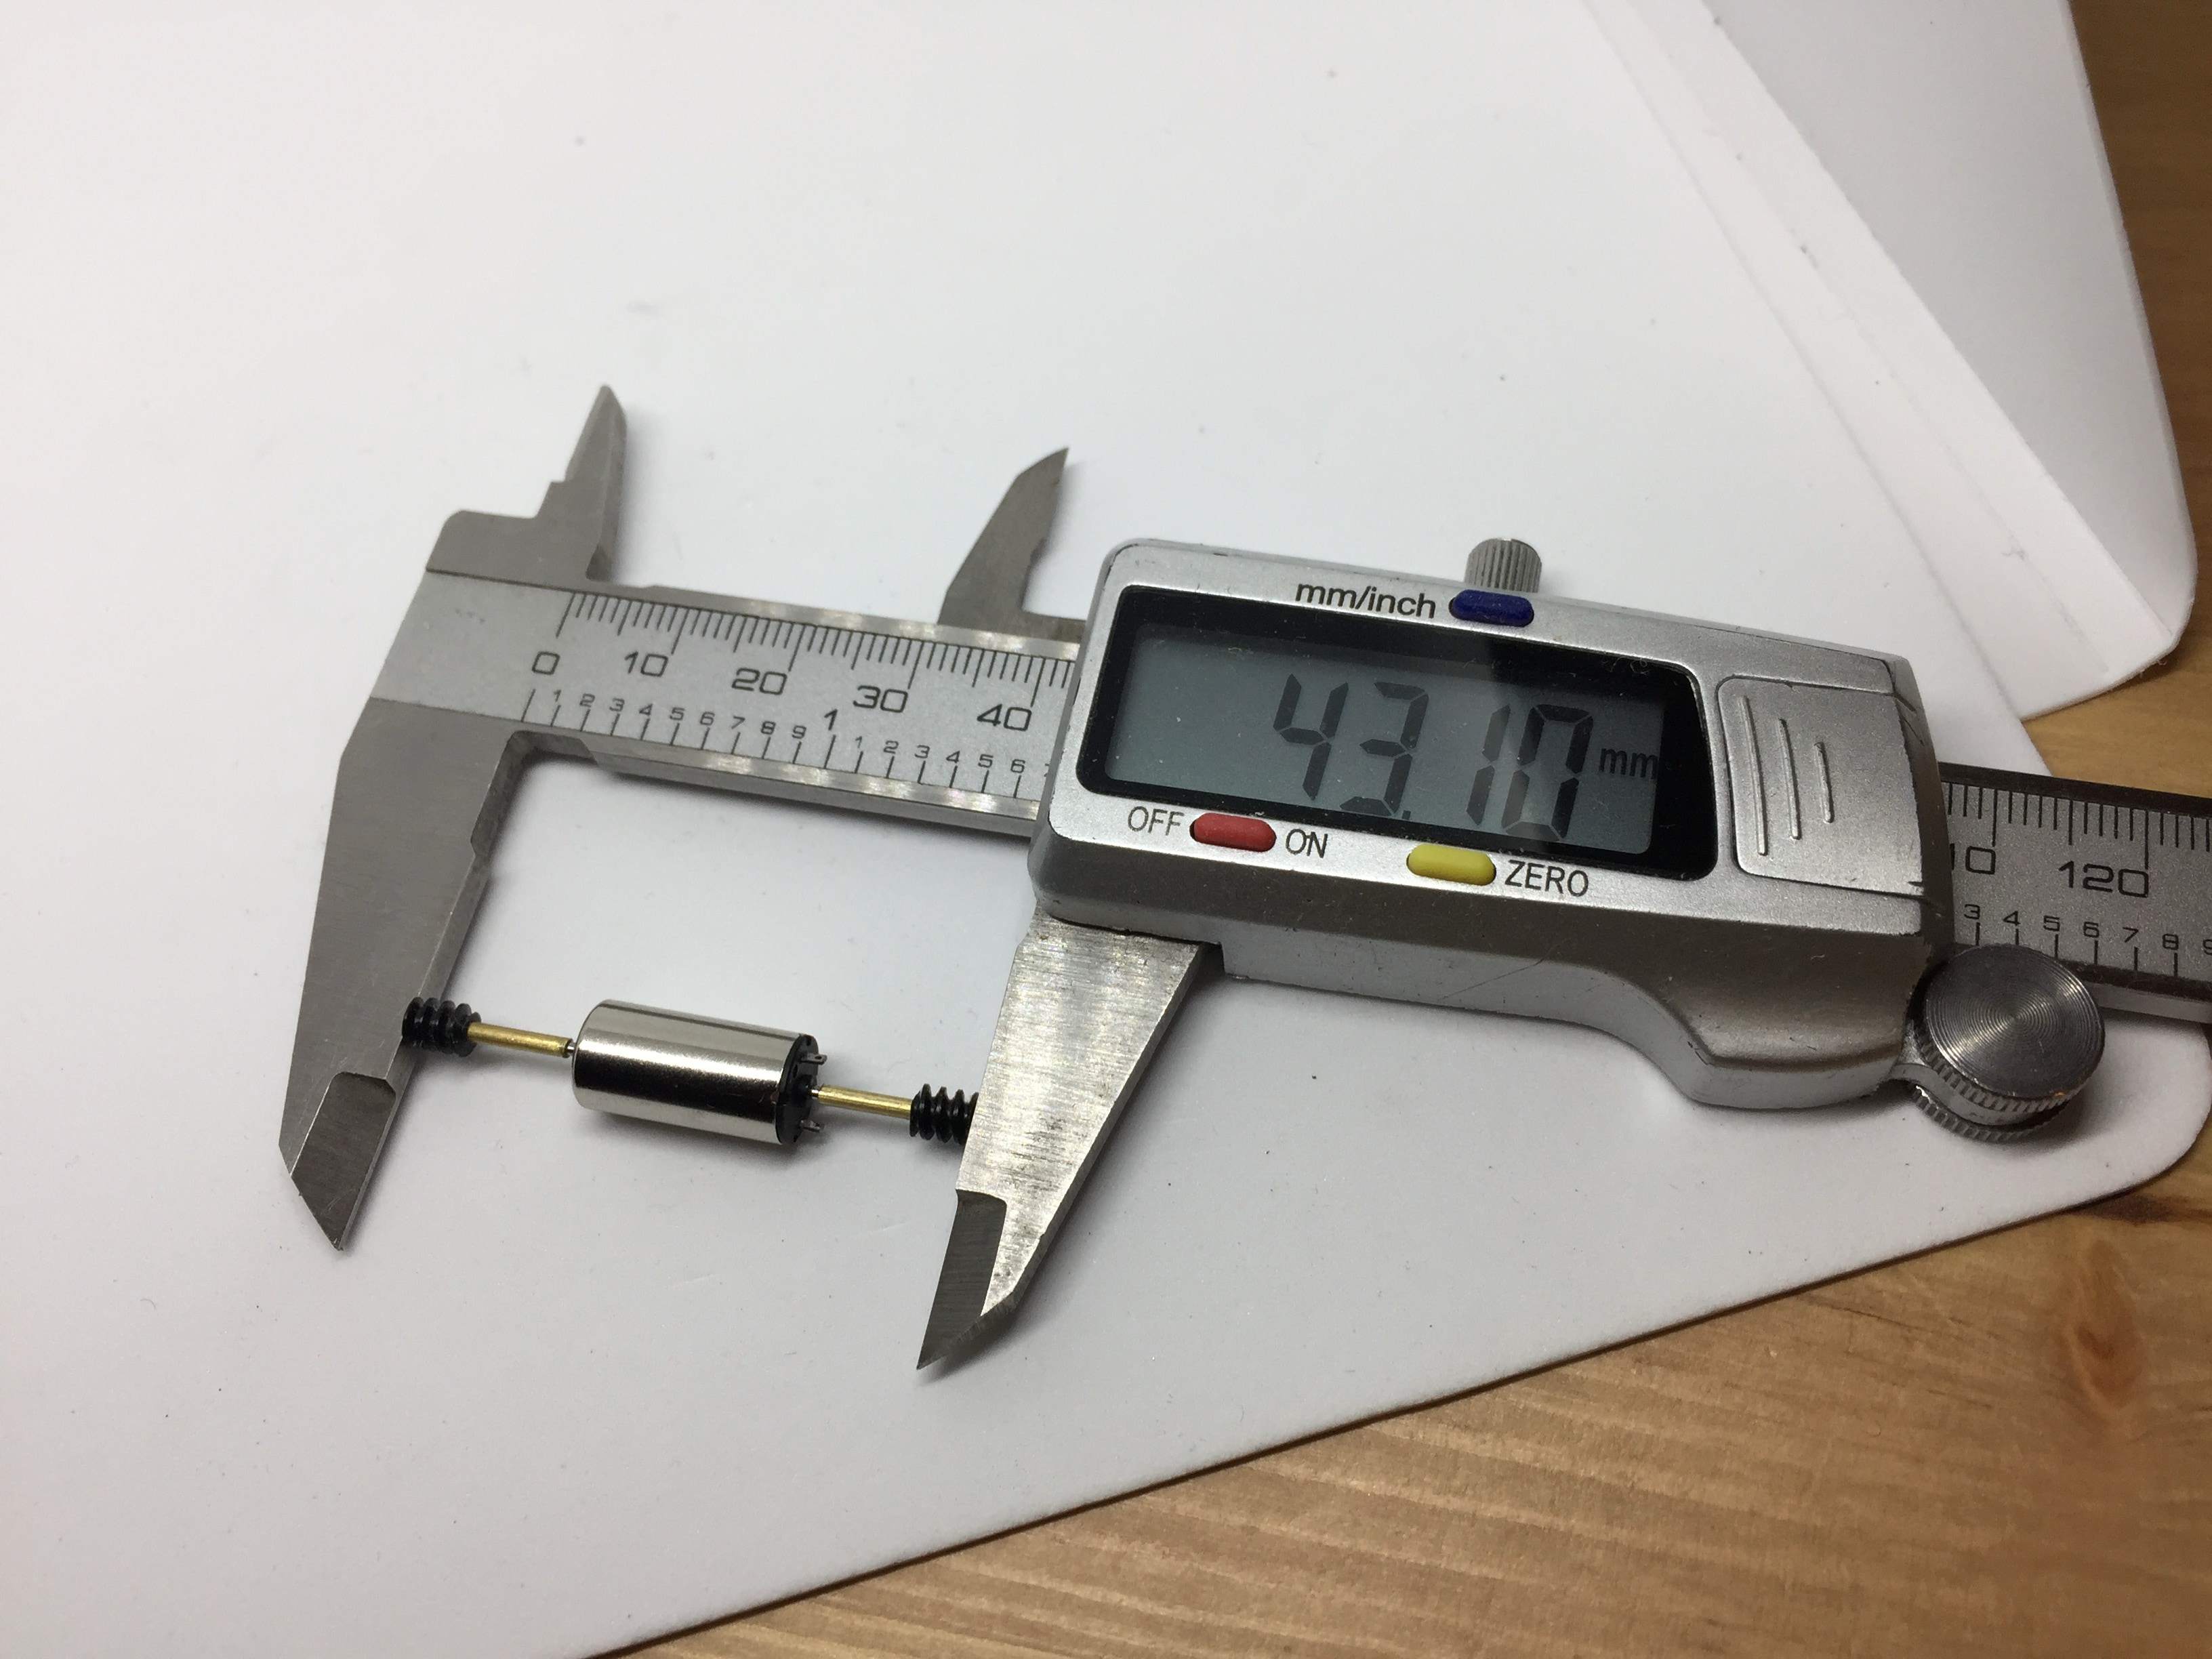
Be careful not to get glue in the motor shaft. I use a kitchen tissue over the shaft to get the Loctite or superglue that will be pushed towards the bottom when fitting the adapter. Leave about just over one millimeter free between motor and adapter. The total length should be about 43 mm.
Fit the adapters
6
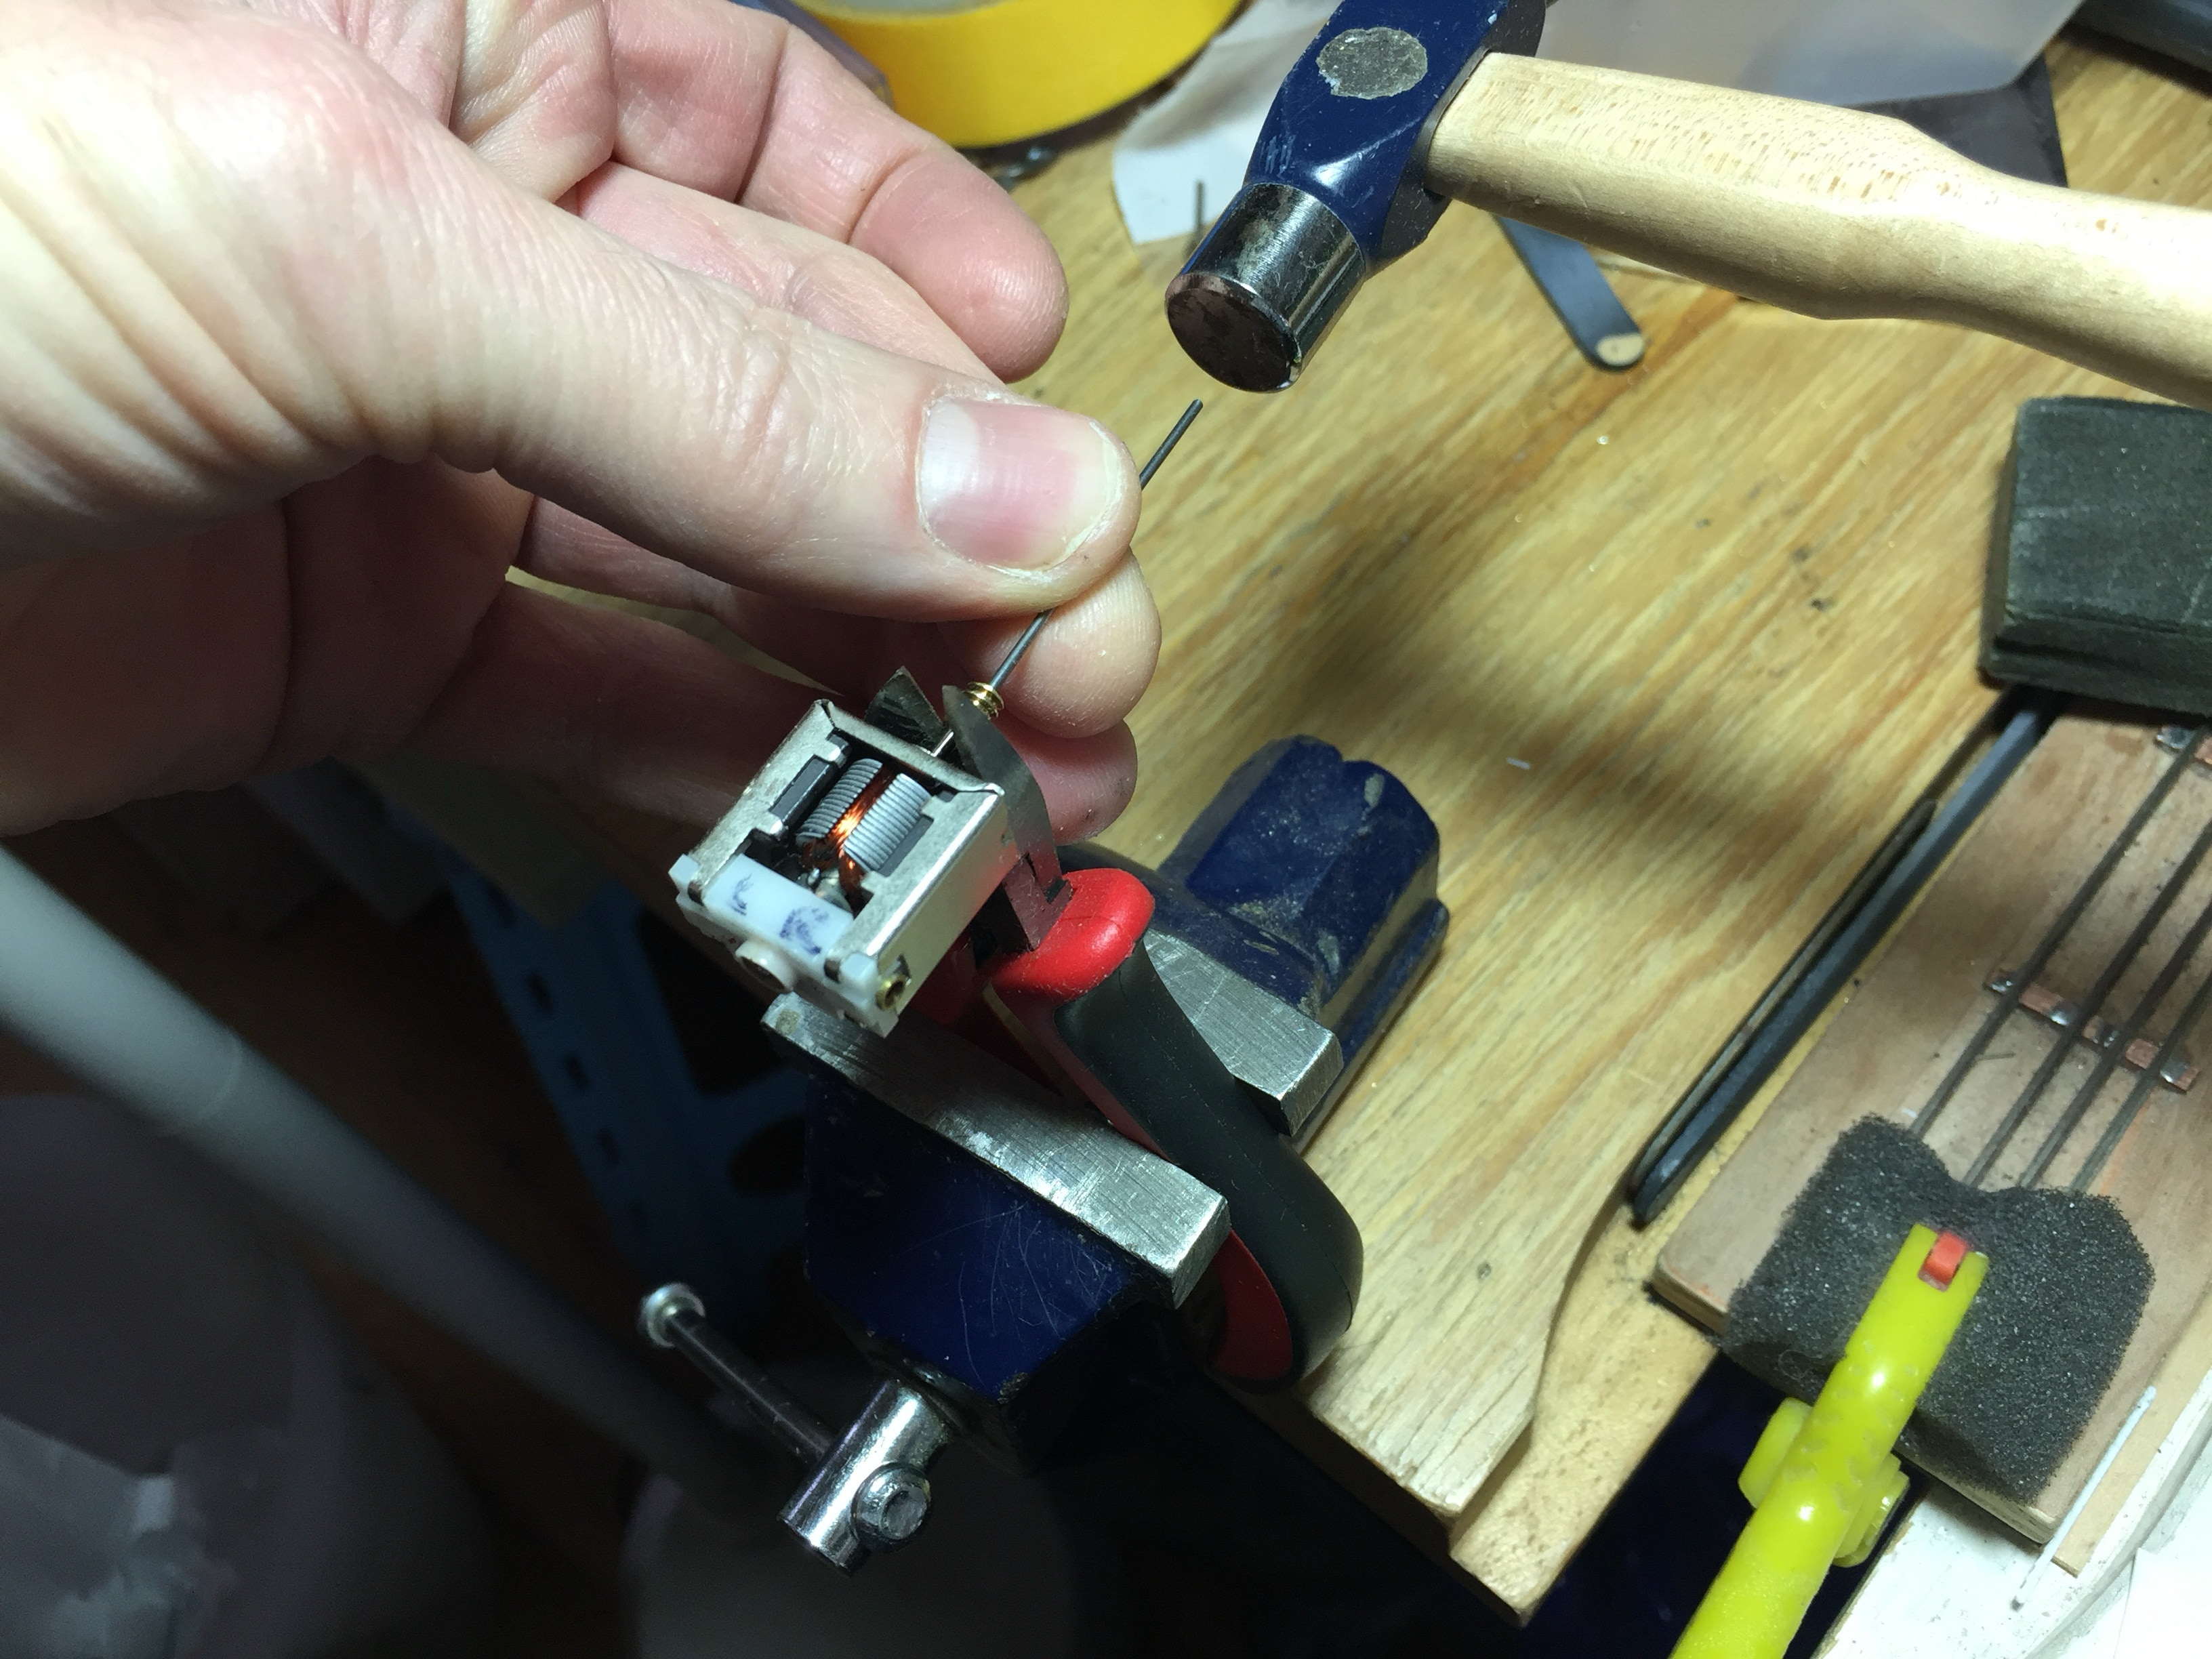
Solder wires to the motor
There is a round mark next to the plus pole of the motor. This is traditionally a red wire. Solder a black wire to the other connector. You can use any colour you like, but as long as you remember which is plus and which is minus. When you install the motor in the train chassis, make sure the connectors are not touching the frame. Otherwise you have to turn the motor a bit or bend these connectors a bit inward.
7
8
Remove some metal of chassis bottom
To let the new motor sit completely flat on the bottom of the chassis, a small part has to be milled. You can do that with a milling bit and a drill. I got a set for under €3 on eBay. Easiest to use a pillar drill and move model under the drill. Cover the sticky gears (because of the grease) with tape, so the milling debris will not go into the gearbox.
Remove contact clips
The contact clips to the old motor are not needed anymore. Cut those off.
10
9
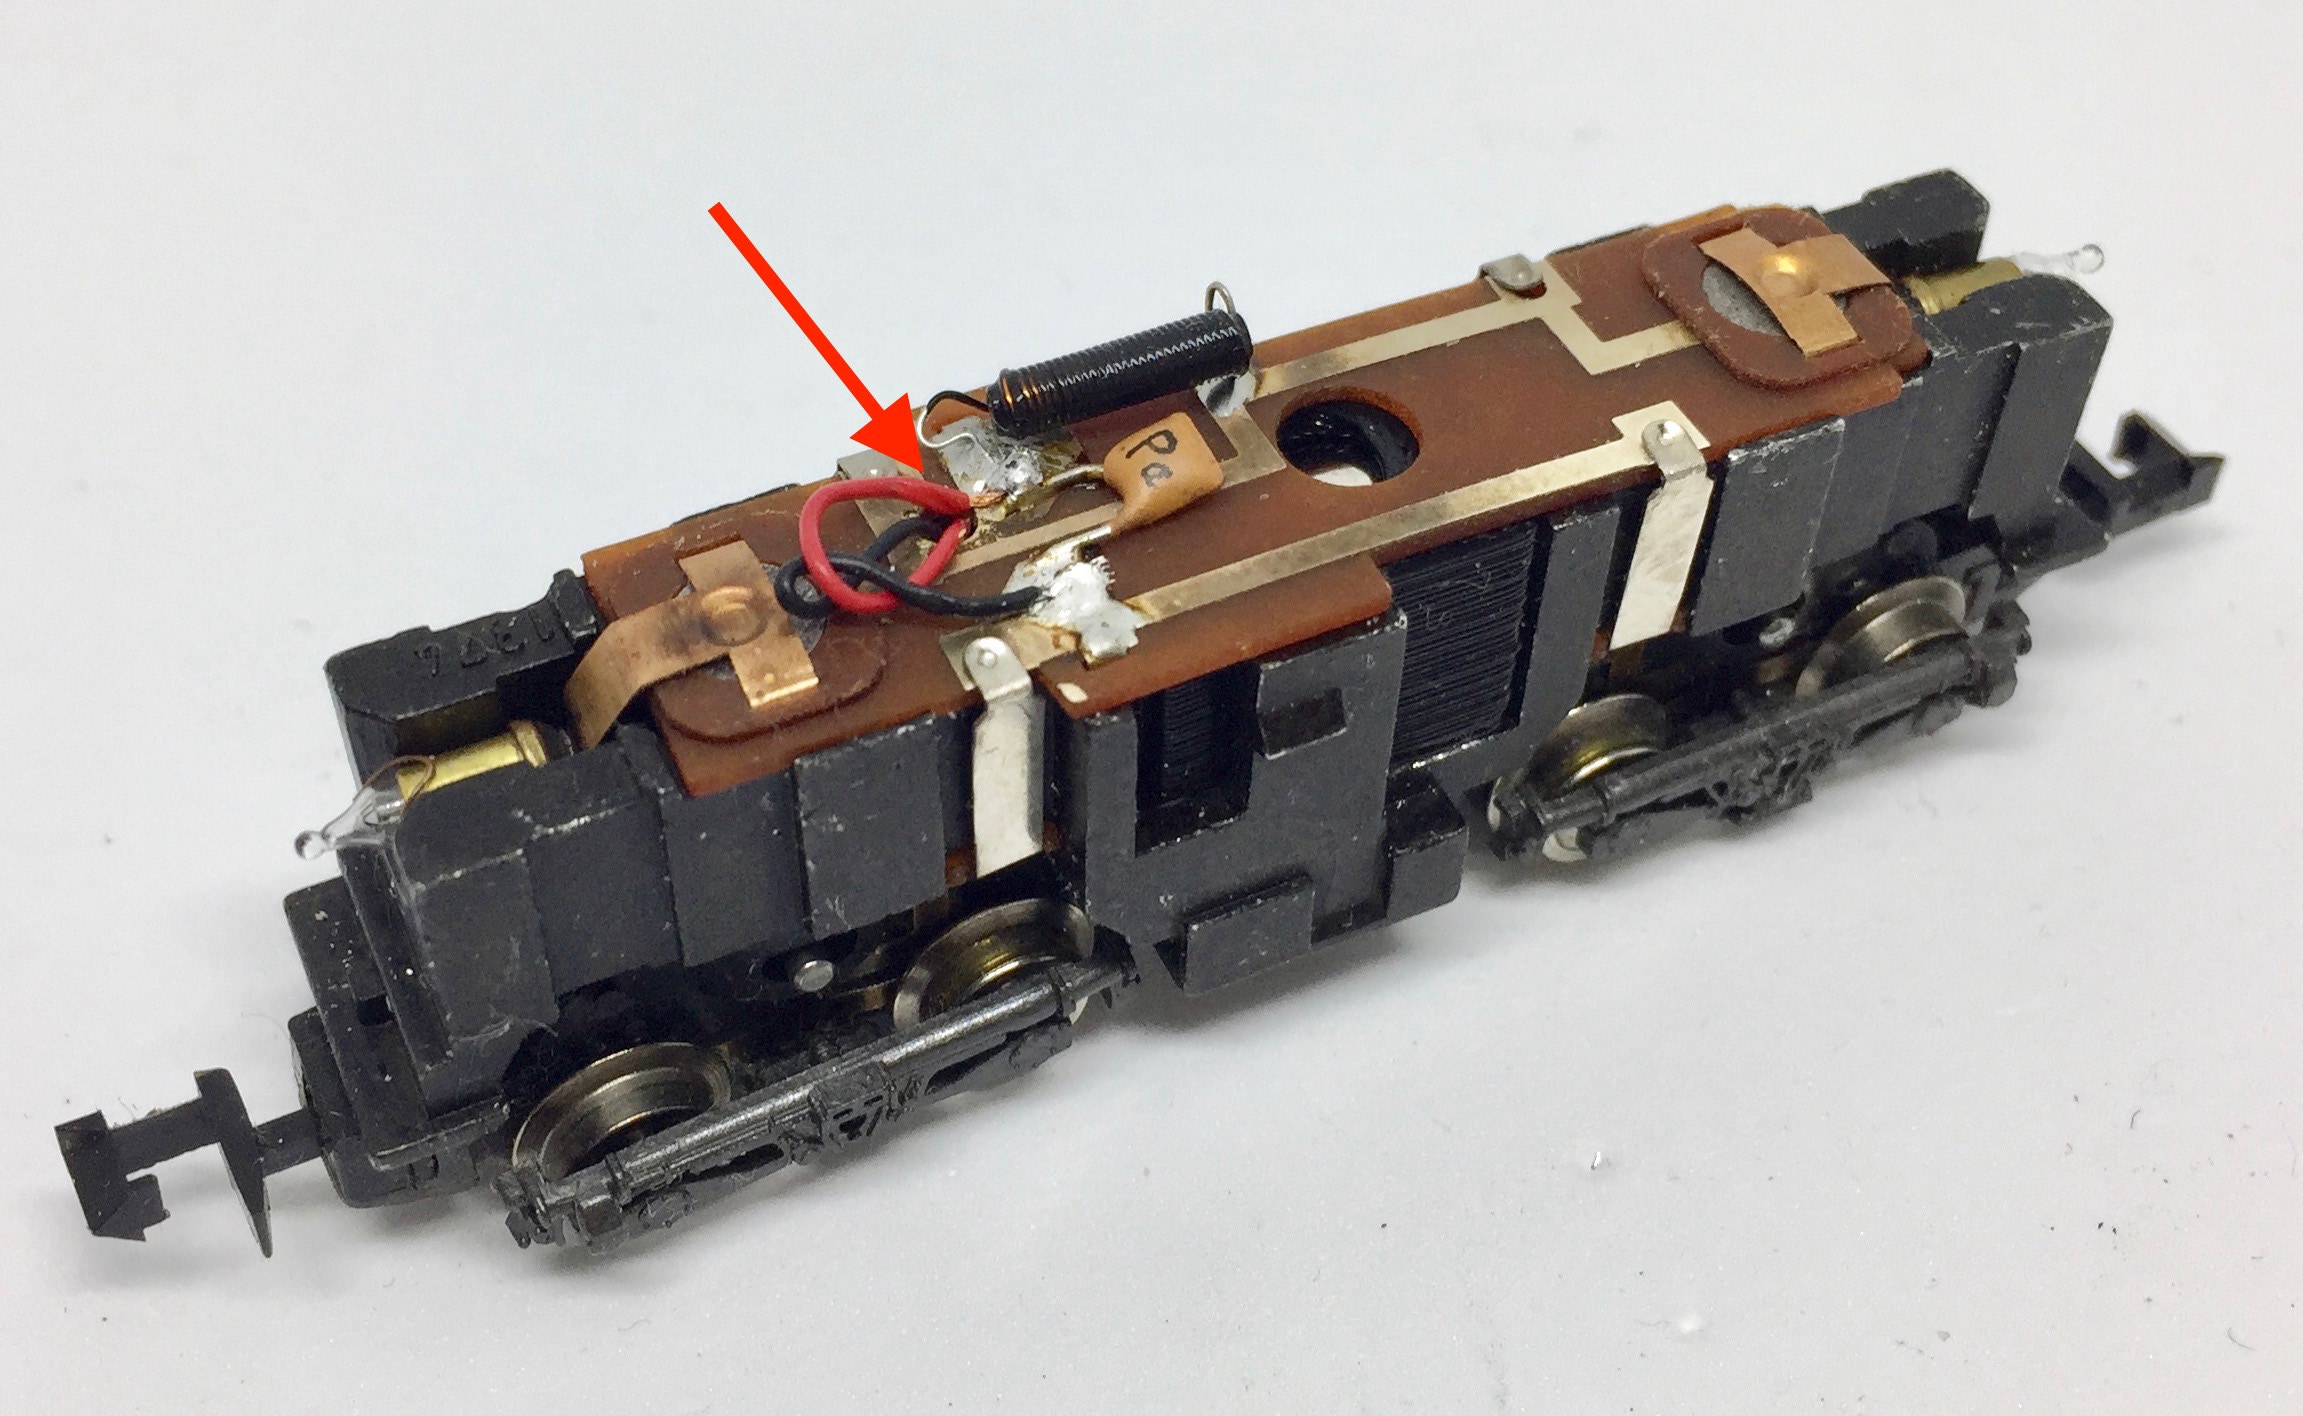
Solder wires in place and put model back together
The red wire will go on the right side (top on the photo) in the direction of driving. Black on the other side.
Put all parts back together. Don’t forget the lights!
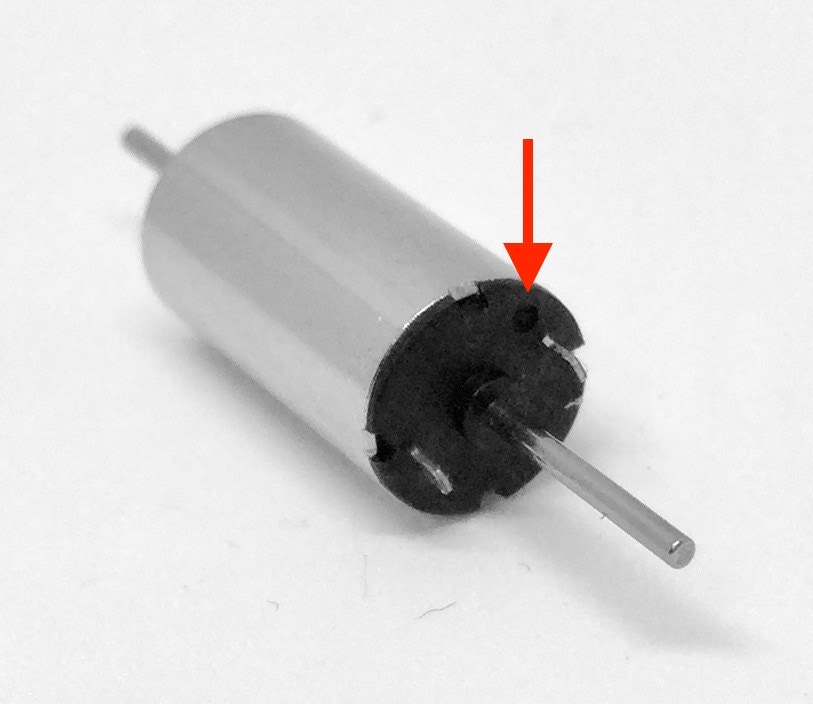
Drill hole for wires
Use an 1 mm drill to drill a hole for the new motor wires at the location with the arrow and fit motor and place PCB board. The wires go through the new hole.
Done!
If you are going to attach a decoder, check here for the CV settings (link). I advise using a Zimo decoder.
•